White Chocolate Ghosts
By Jessie
Updated: July 7, 2025
Rate This Recipe
By: Jessie
Updated: July 7, 2025
Rate This Recipe:
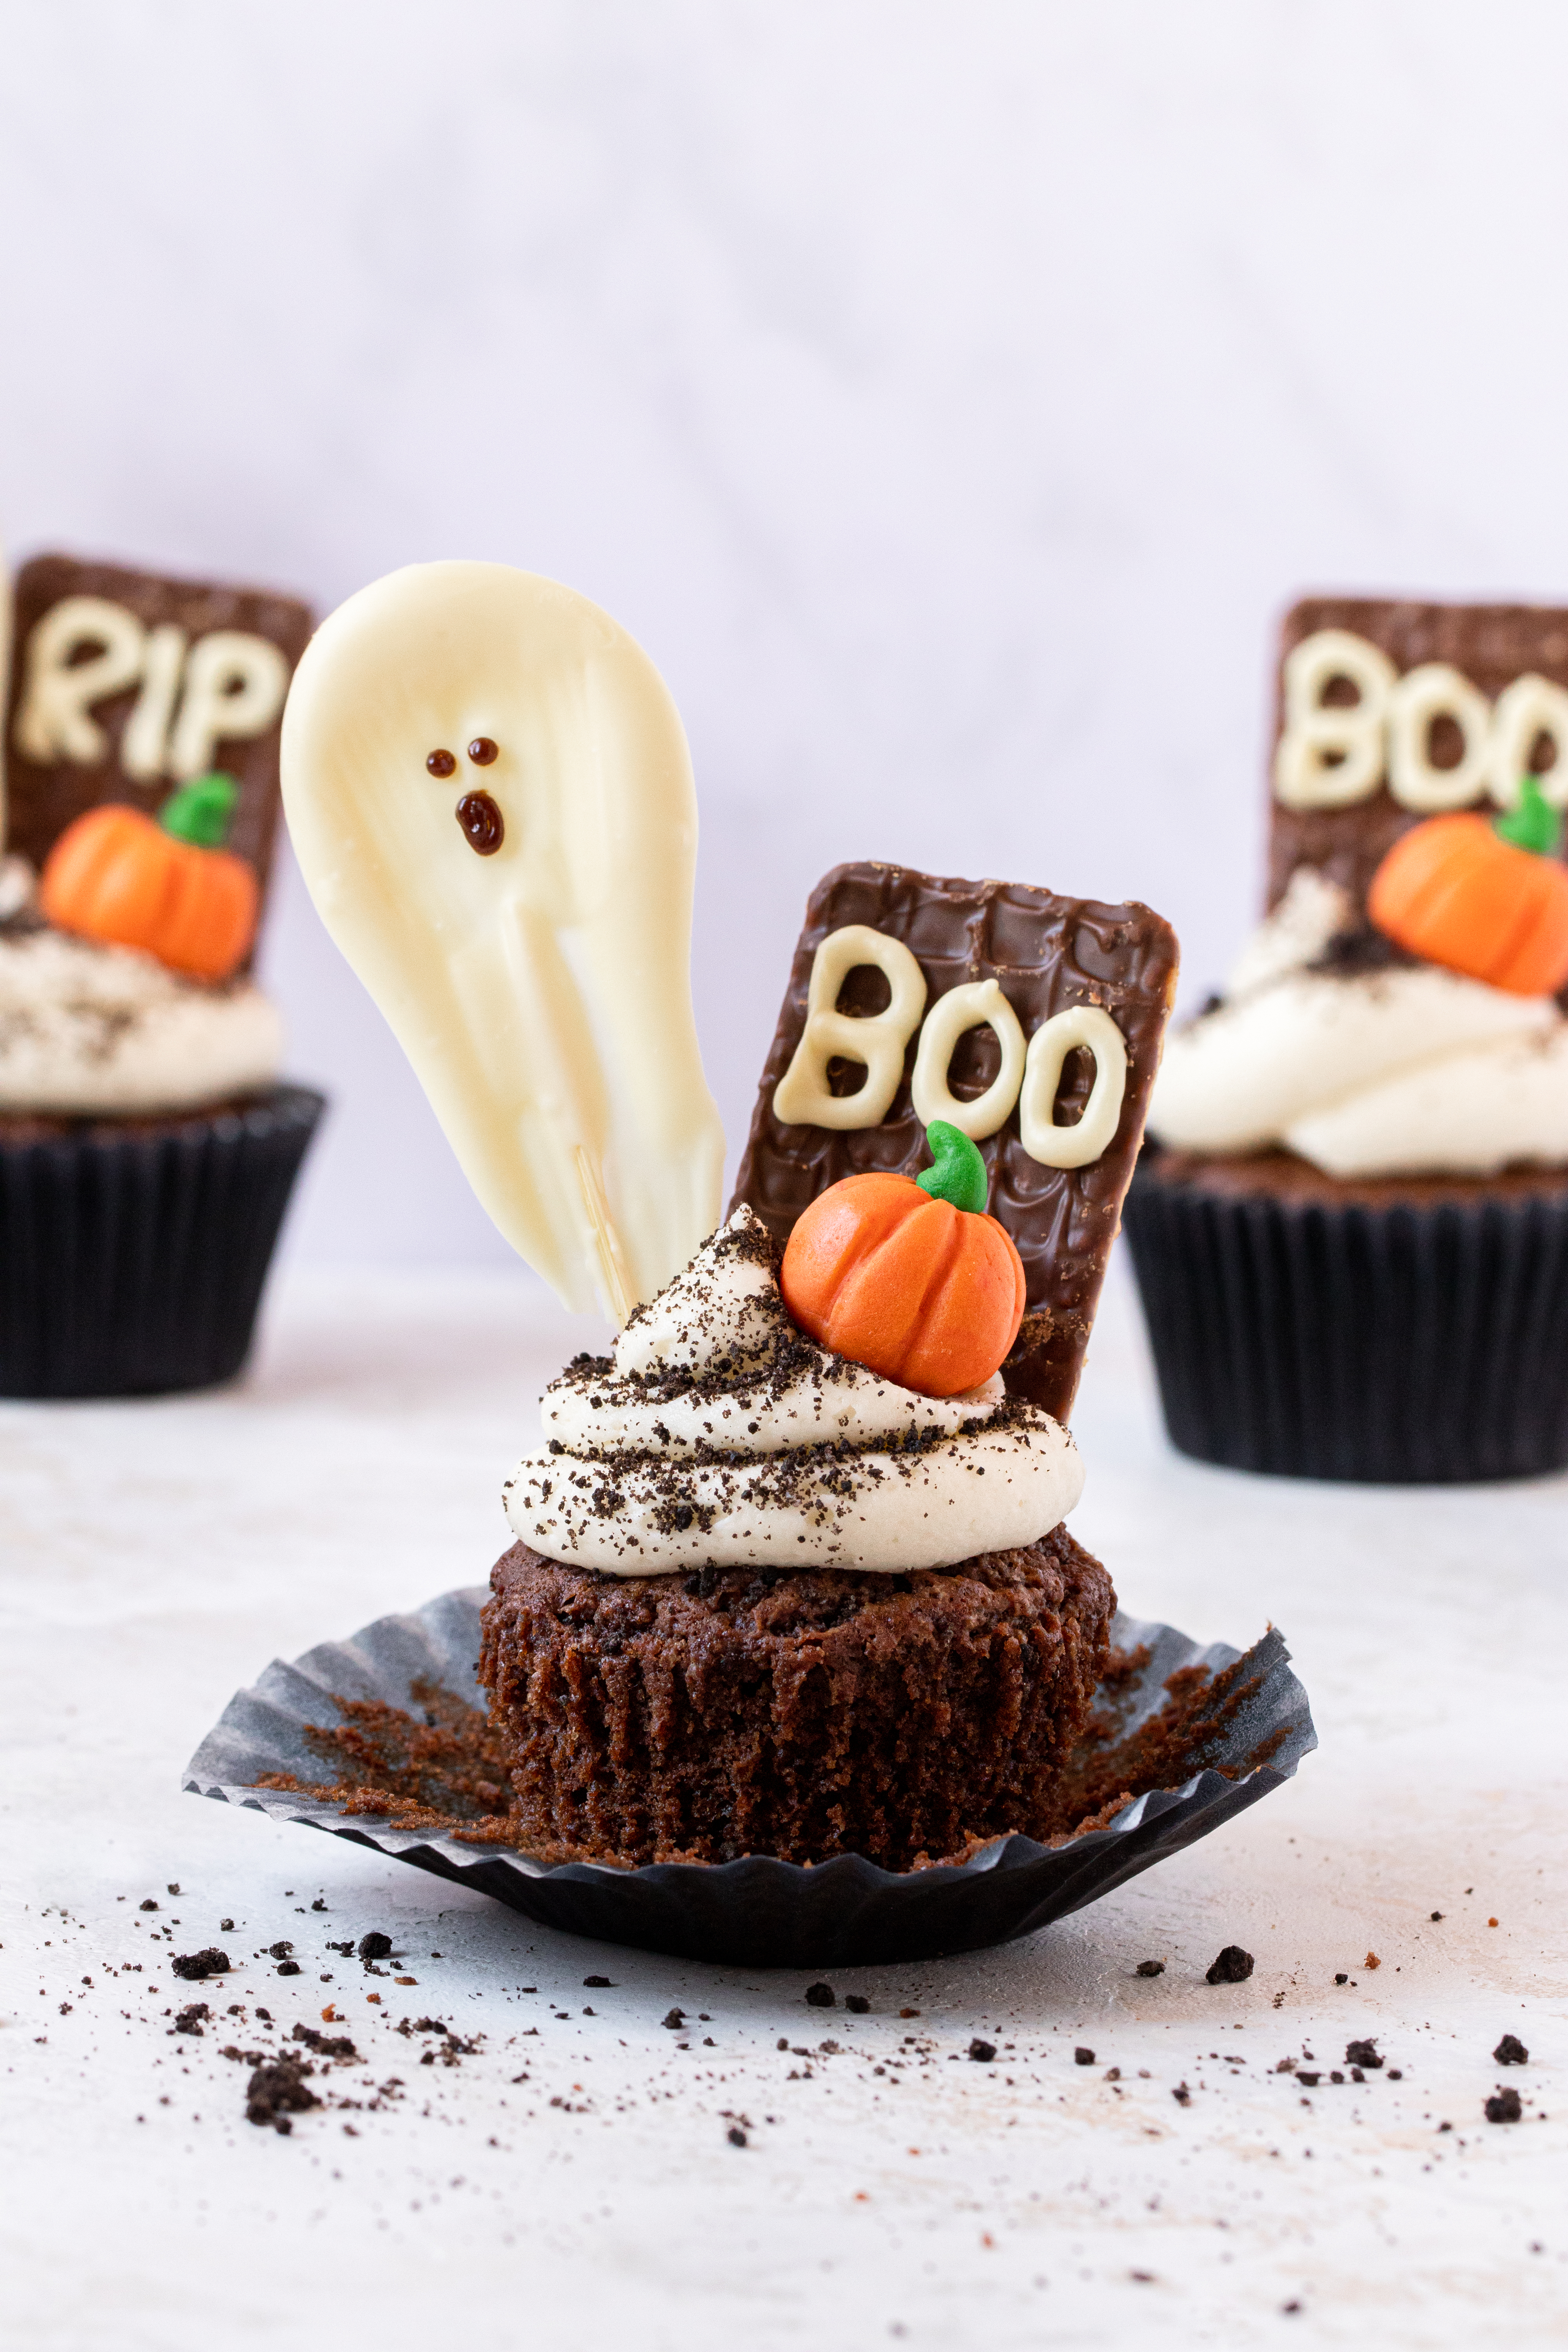
How fa-boo-lous are these white chocolate ghosts? Quick, delicious and fun to make. Use them to decorate cakes, brownies or spooktacular cupcakes!
This post contains links to affiliate websites, such as Amazon, and we receive an affiliate commission for any purchases made by you using these links. We appreciate your support!
How fa-boo-lous are these white chocolate ghosts? They’re quick, delicious and fun to make. Use them to decorate your Halloween cakes, brownies or cupcakes, just like the ones in the picture below!
How to make white chocolate ghosts
These white chocolate ghosts are frightfully easy to make, you only need two ingredients and some basic equipment:
Ingredient list
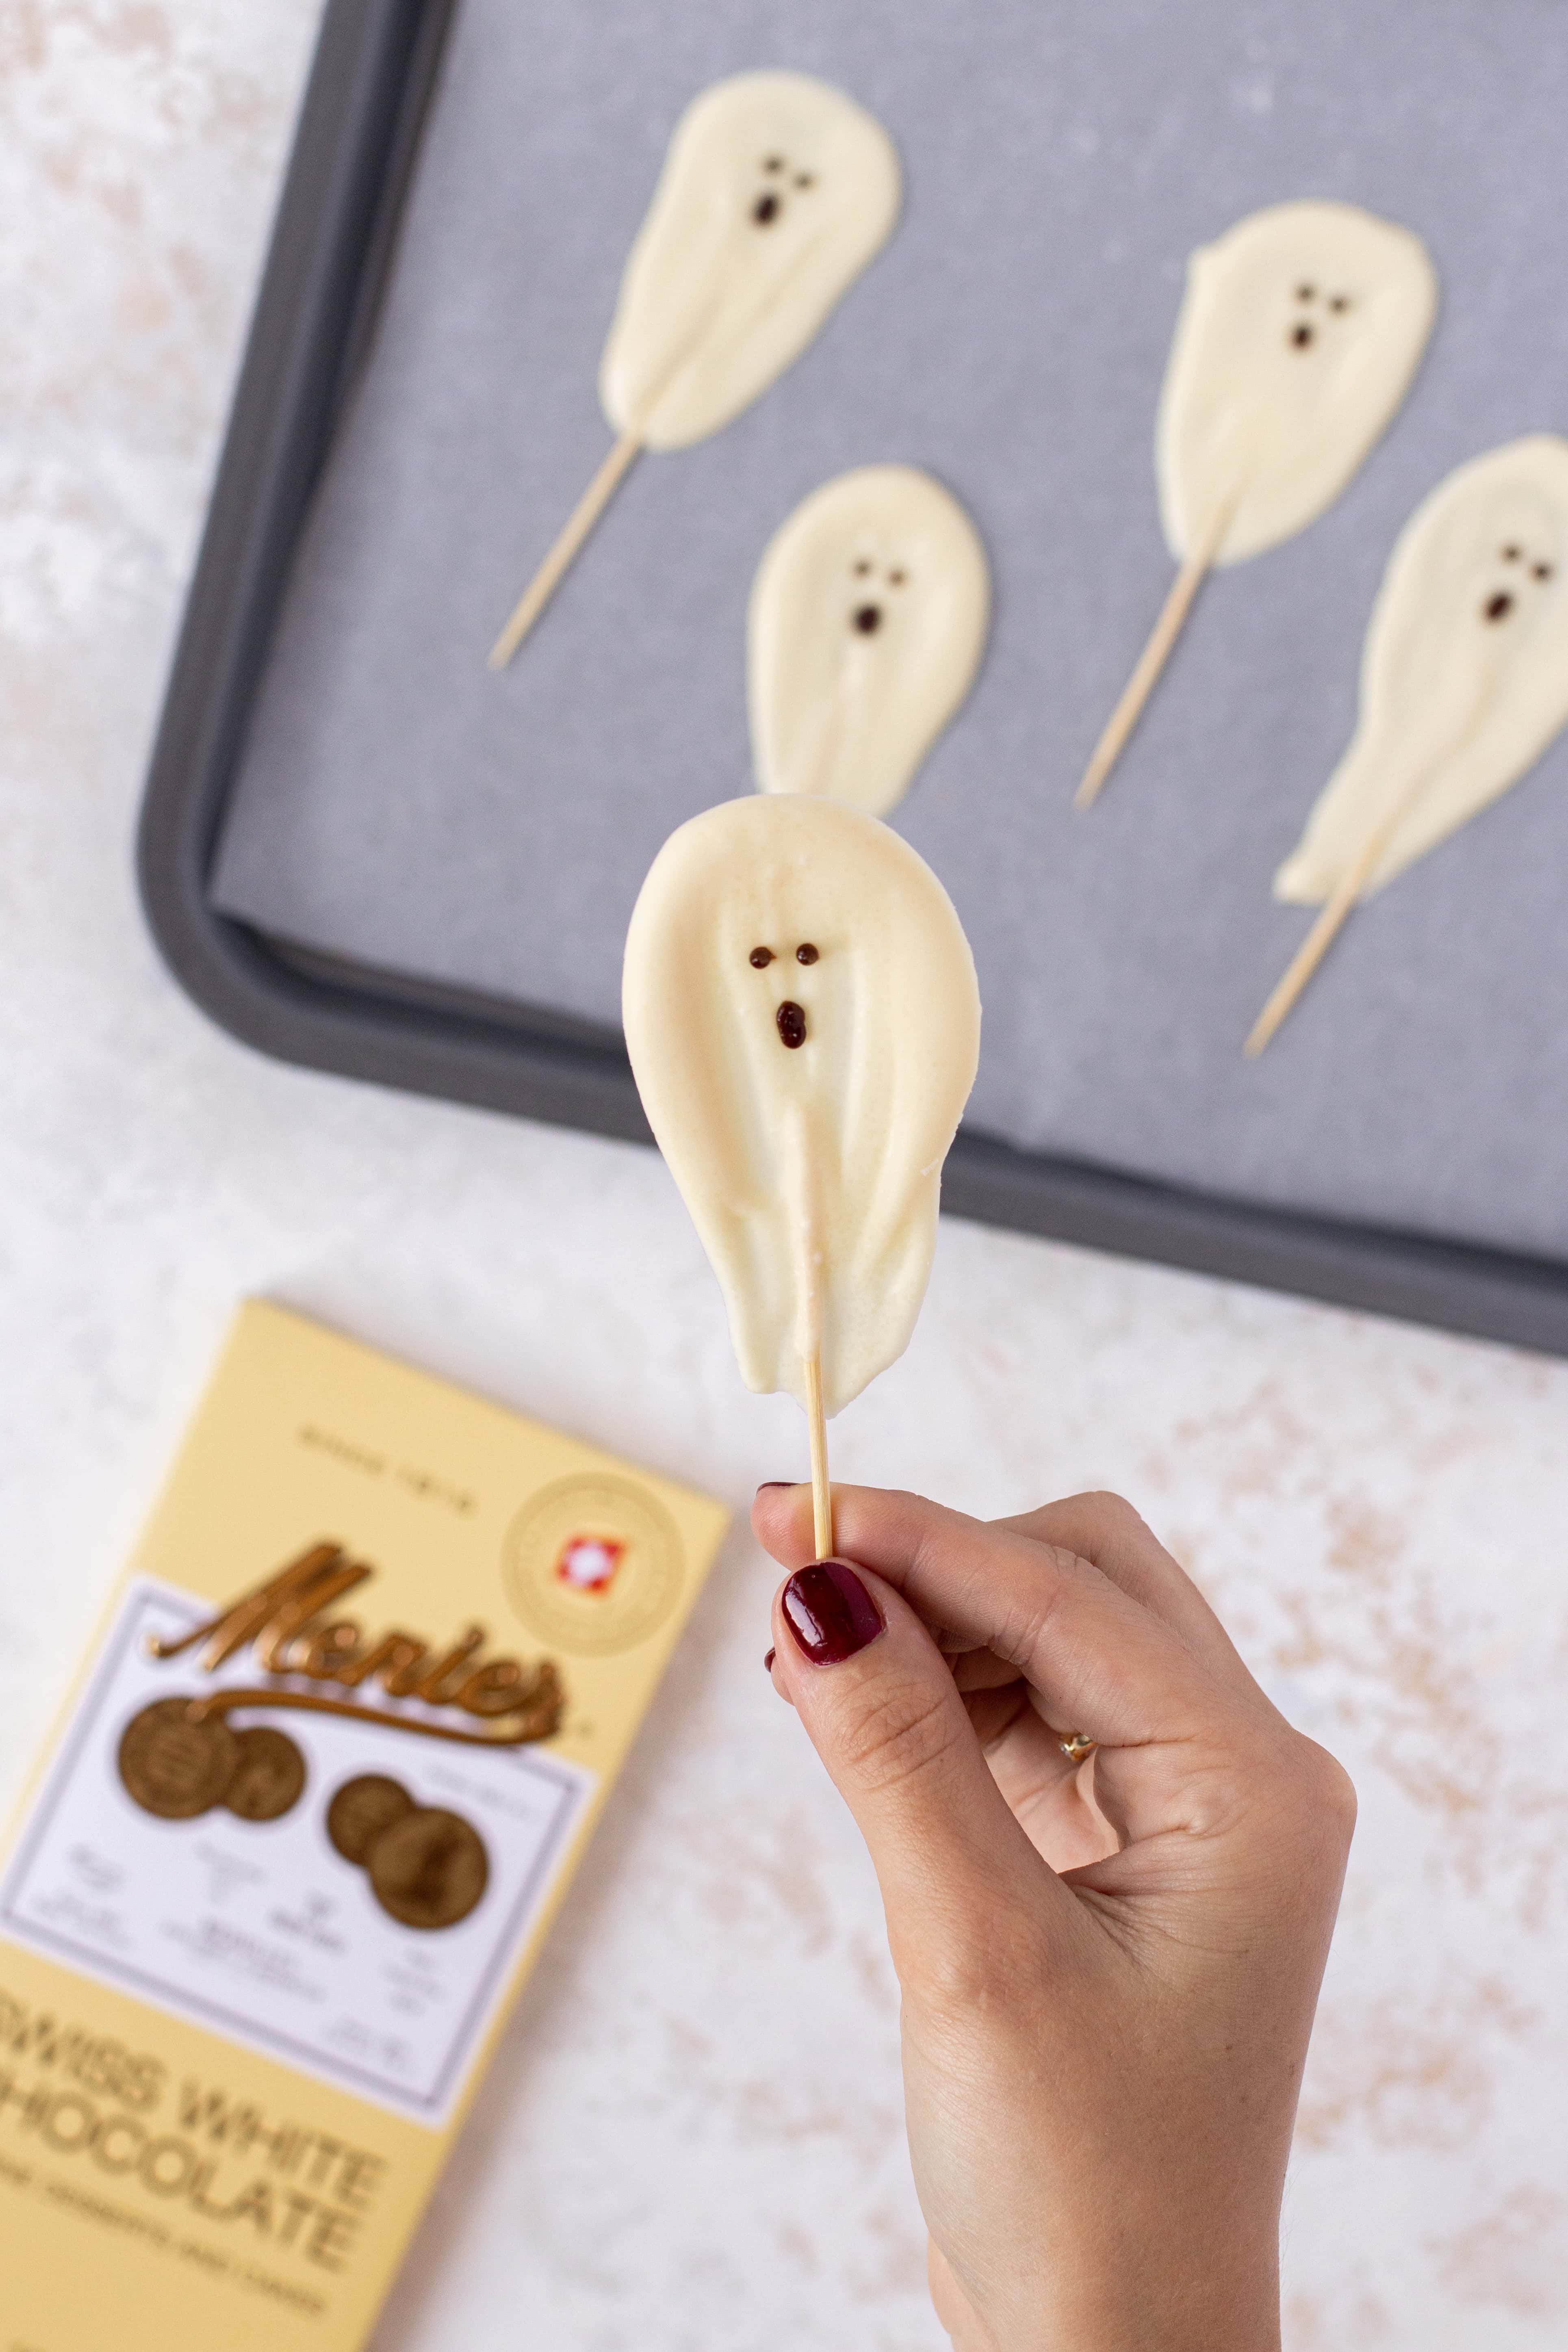
- Good quality white chocolate – my go-to is Menier Swiss White Chocolate. It melts perfectly smooth in the microwave, tastes amazing and also sets well.
- Chocolate writing icing – usually comes in a tube. Black writing icing would also work well.
Equipment list
- Large flat baking tray – any coloured baking tray will do. If you don’t have a large one, you could use 2 or 3 trays instead.
- Greaseproof paper – used to line the baking tray. The white chocolate ghosts will peel off more easily using greaseproof paper.
- Cocktail sticks – you’ll need these if you’re planning to stick the ghosts into cupcakes/cakes etc. If you plan to just eat them on their own to lay them on top of a bake, then you don’t need the cocktail sticks.
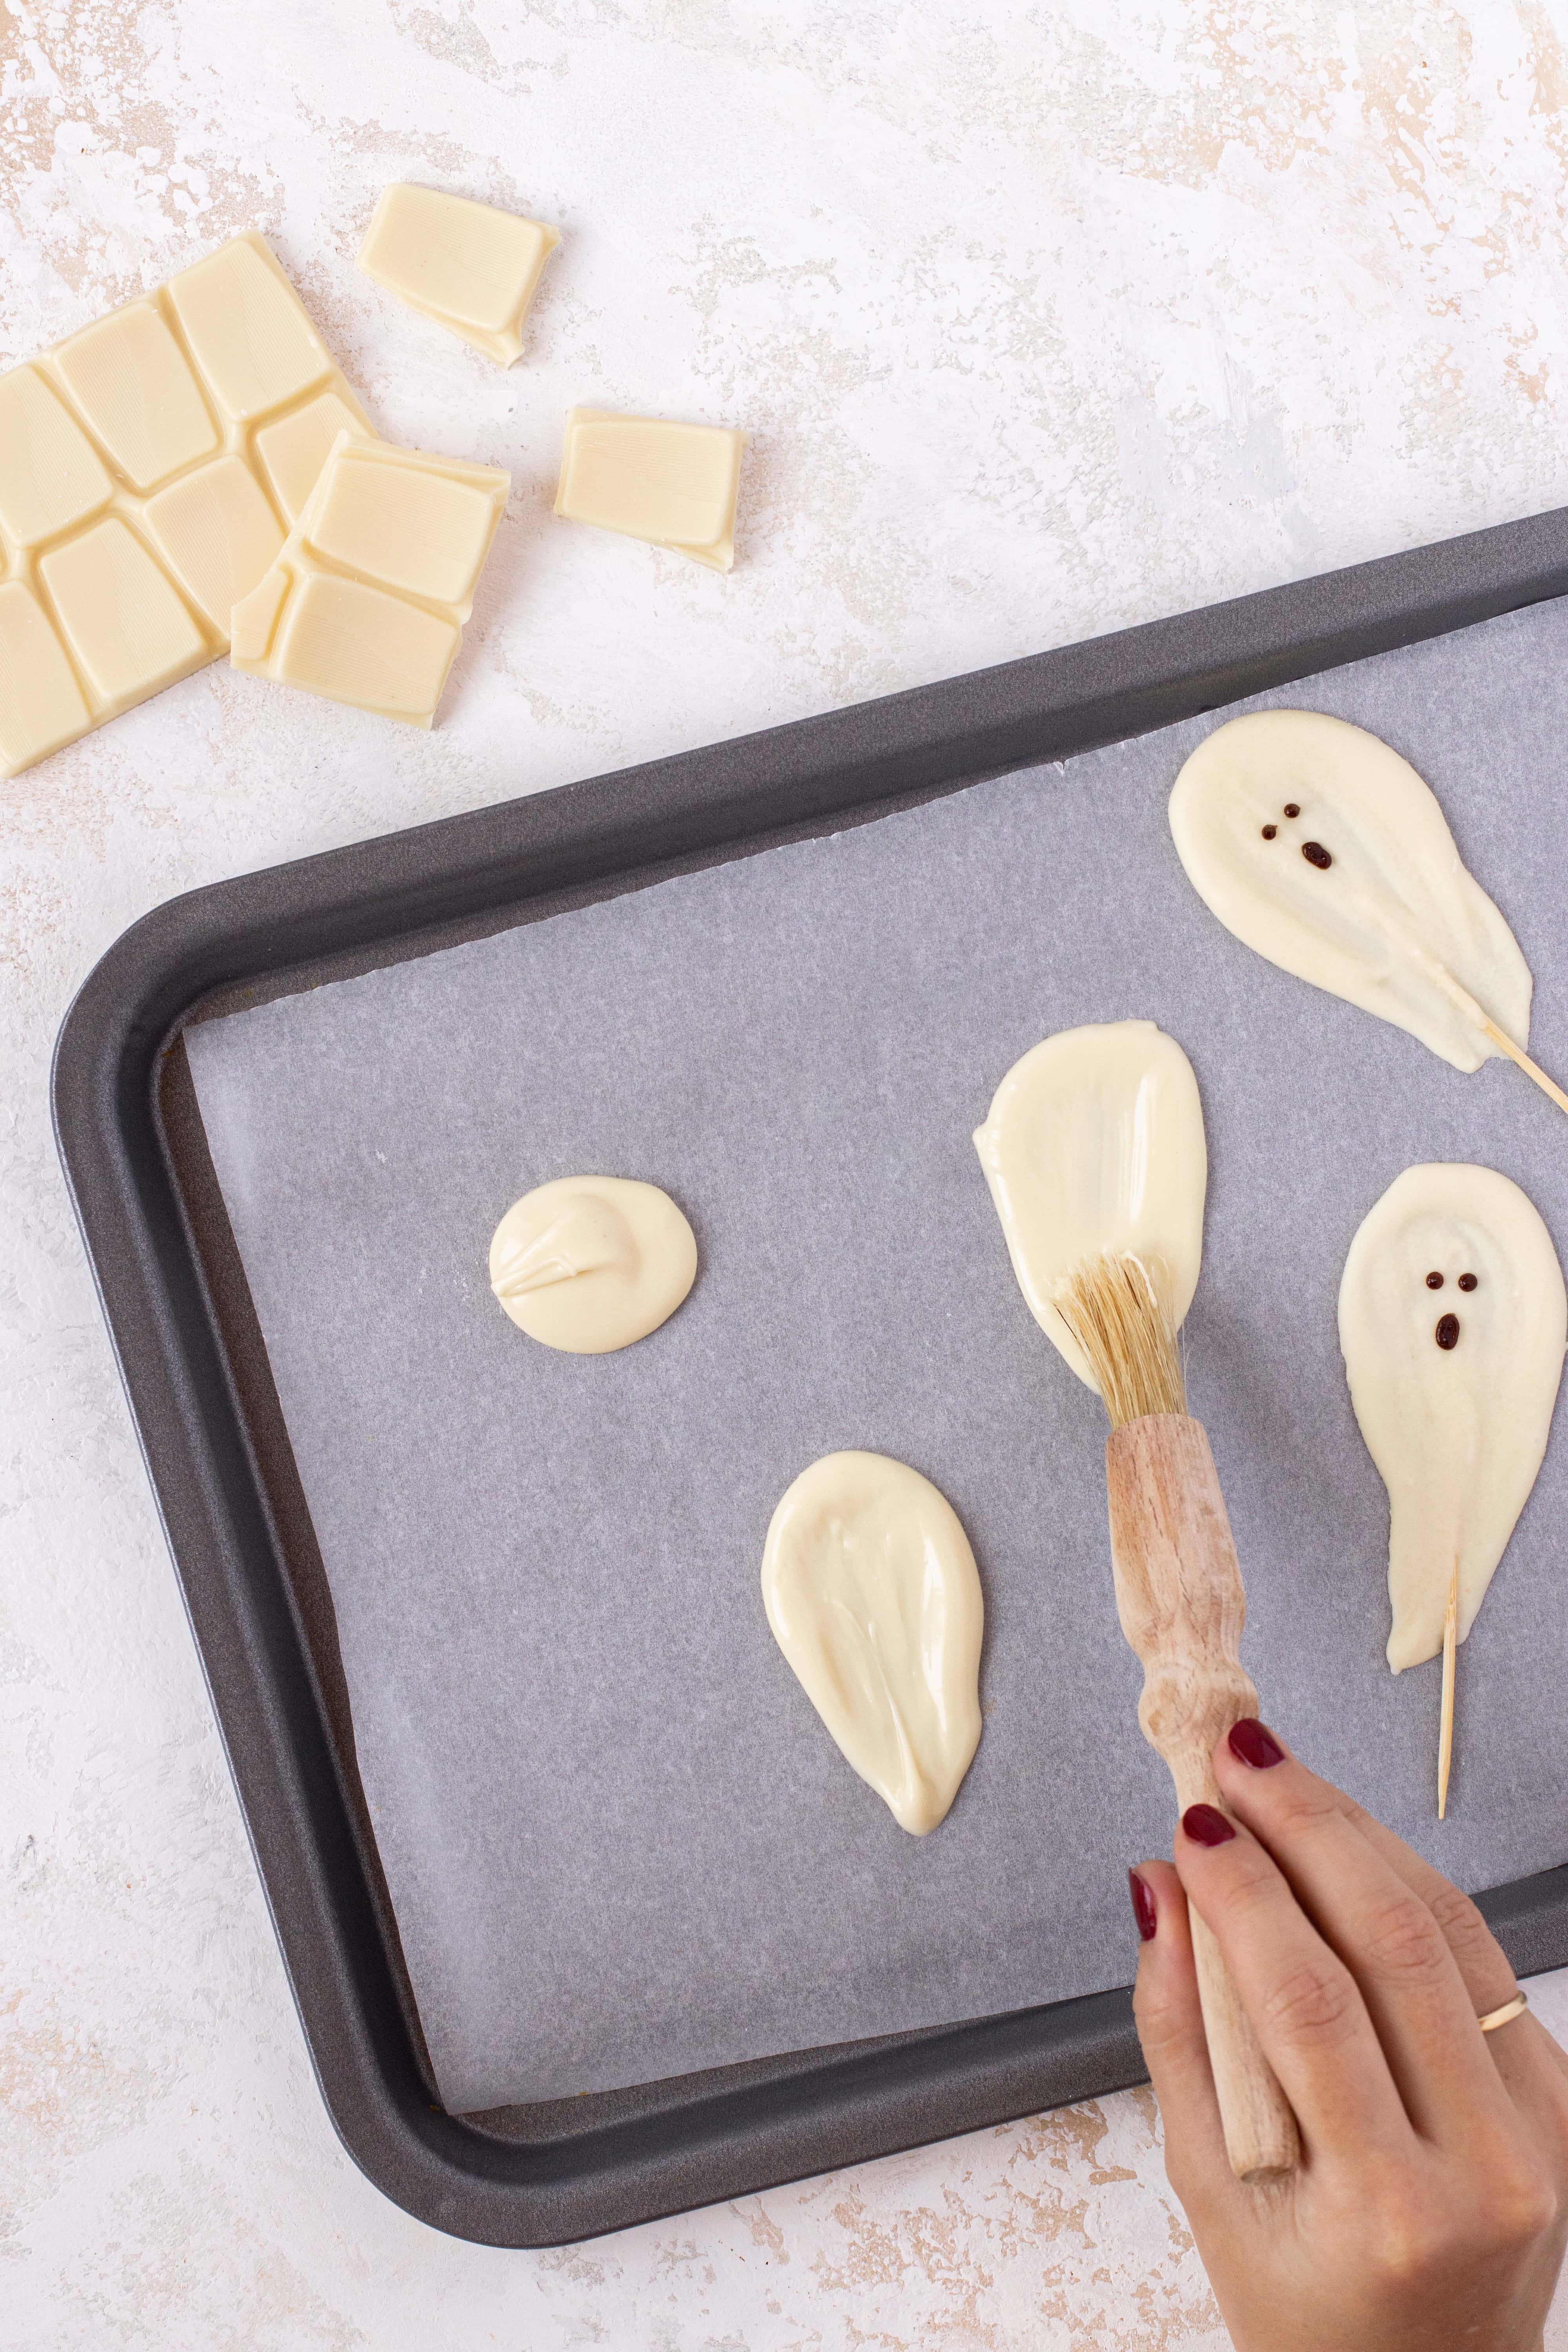
- Pastry brush/teaspoon – a pastry brush would be ideal to brush the white chocolate down to make the ghost shape. If you don’t have one you can use the back of a teaspoon instead.
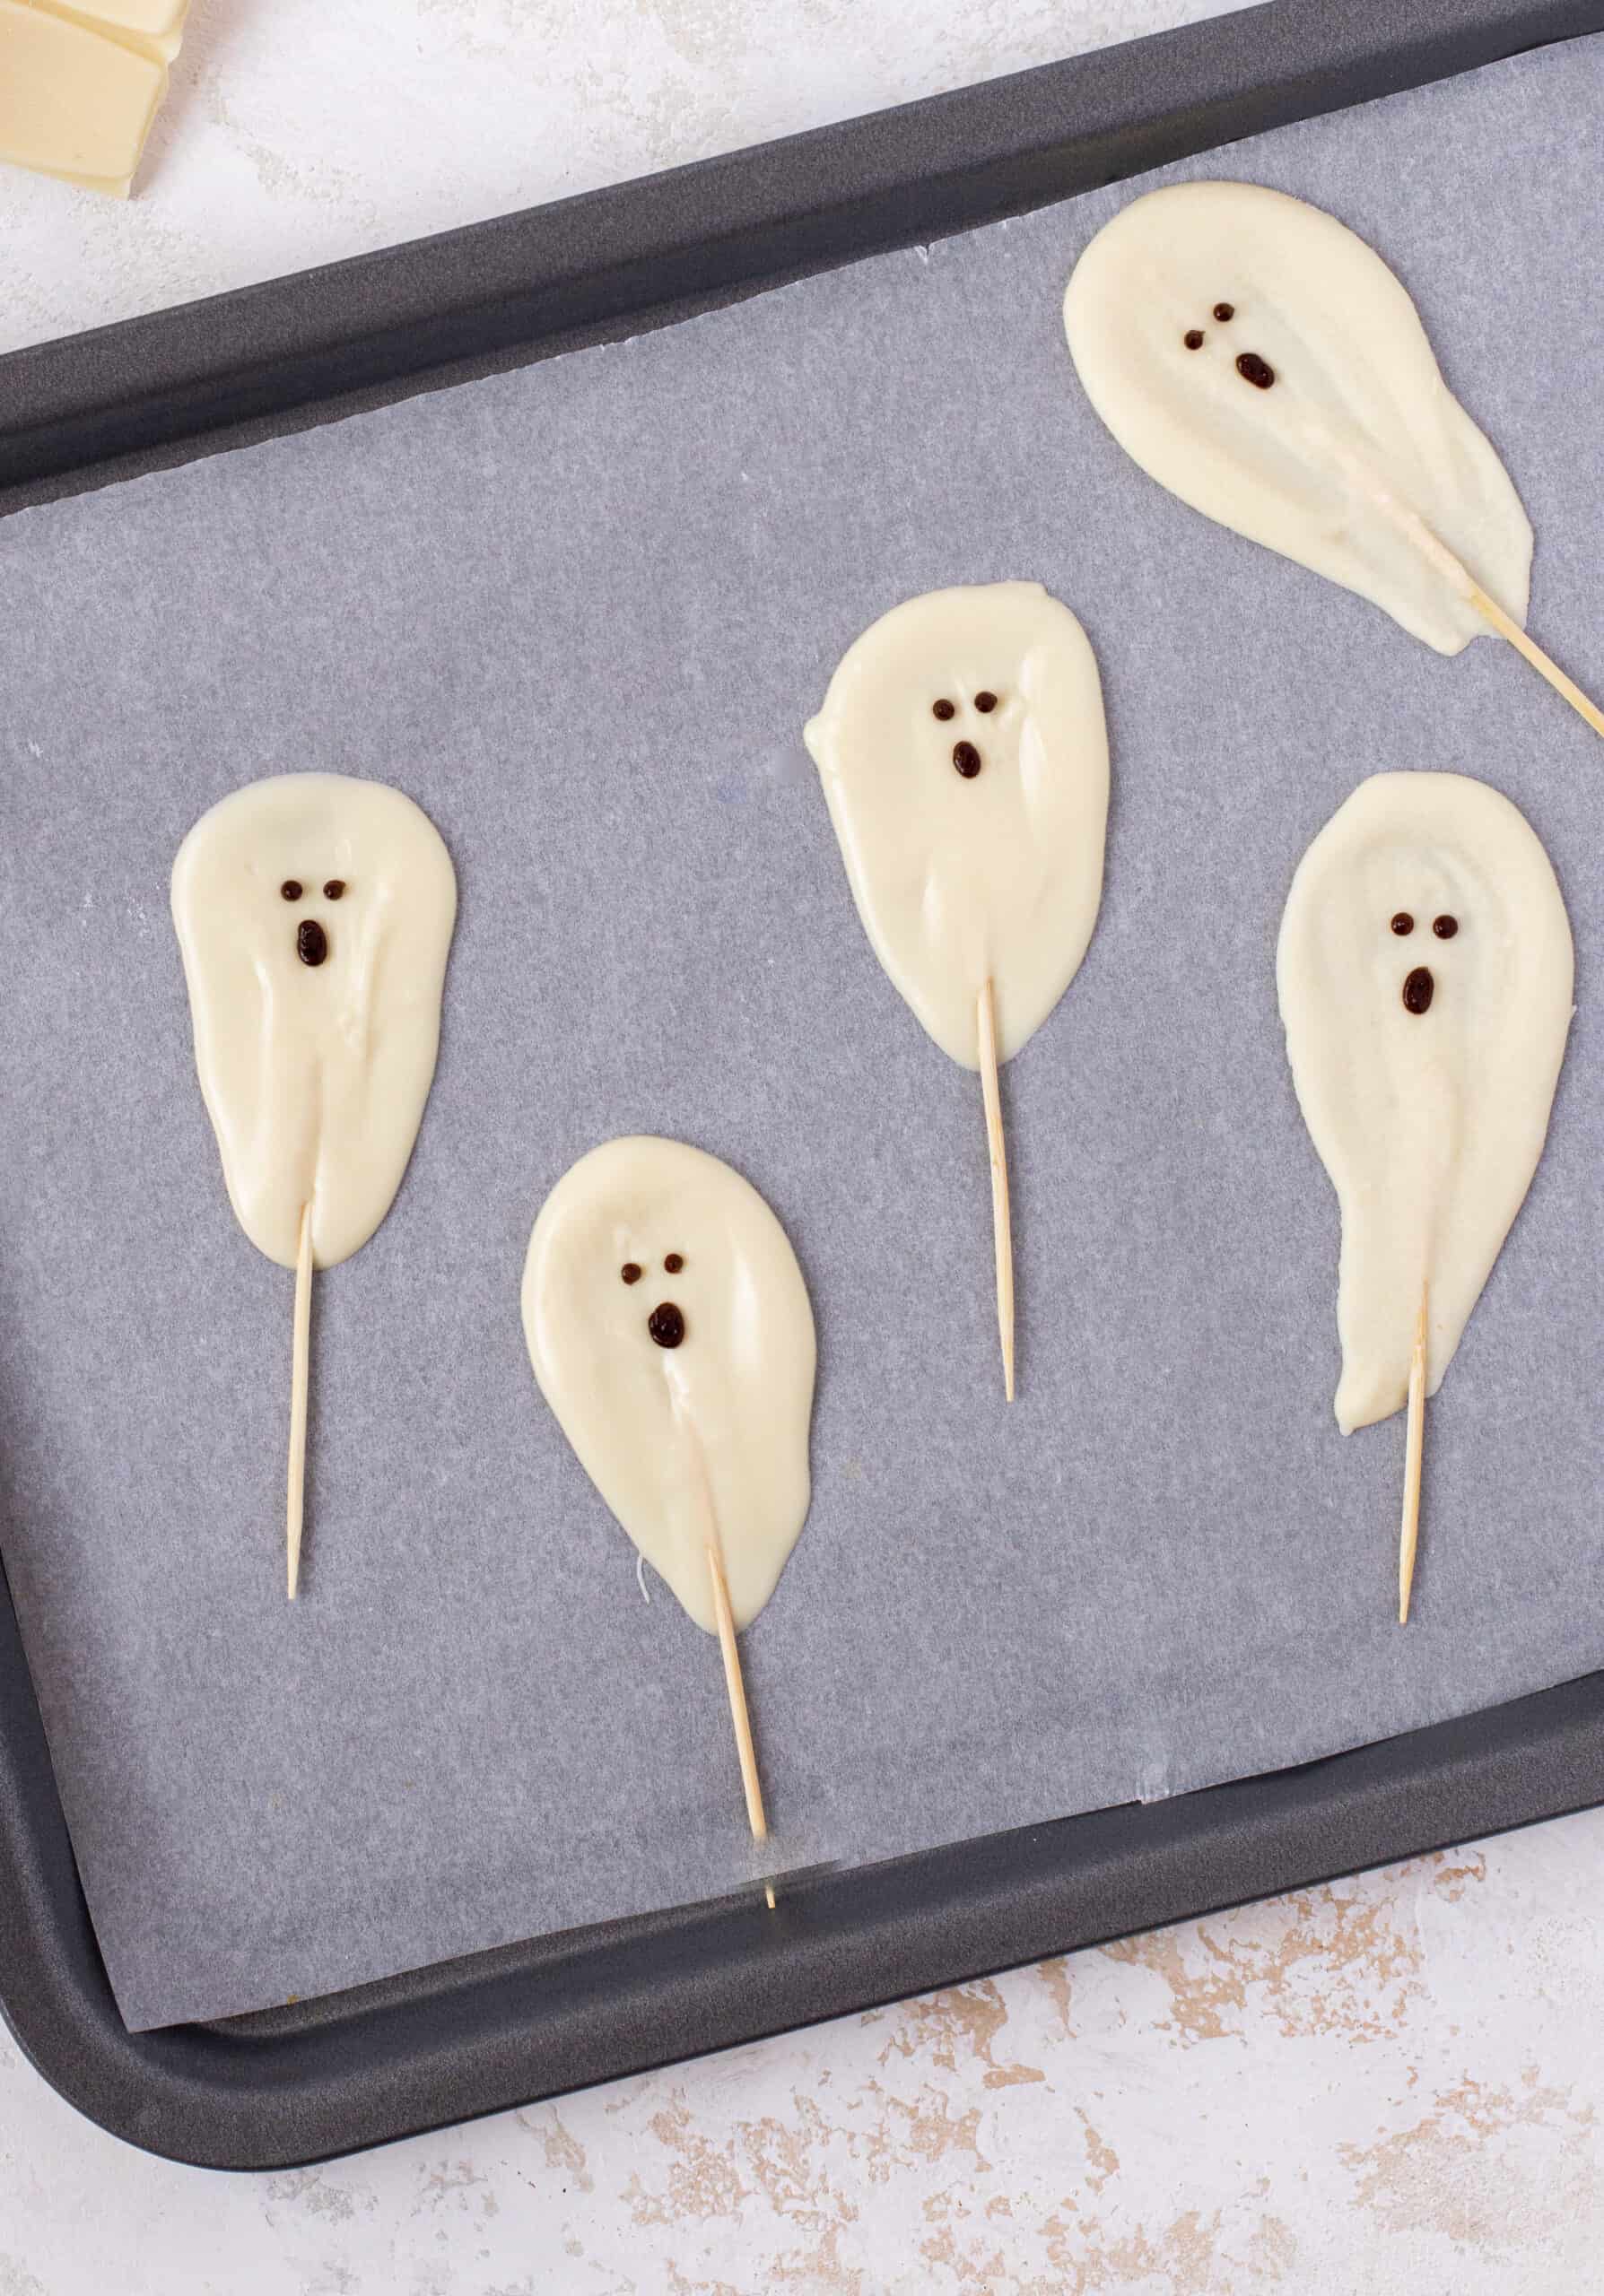
Make the white chocolate ghosts in 6 simple steps:
- Melt the white chocolate in the microwave. It’s best to do this in 20-30 second blasts, stirring between each, as white chocolate can burn quite quickly.
- Drop spoonfuls of white chocolate onto the lined baking tray.
- Use a pastry brush or the back of a spoon to brush the chocolate down.
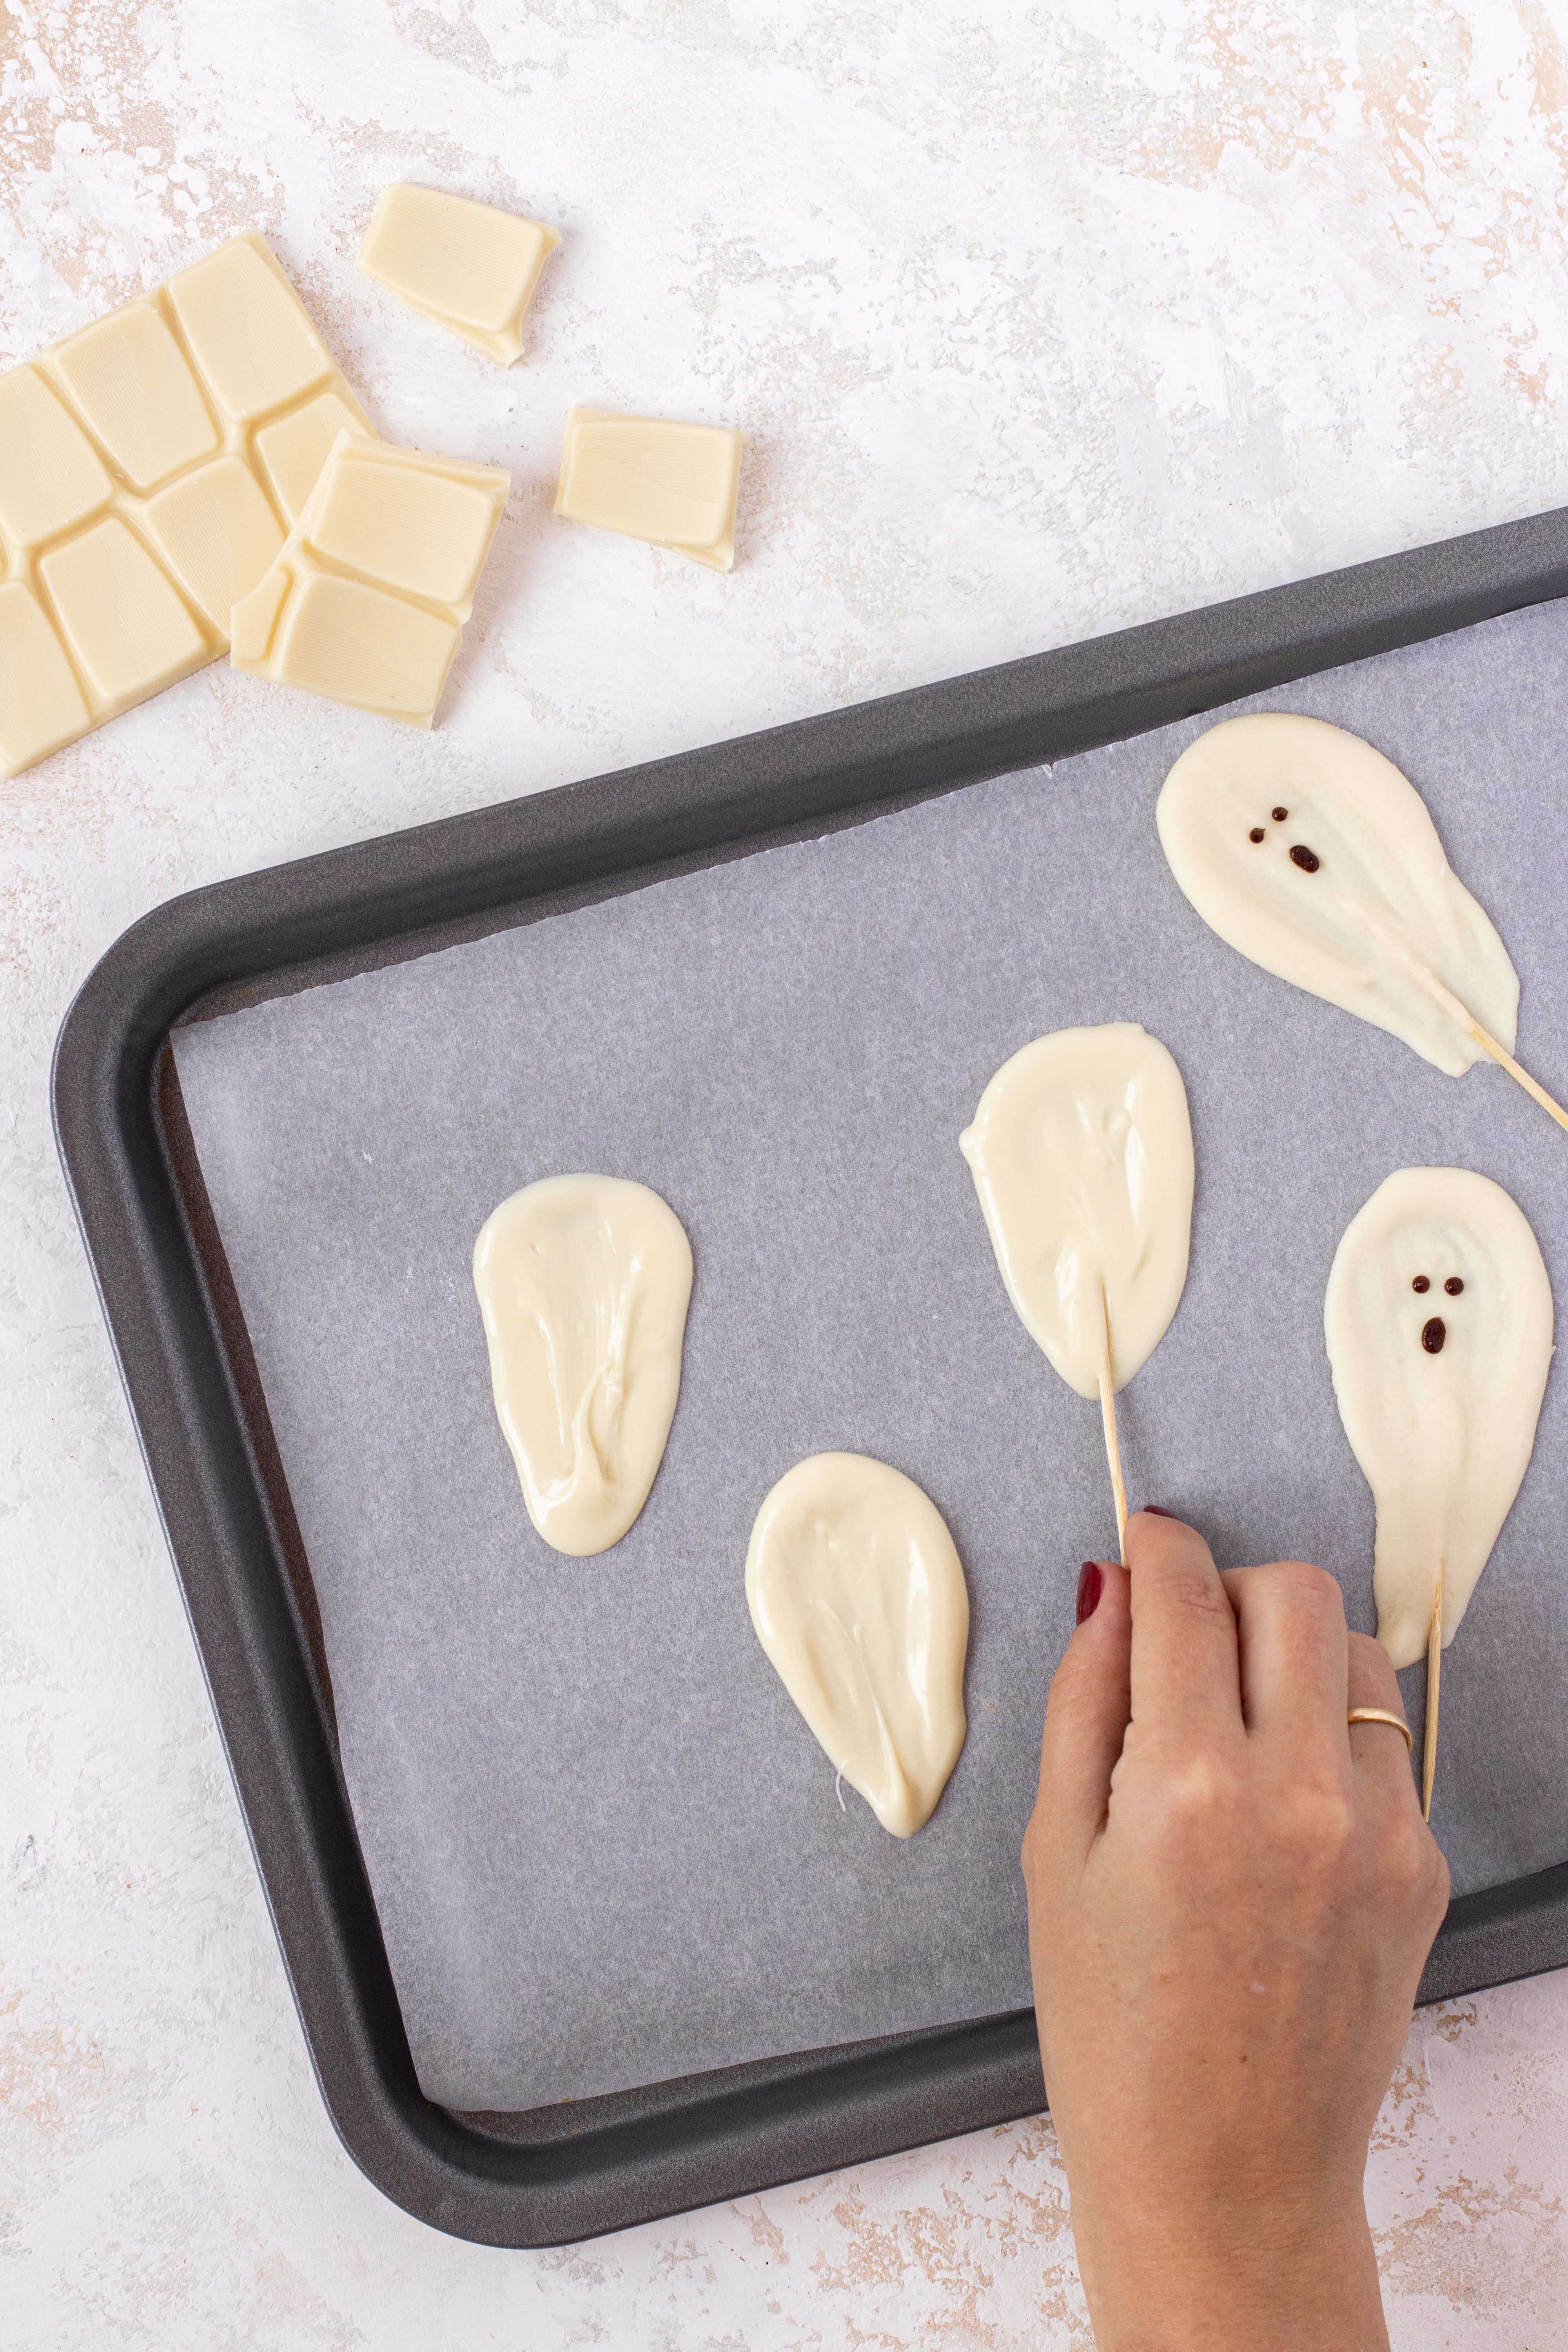
- Place the cocktail sticks in the bottom half of the chocolate ghosts.
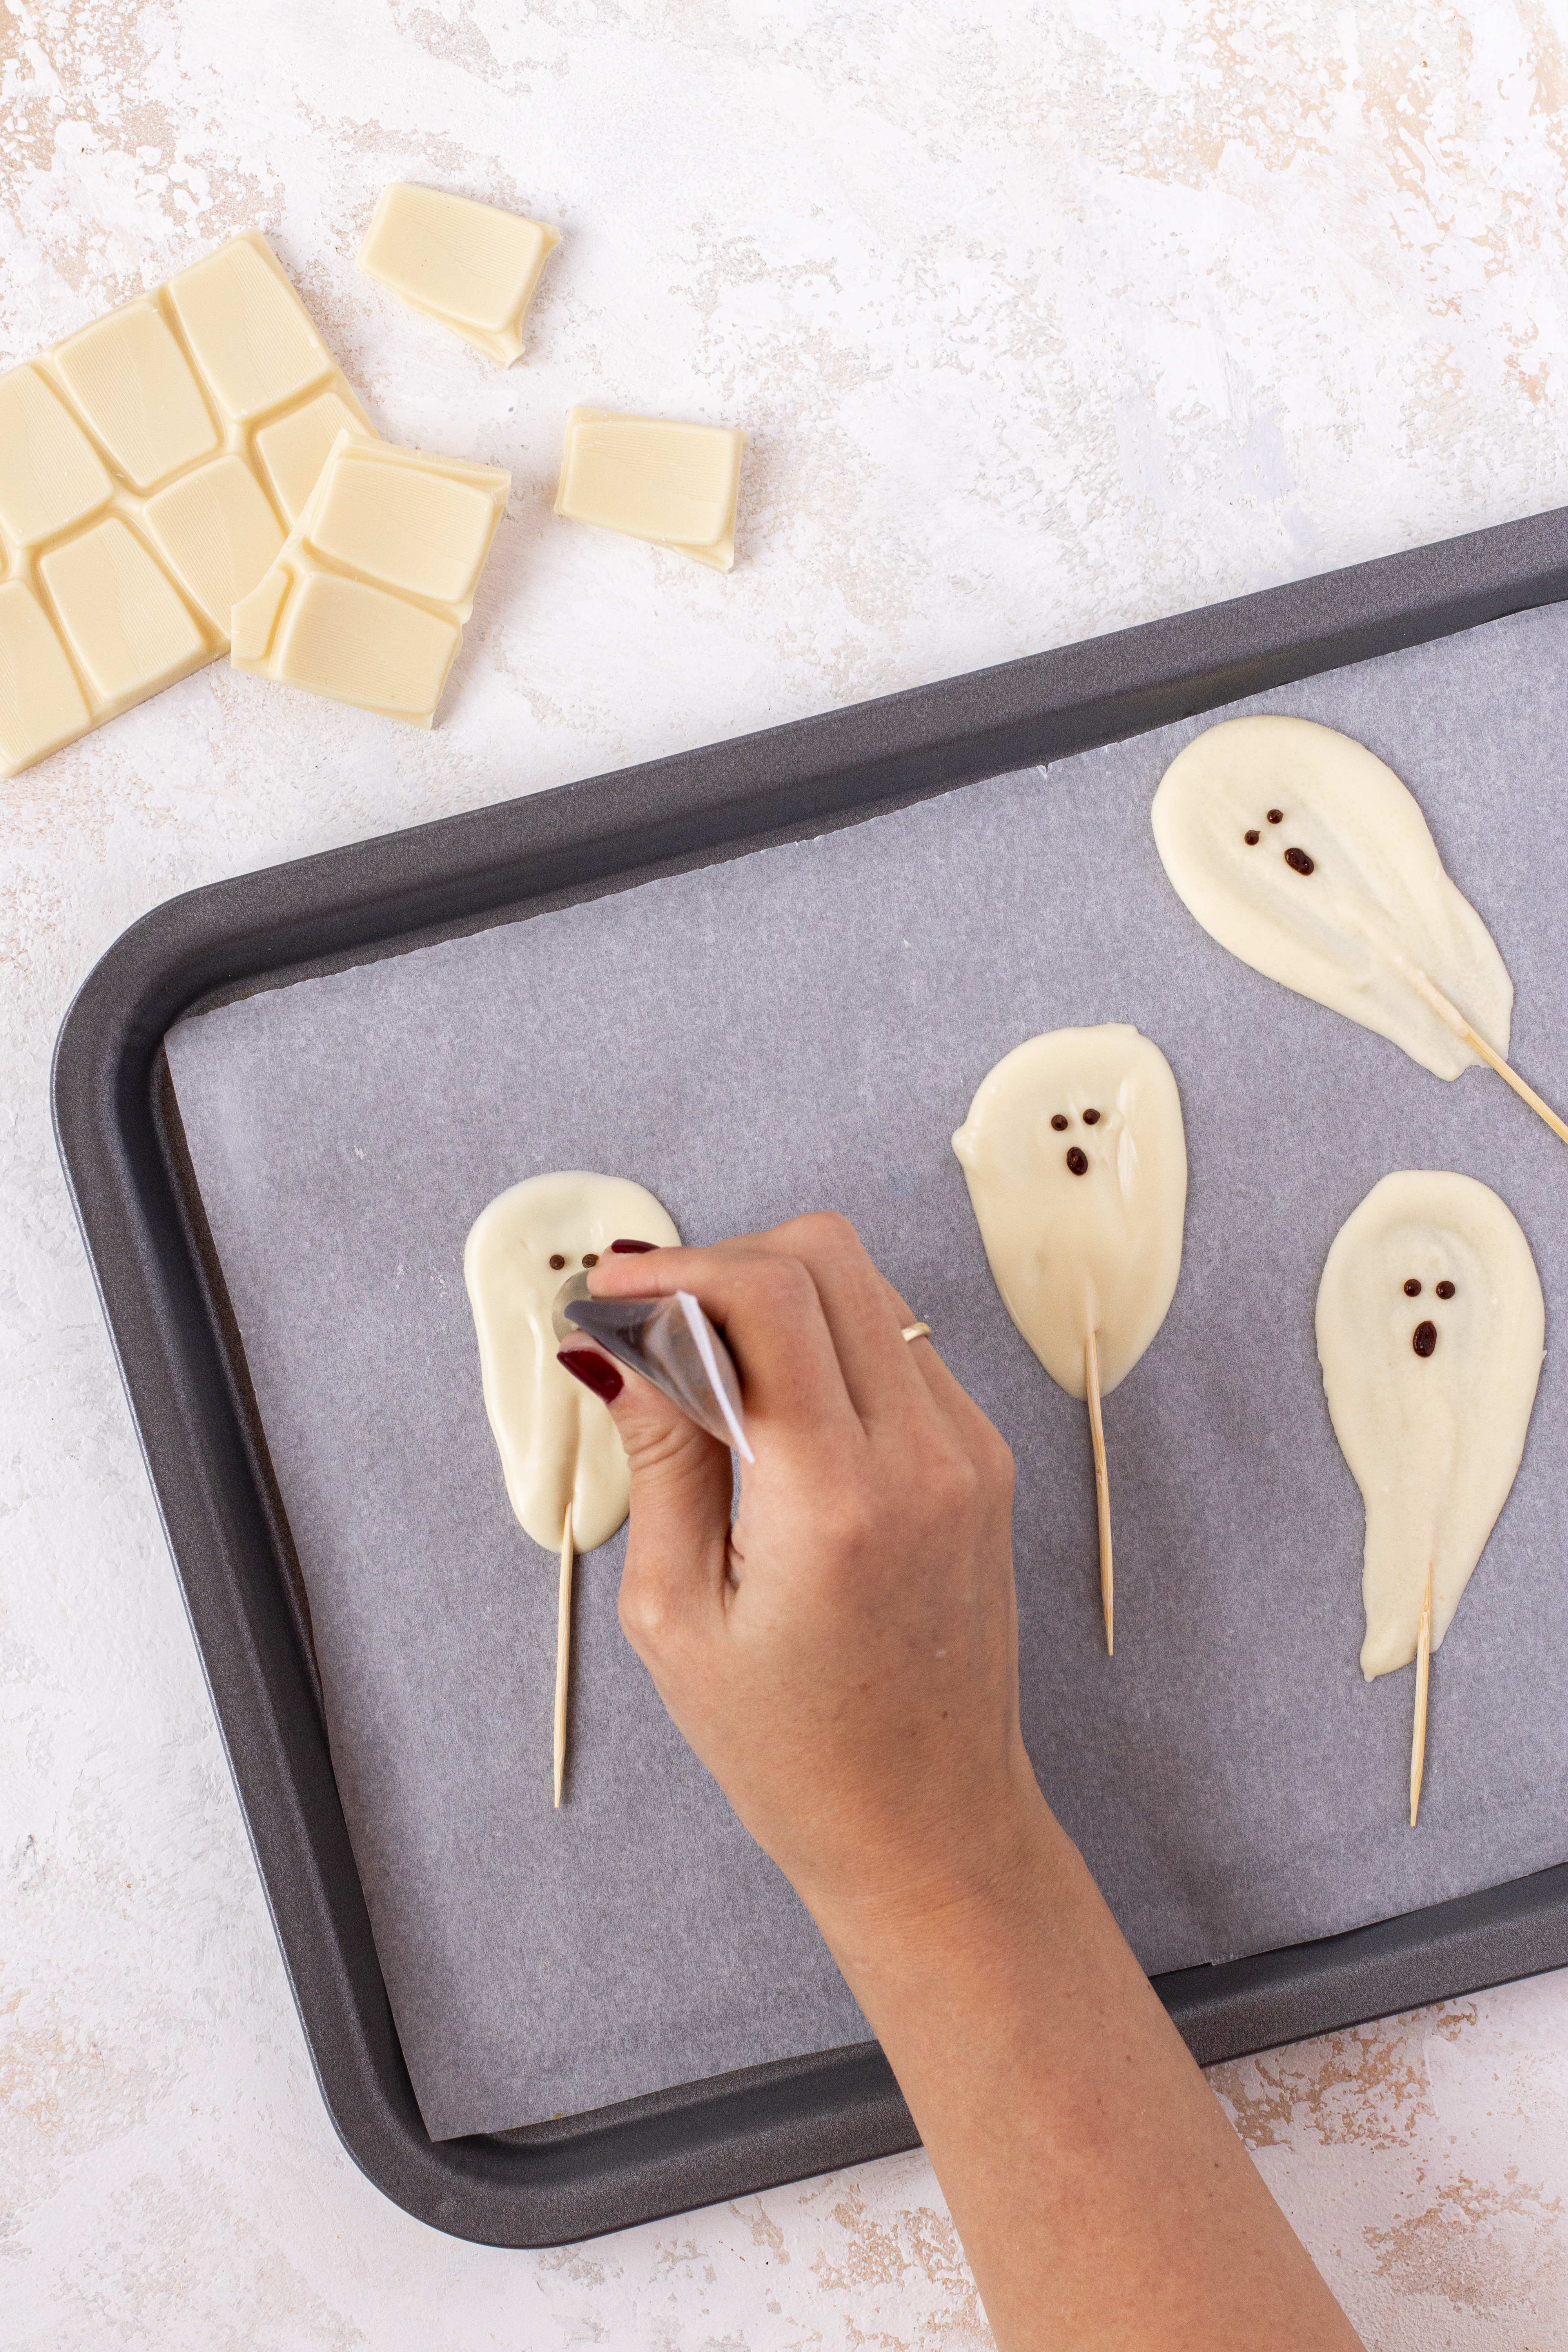
- Leave to set for 20 minutes or so, then draw on the eyes and mouth shape.
- Pop in the fridge to harden for 20 minutes. Then carefully peel off the ghosts.
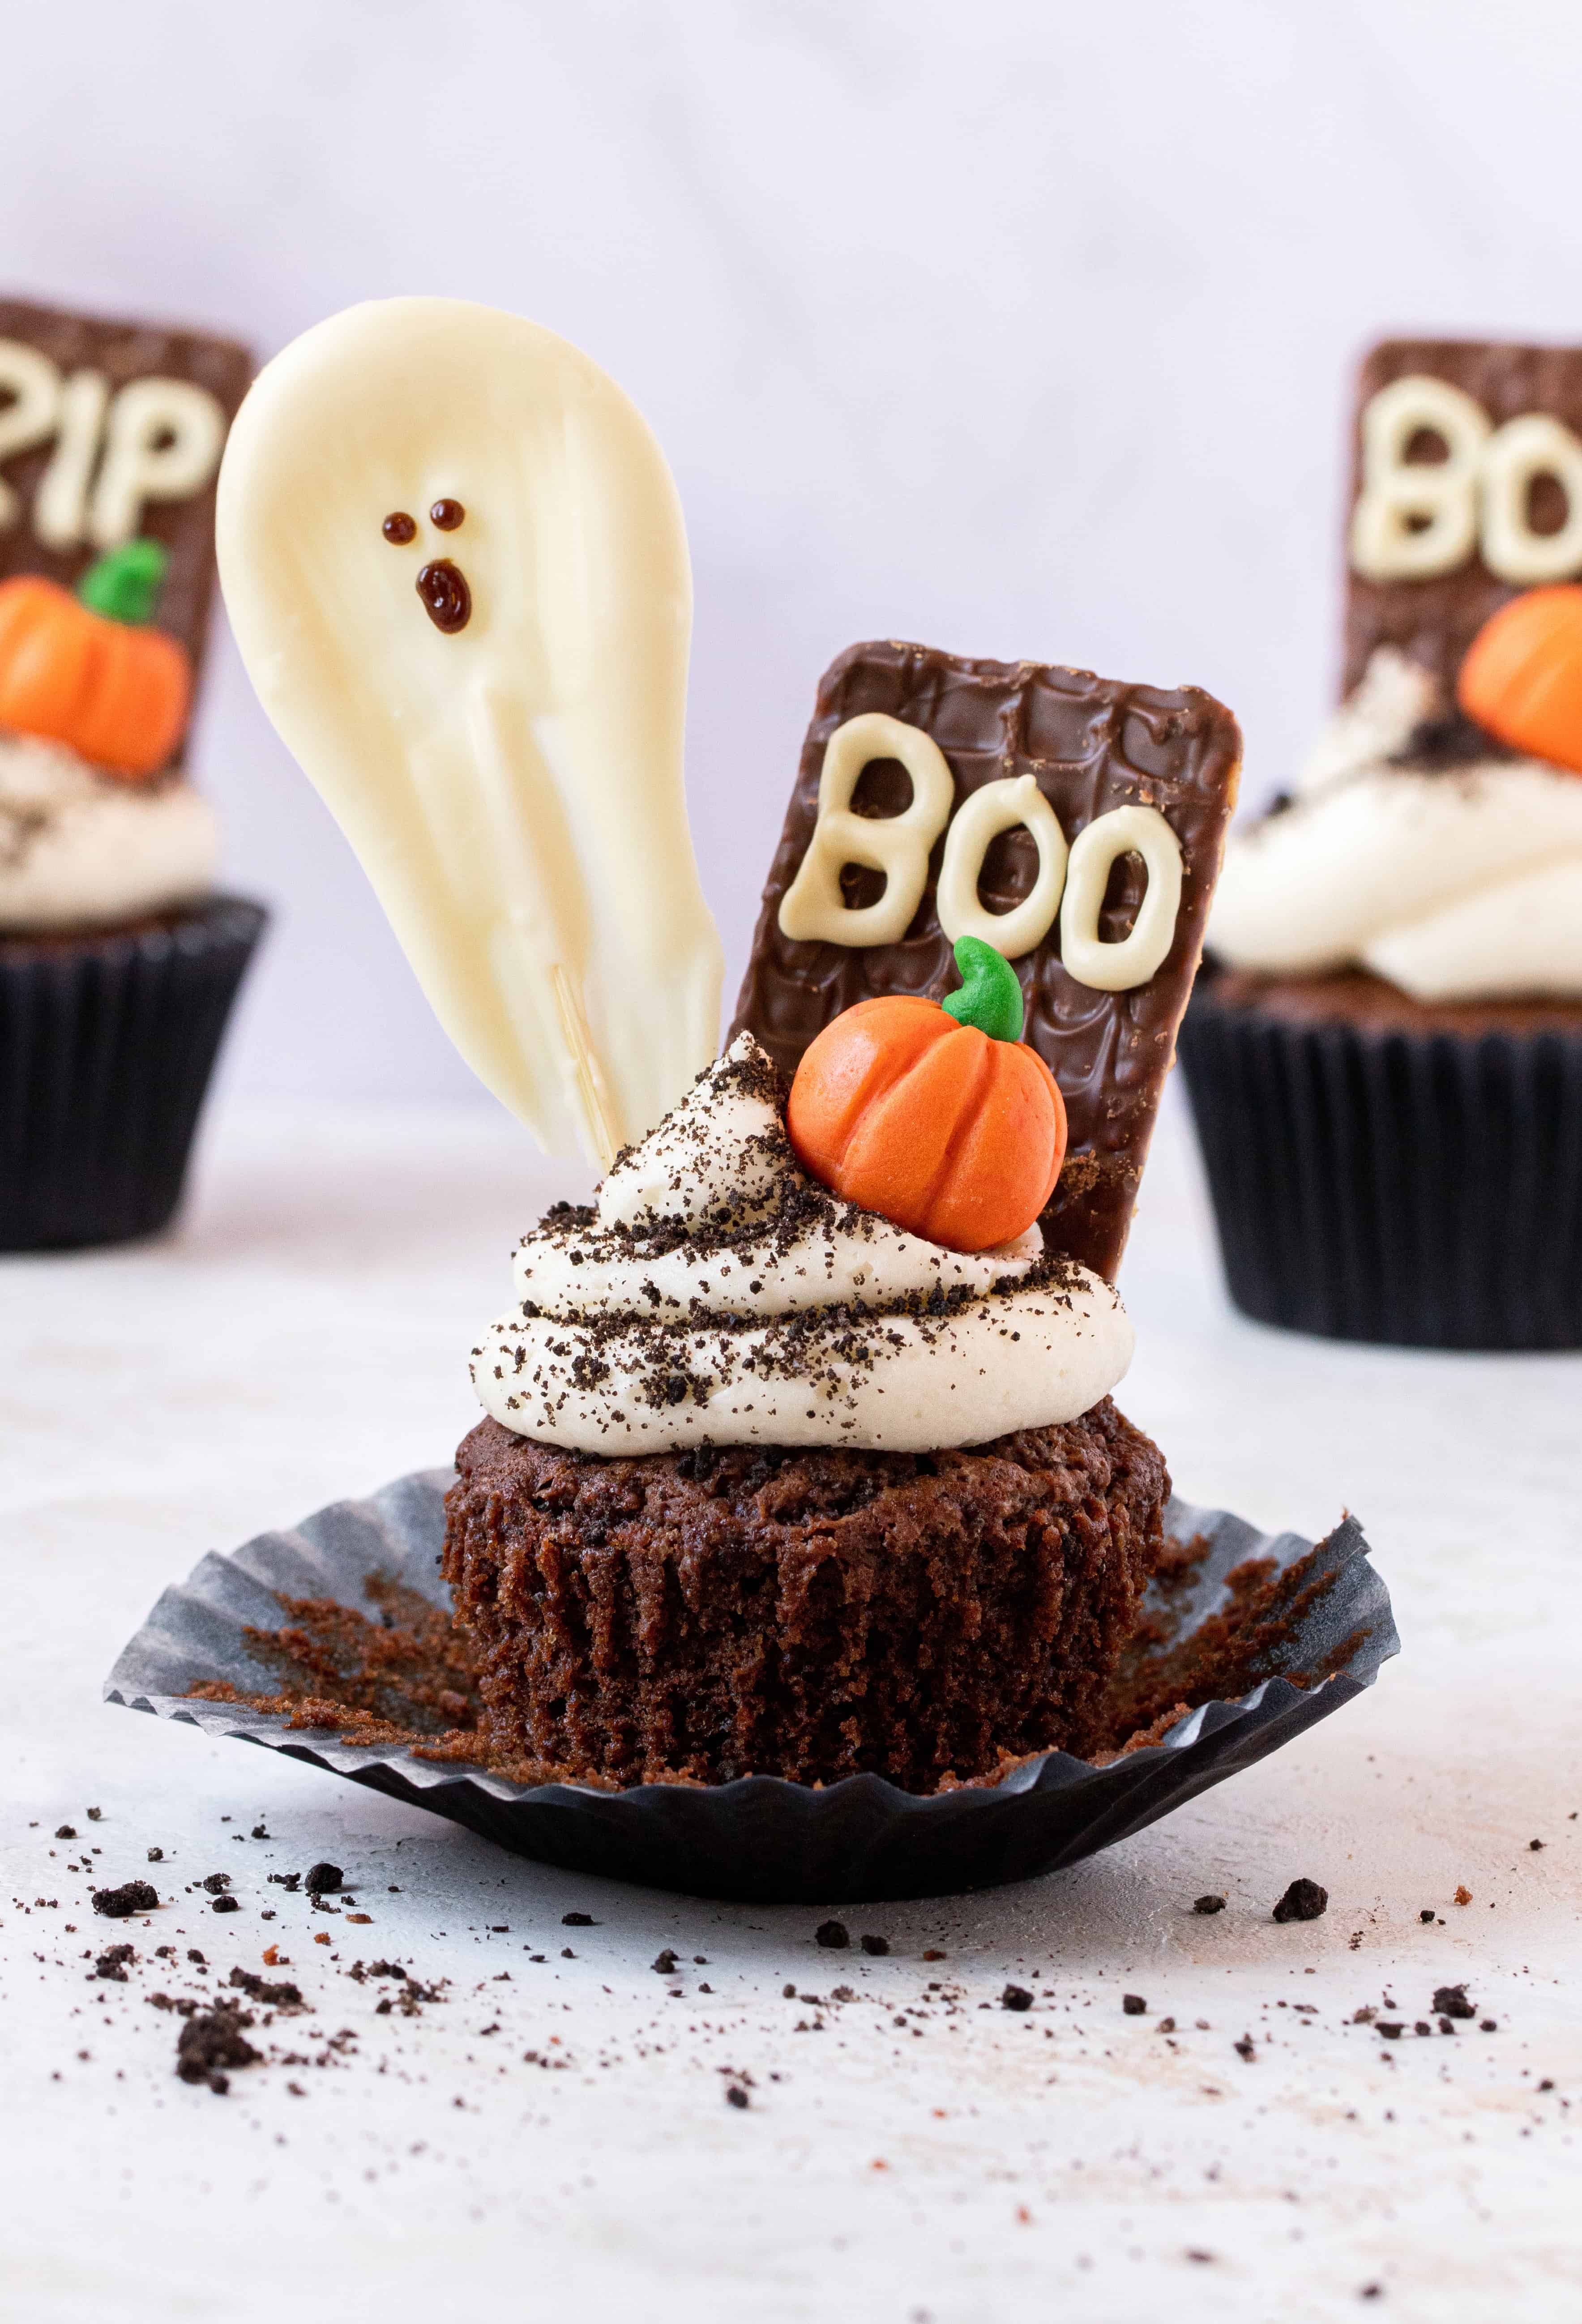
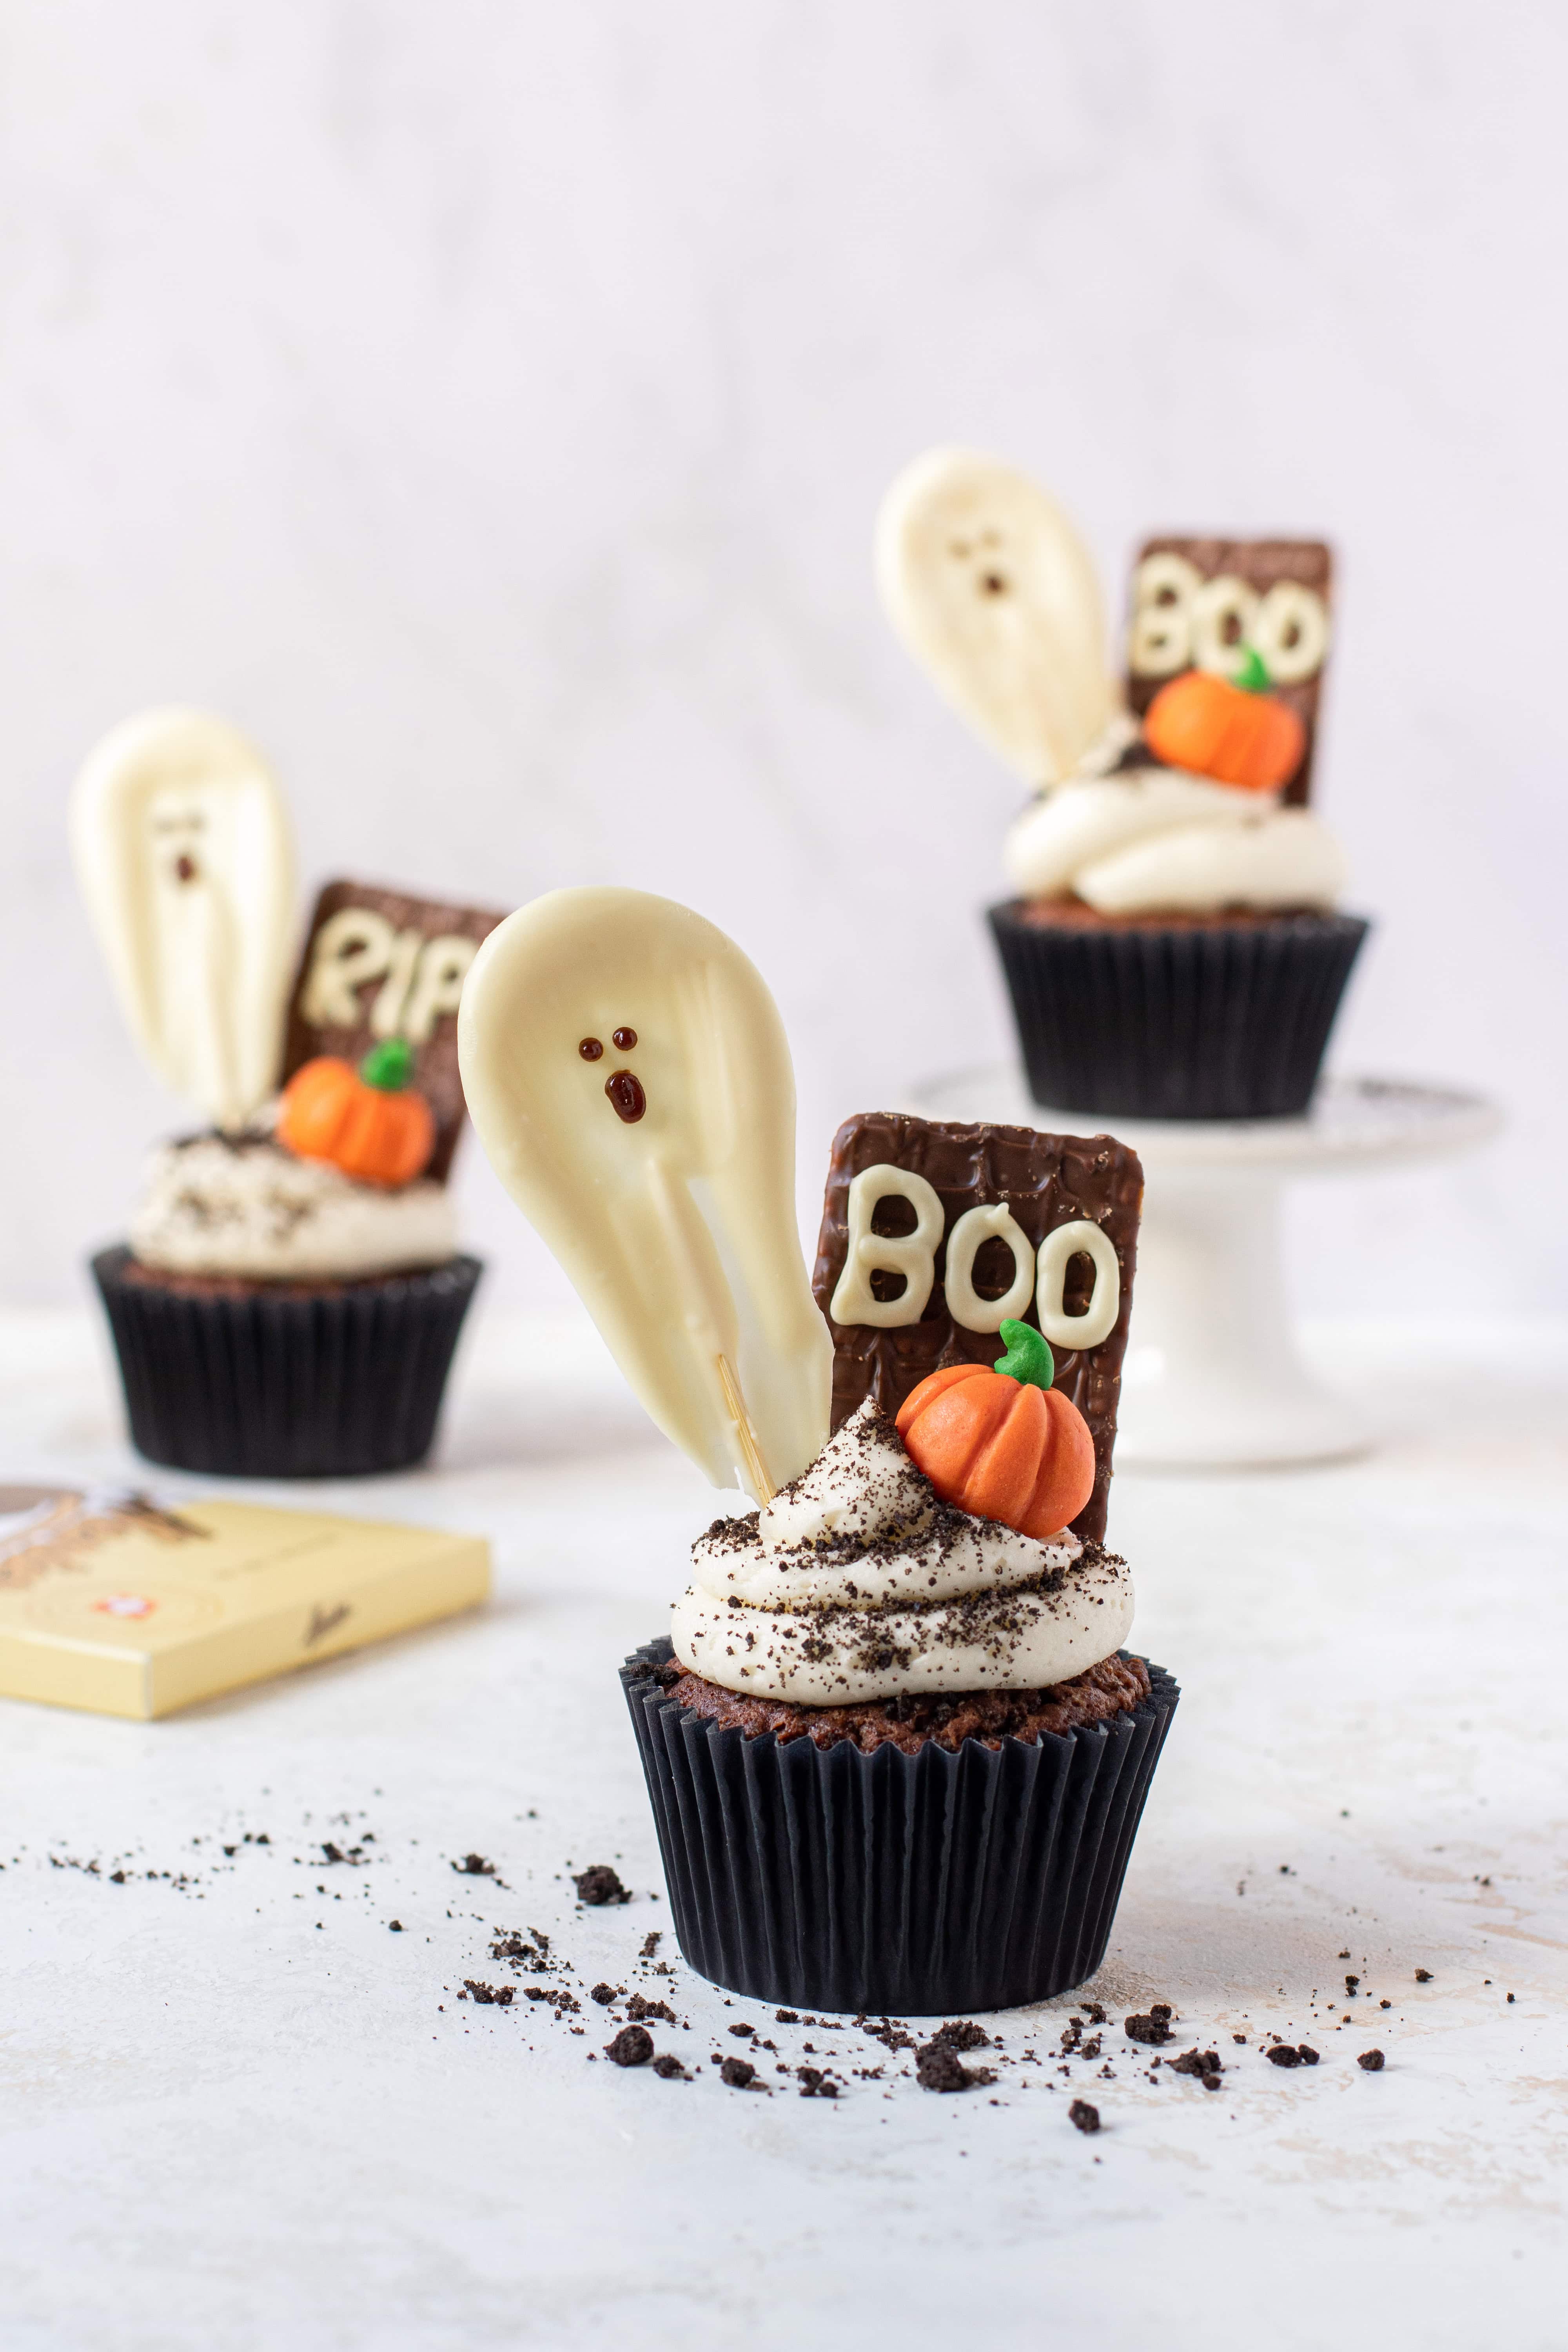
Decoration ideas
Here are a few creative ways you can use these white chocolate ghosts to spookify your bakes:
- Cupcakes – pipe buttercream swirls on top of cupcakes then push the ghosts in the top for decoration (just like in the photo below).
- Cakes – buttercream the outside of a layer cake and stick the ghosts around the outside. This Death by Double Chocolate Cake recipe would be perfect for this.
- Cheesecake – lay the ghosts on top of a cheesecake for a spooky topping.
- Brownies – slice the brownies into portions and then stick a ghost into each one. This recipe for my Spider Web Brownies would be ideal!
Equipment used to make white chocolate ghosts
More sweetness on social
Find recipe videos, baking hacks and food photography tips.
White Chocolate Ghosts
How fa-boo-lous are these white chocolate ghosts? Quick, delicious and fun to make. Use them to decorate cakes, brownies or spooktacular cupcakes!
Rate this Recipe
Print Pin Rate this RecipeServings:
Ingredients
- 100 g White chocolate my favourite brand is Menier
- Chocolate writing icing
Instructions
- Line a large baking tray with greaseproof paper.
- Chop up the white chocolate into small chunks and place in a microwave-safe bowl. Microwave in 20-second blasts (stirring after each) until melted and smooth.
- Drop teaspoons of melted white chocolate onto the baking tray, and use a pastry brush or the back of a spoon to smear the white chocolate downwards. This will create a ghost shape.
- Place a cocktail stick into the bottom half of each ghost, and roll it in the white chocolate to conceal the stick.
- Leave to dry for 20 minutes, then draw on two dots for the eyes and an oval for the ghost mouth using the chocolate writing icing.
- Place in the fridge for 20-30 minutes until the chocolate is hard and set.
- Carefully peel the ghosts of the baking paper and use them to decorate your spooky bakes.
More halloween recipes to love
This post contains affiliate links which means I will make a small commission if you purchase through those links. I only recommend products that I know, trust and love!