Death by Double Chocolate Cake
By Jessie
Updated: July 7, 2025
Rate This Recipe
By: Jessie
Updated: July 7, 2025
Rate This Recipe:

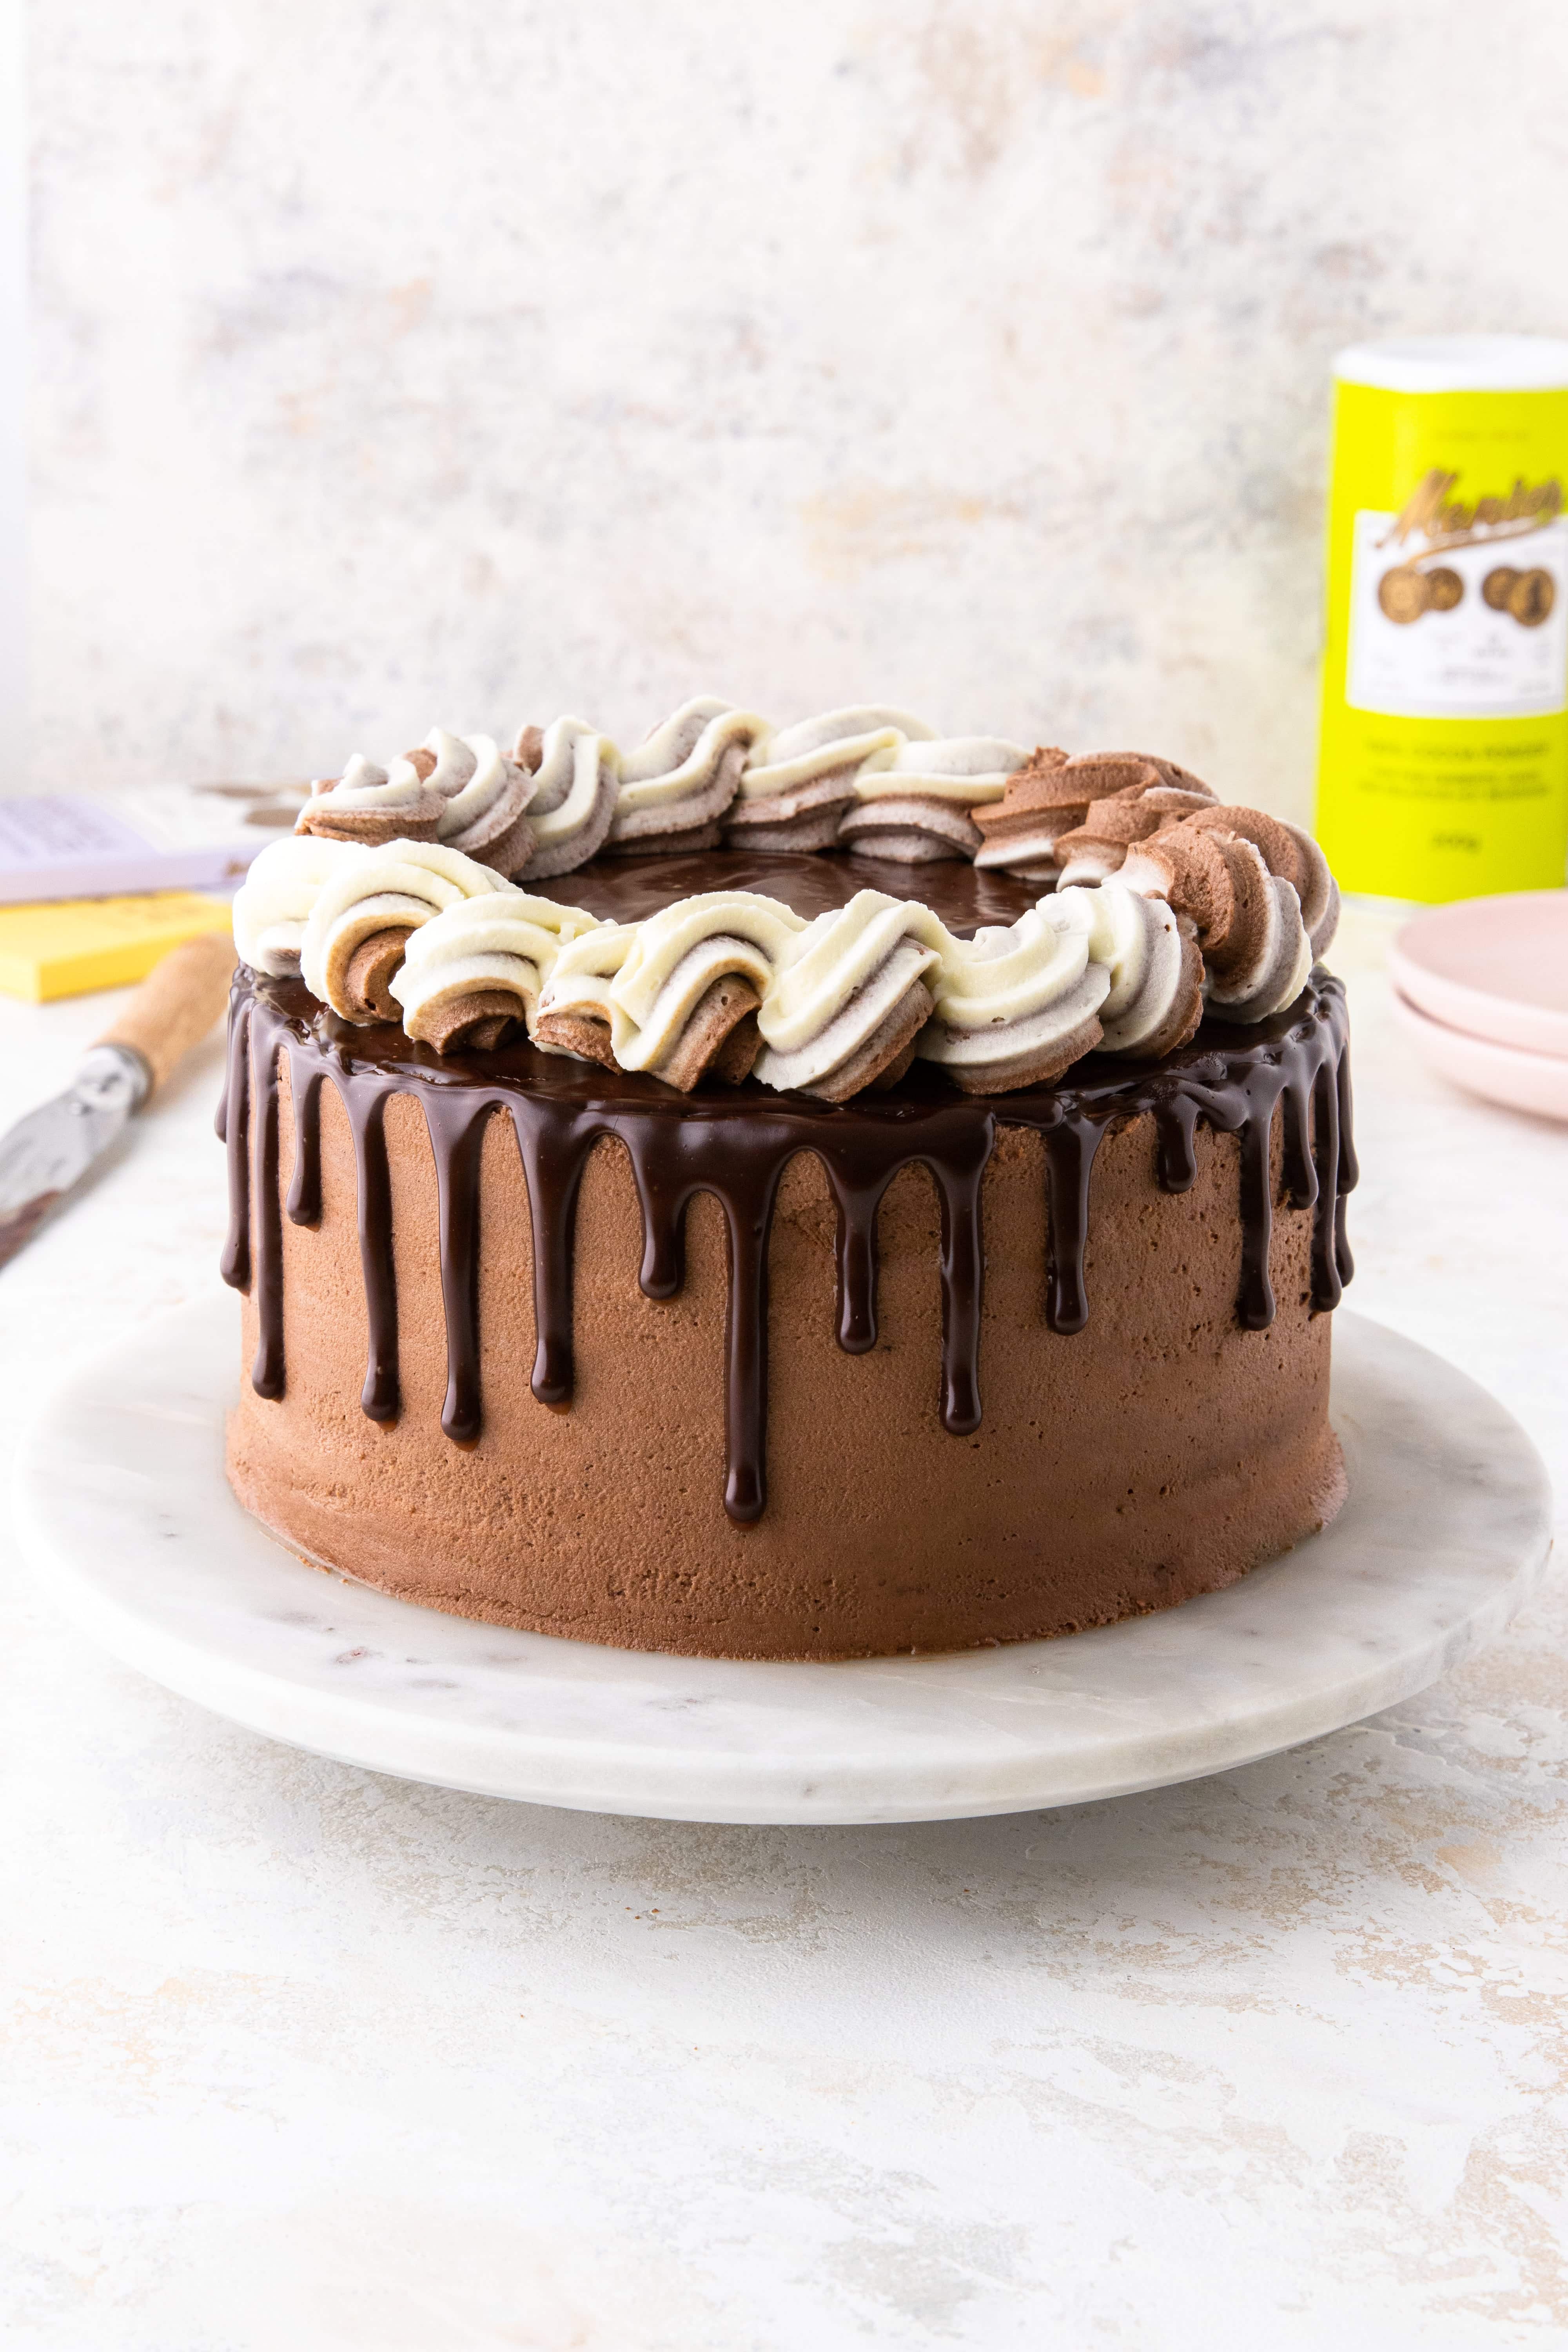
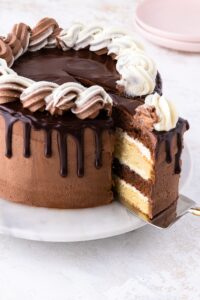
Calling all chocoholics, this Death by Double Chocolate Cake is the recipe for you! Layers of milk and white chocolate sponge are sandwiched together with white chocolate buttercream and coated in milk chocolate buttercream. For the decoration, I’ve paired a chocolate ganache drip with a chocolate buttercream rope border to create the ultimate show-stopper.
This detailed recipe includes step-by-step photographs, cake decorating videos and many baking tips to help you along the way. Enjoy!
This post is kindly sponsored by Menier Chocolate, however all opinions are my own.
About this delicious double chocolate cake
TASTE: chocolate, chocolate and more chocolate! Salted butter is used to make the buttercream which helps balance the sweetness.
TEXTURE: Soft, moist sponge with deliciously creamy buttercream.
EASE: The ganache drip and rope border are a little challenging, but I’ve included video tutorials and top tips to help you out.
PERFECT FOR: birthdays, celebrations and for those who LOVE choccy.
BAKING FACT: the phrase “Death by chocolate cake” basically means the ultimate rich, decadent and indulgent chocolate dessert!
Which chocolate is best for baking?
It’s no secret that I LOVE a chocolatey bake! If you were to take a scroll on my Insta you’d see that it’s 80% chocolate recipes 😅 There are many different brands of baking chocolate out there, including supermarket’s own brands, but personally I don’t think you can beat Menier Chocolate. It ticks every box… creamy texture ✔️ rich flavour that doesn’t taste like ‘cooking’ chocolate ✔️ easy to melt ✔️
To make this double chocolate cake, you will need:
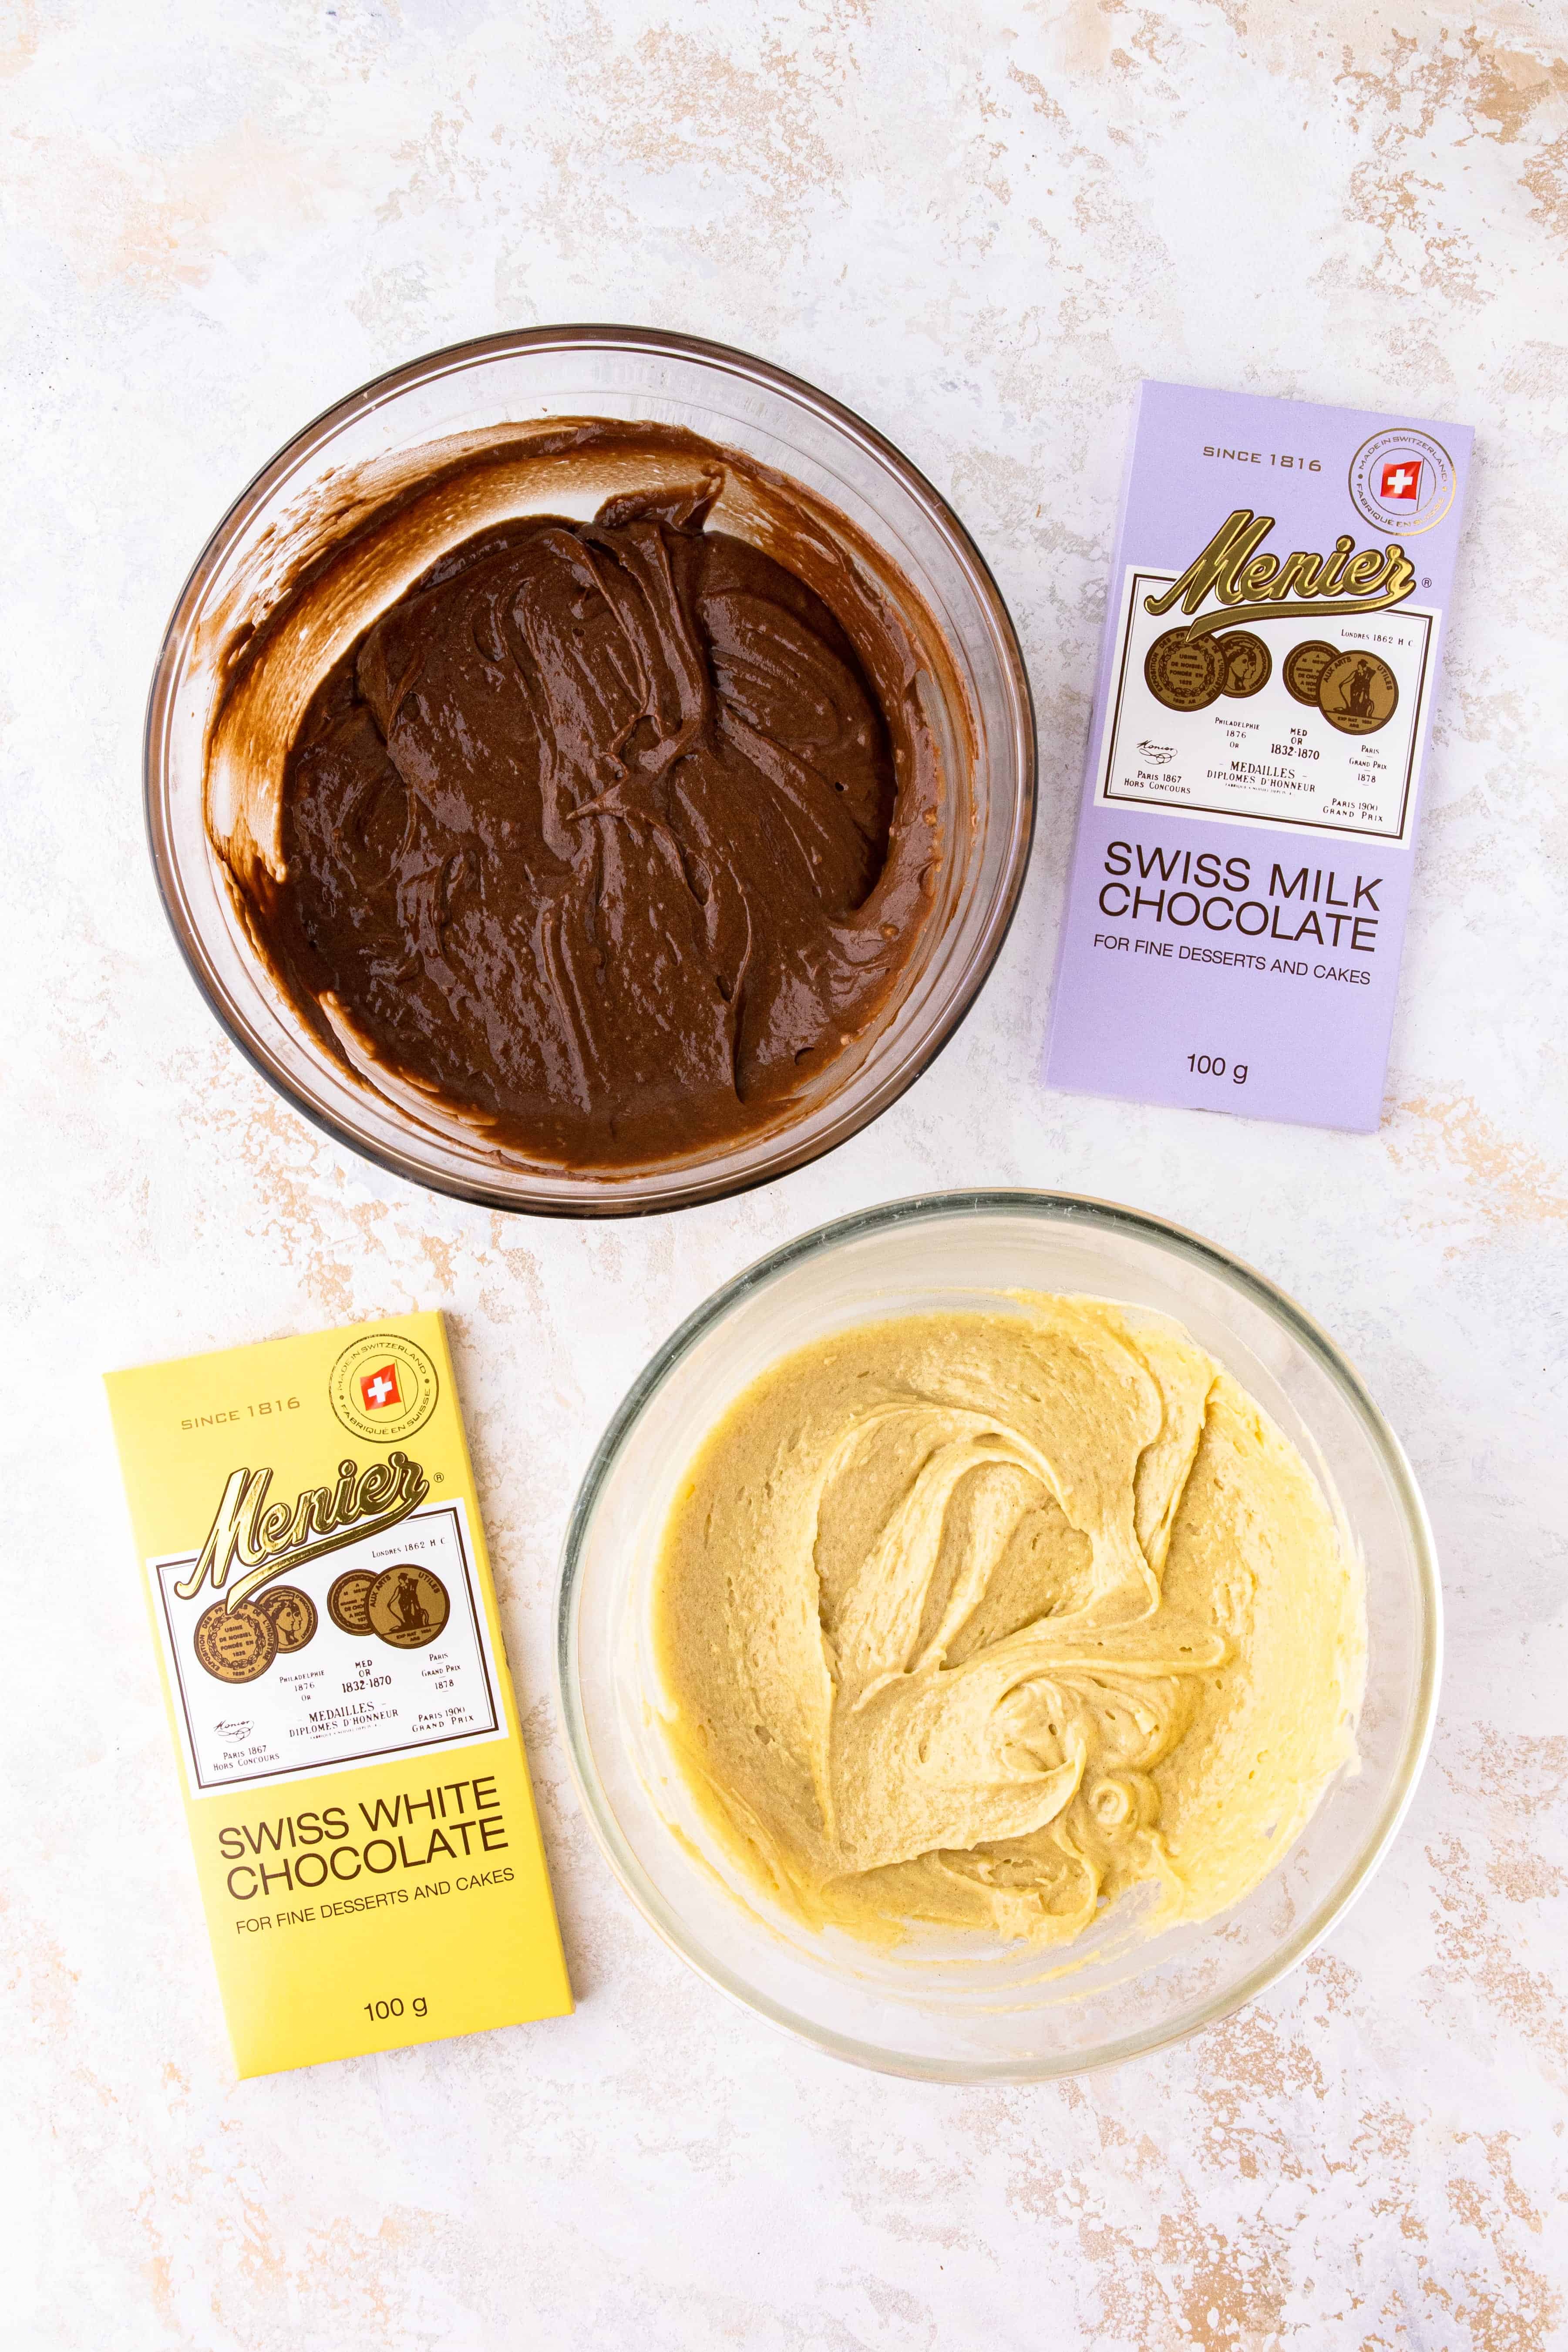
- Menier Milk Chocolate – to make the milk chocolate sponge and buttercream
- Menier 100% Cocoa Powder – used to enhance the flavour and texture of the milk chocolate sponge
- Menier White Chocolate – to make the white chocolate sponge and buttercream
- Menier 70% Dark Chocolate – to make the chocolate ganache drip
How to make this double chocolate cake
There are four main parts to this recipe; let’s break it down:
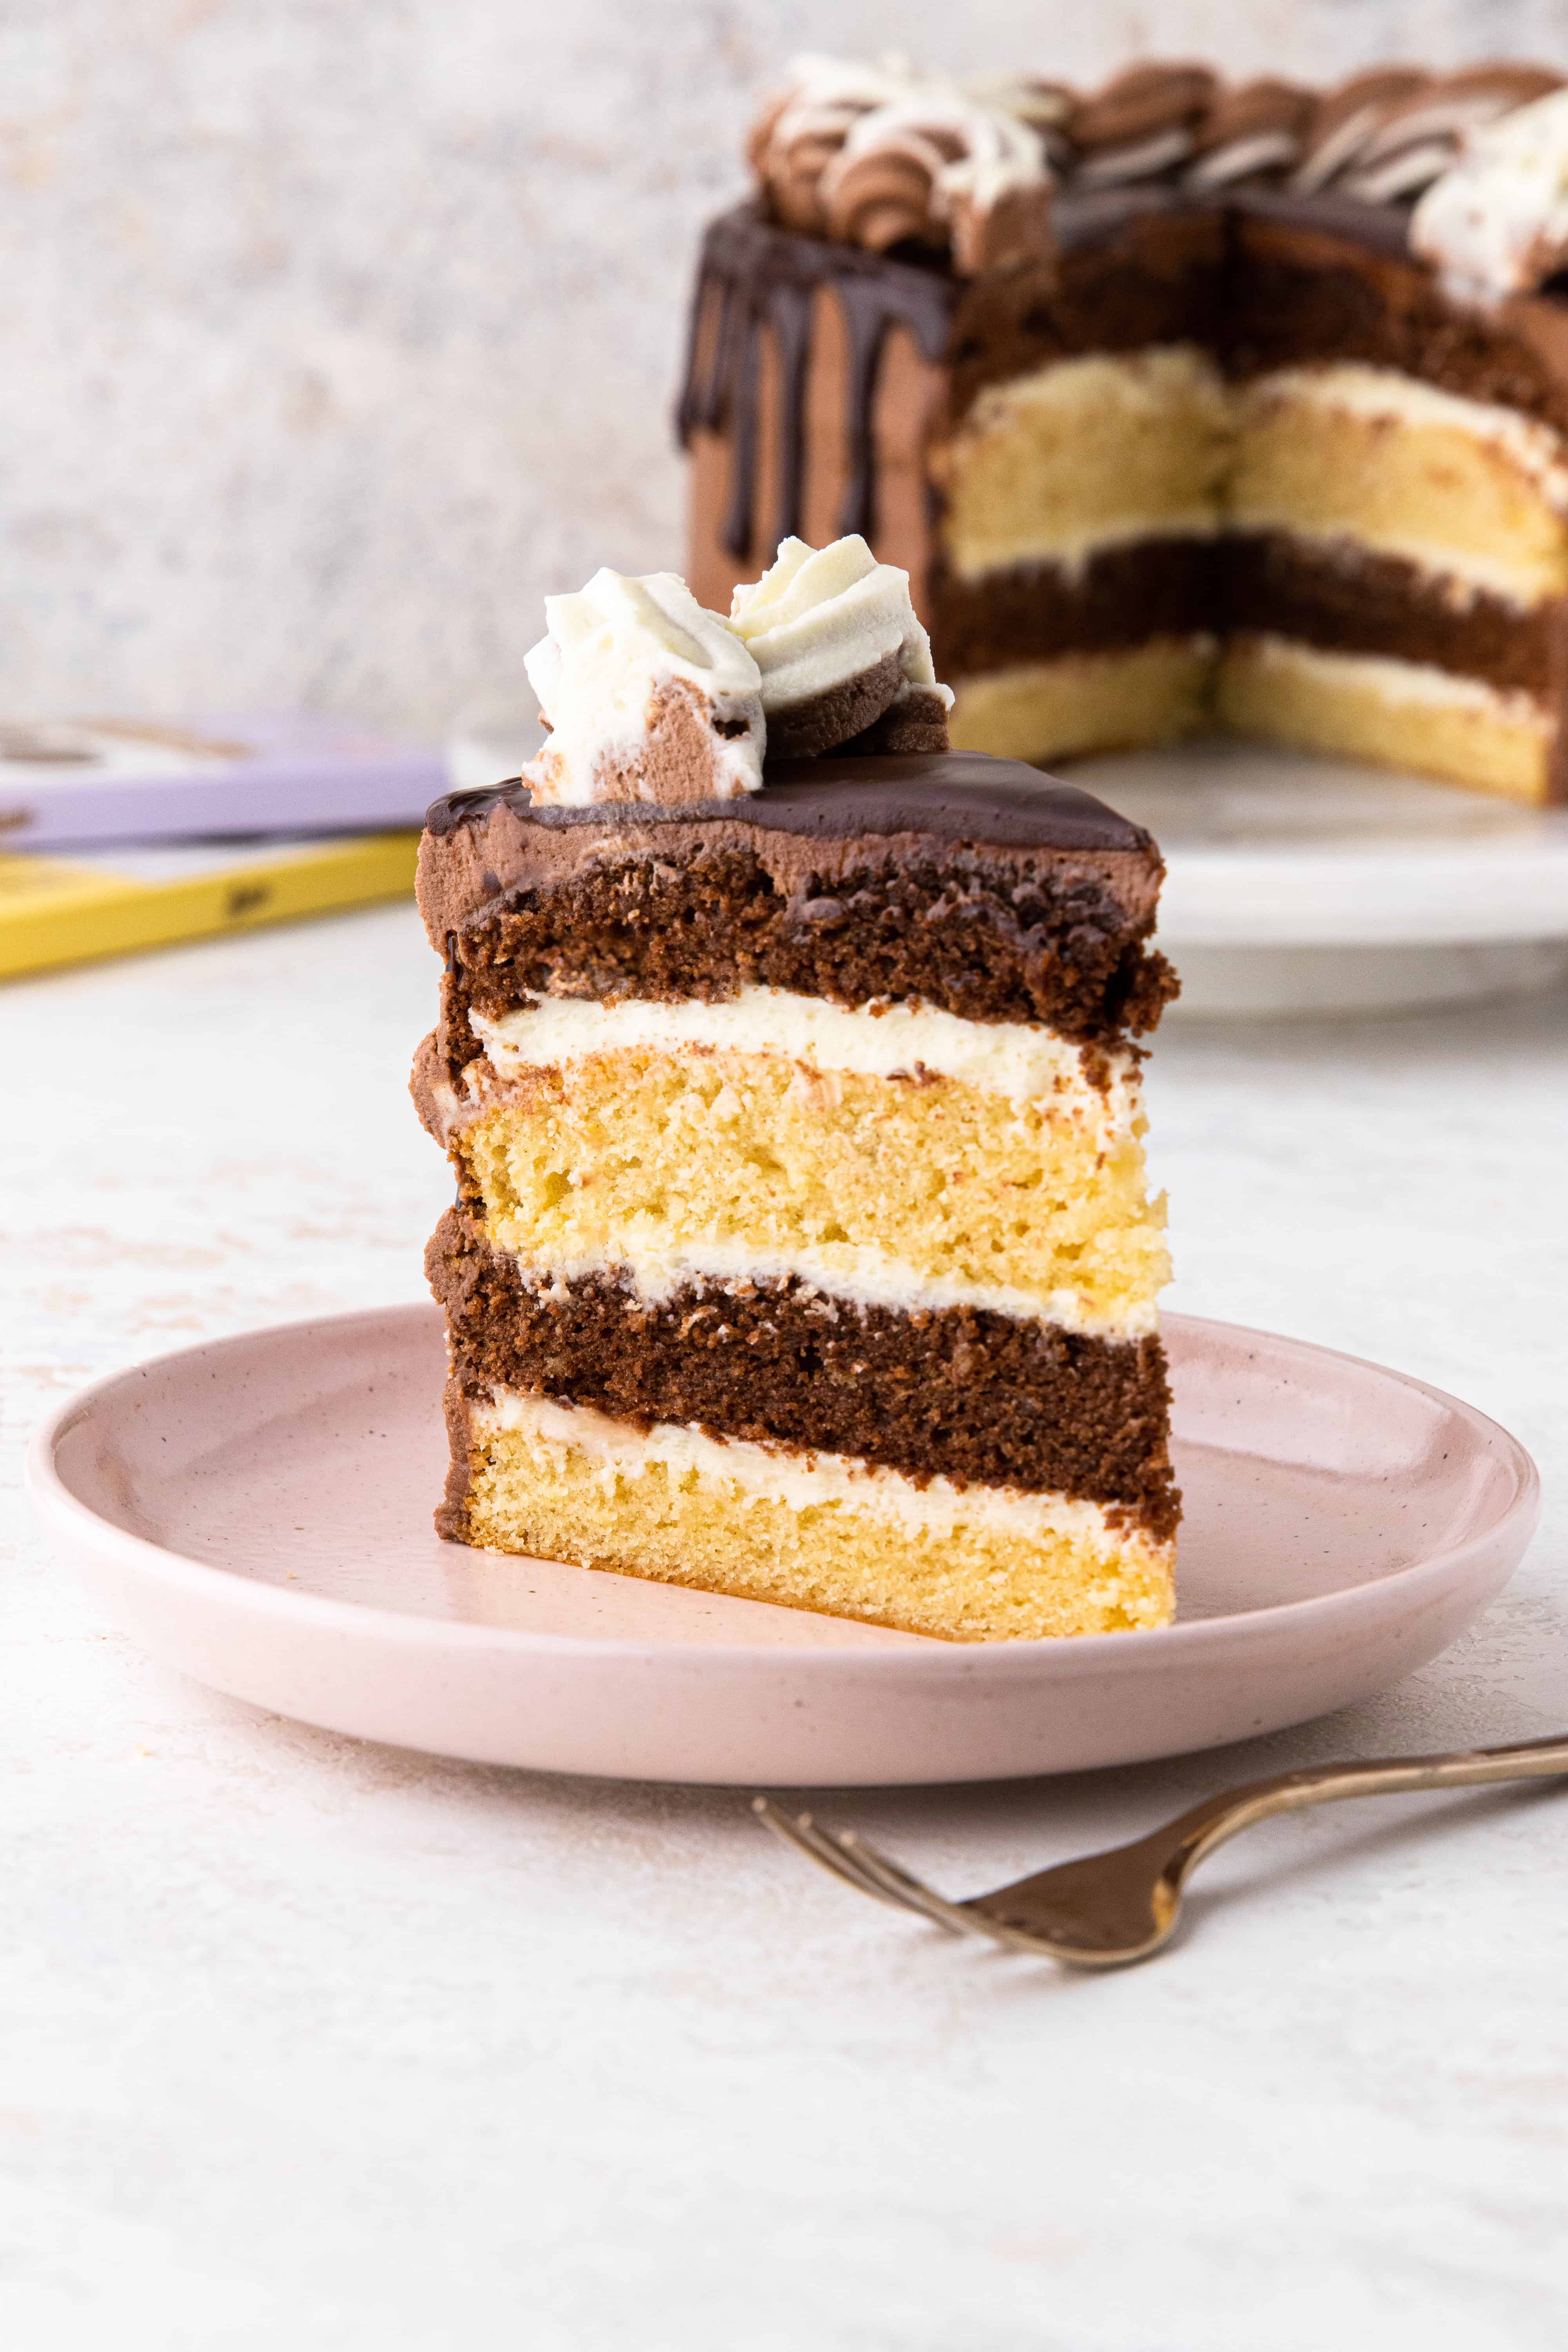
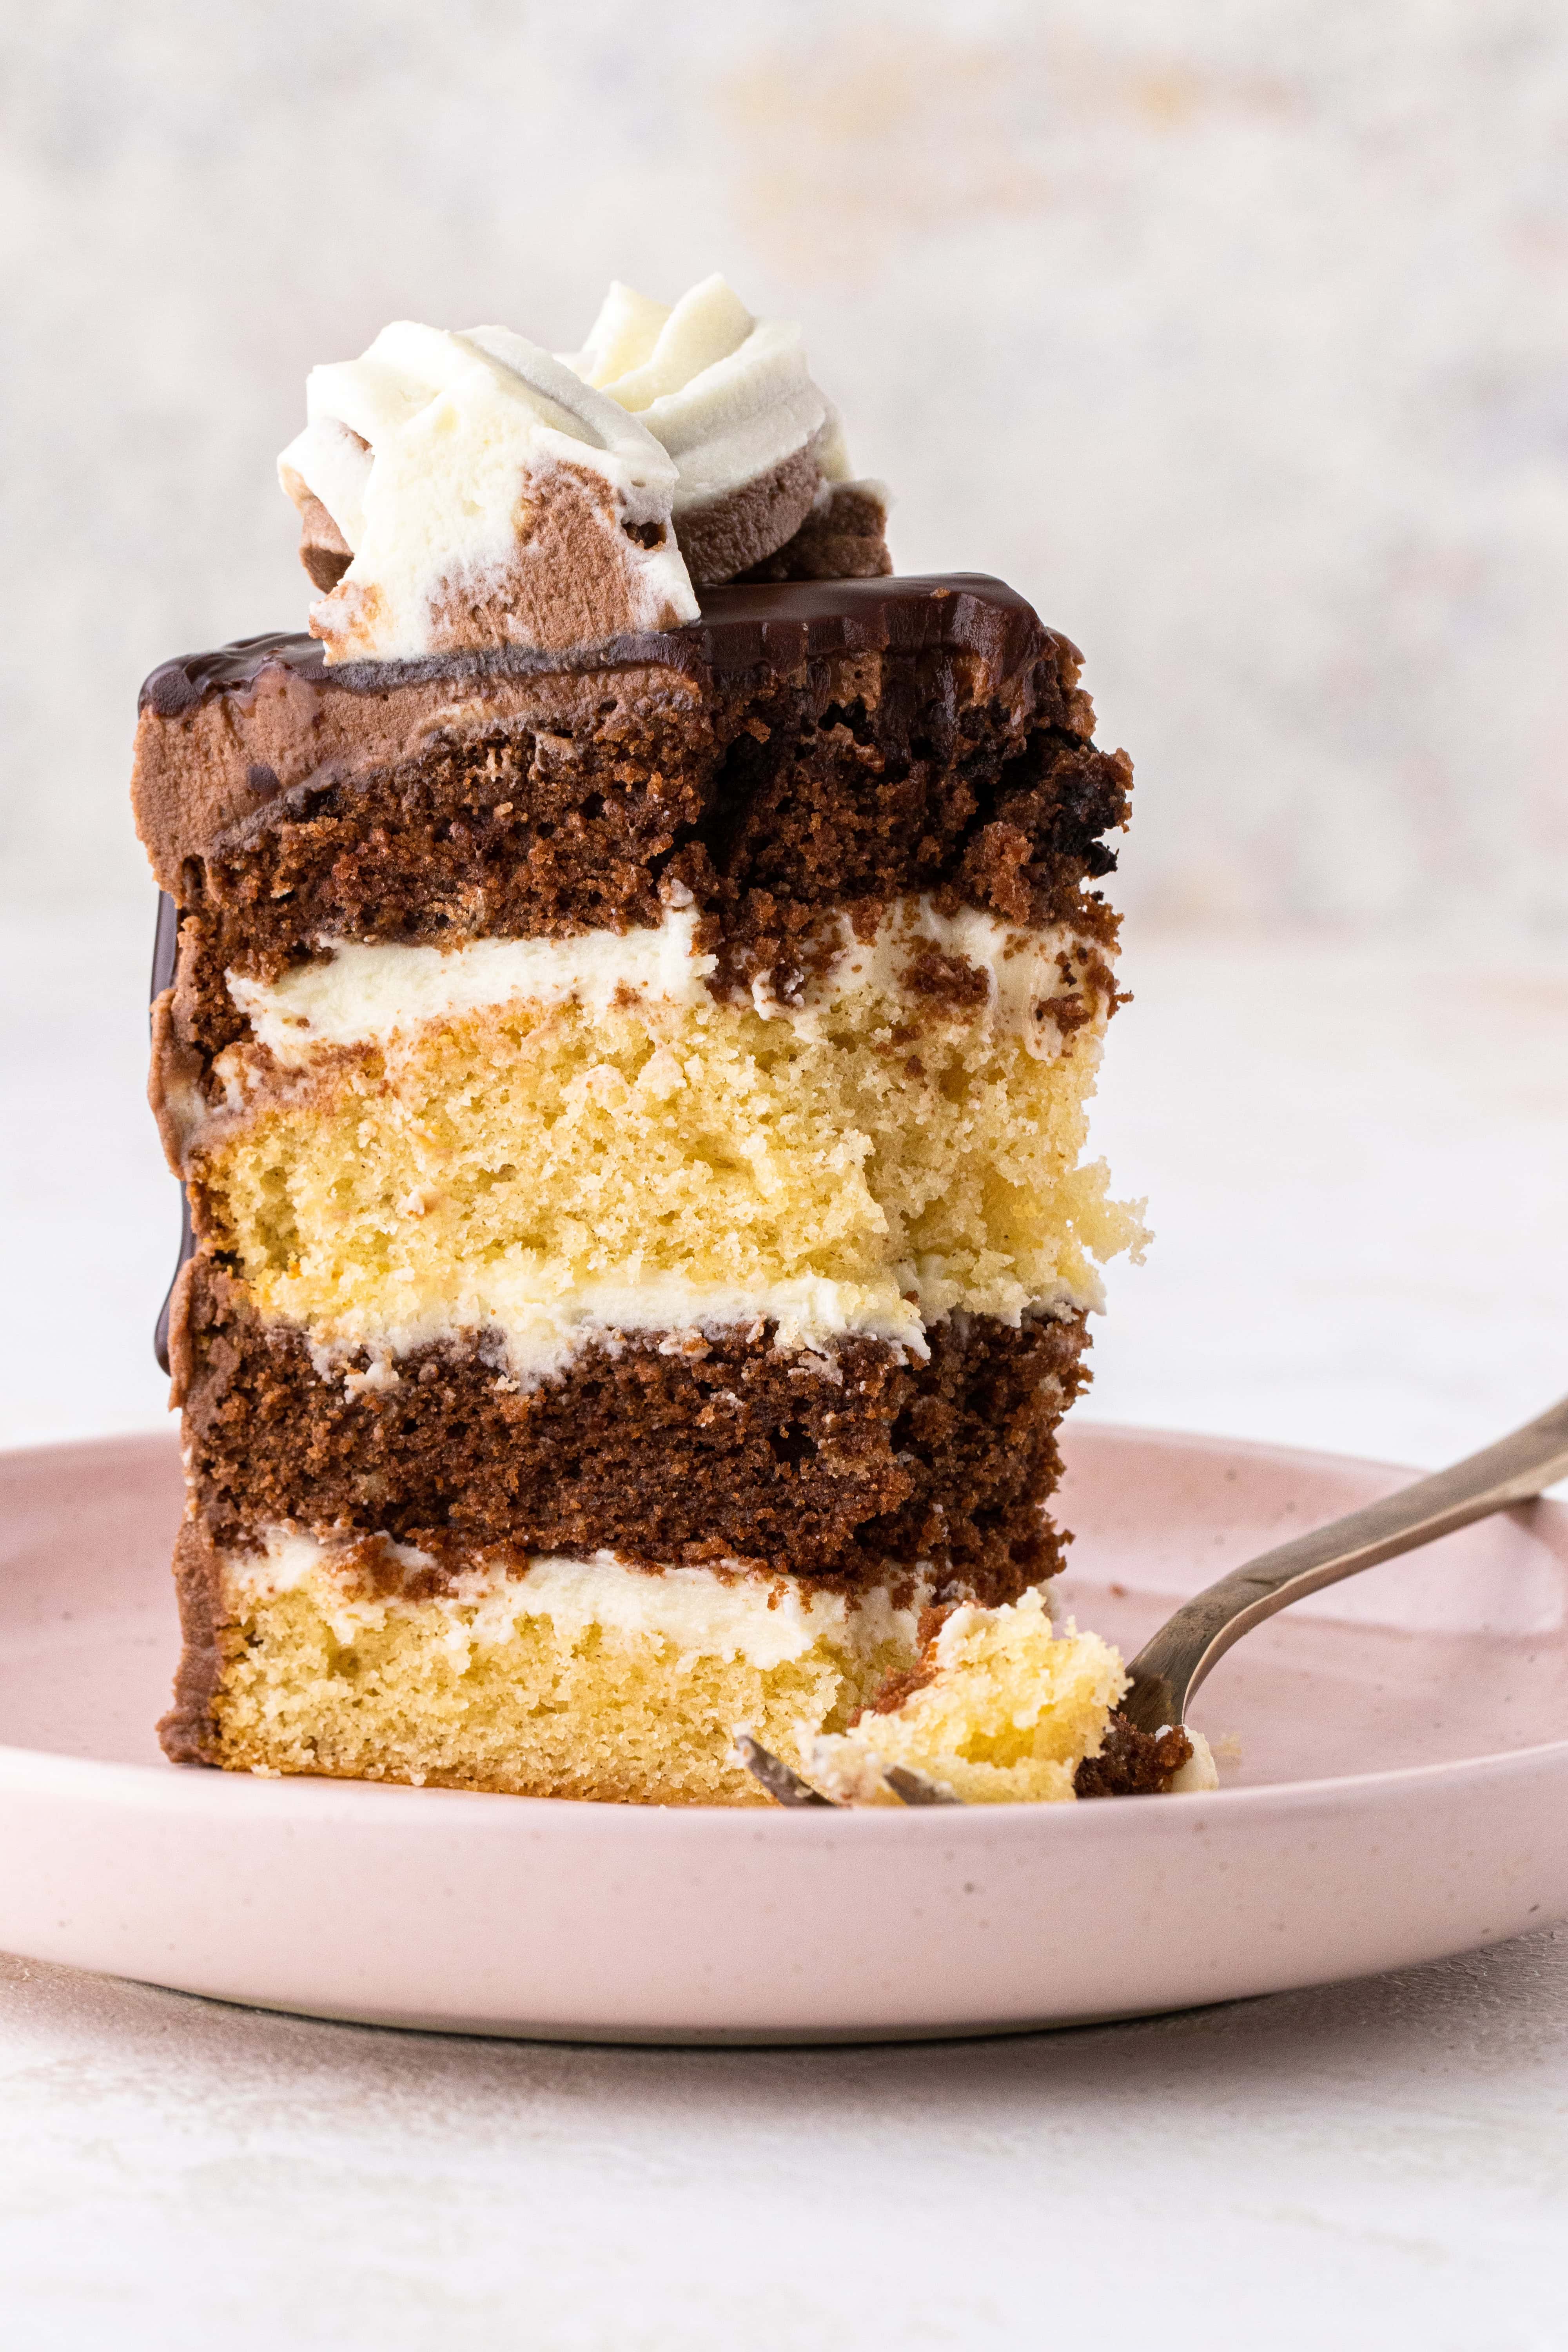
- Double chocolate sponge layers: alternating between milk and white chocolate, the sponge layers in this double chocolate cake are soft and moist. You’ll first whip together a big batch of plain cake mixture, then divide it between two bowls and mix melted milk chocolate into one bowl and melted white chocolate into the other. The recipe makes enough for two 7″ sponges, which can be sliced into two layers, making this a four-layer double chocolate cake.
- Double chocolate buttercream: similar to the sponges, you’ll make up a big batch of buttercream, then divide it in half to make a white chocolate buttercream for the filling and a milk chocolate buttercream for the coating. The buttercream is made using salted butter, which prevents the cake from becoming too sickly sweet.
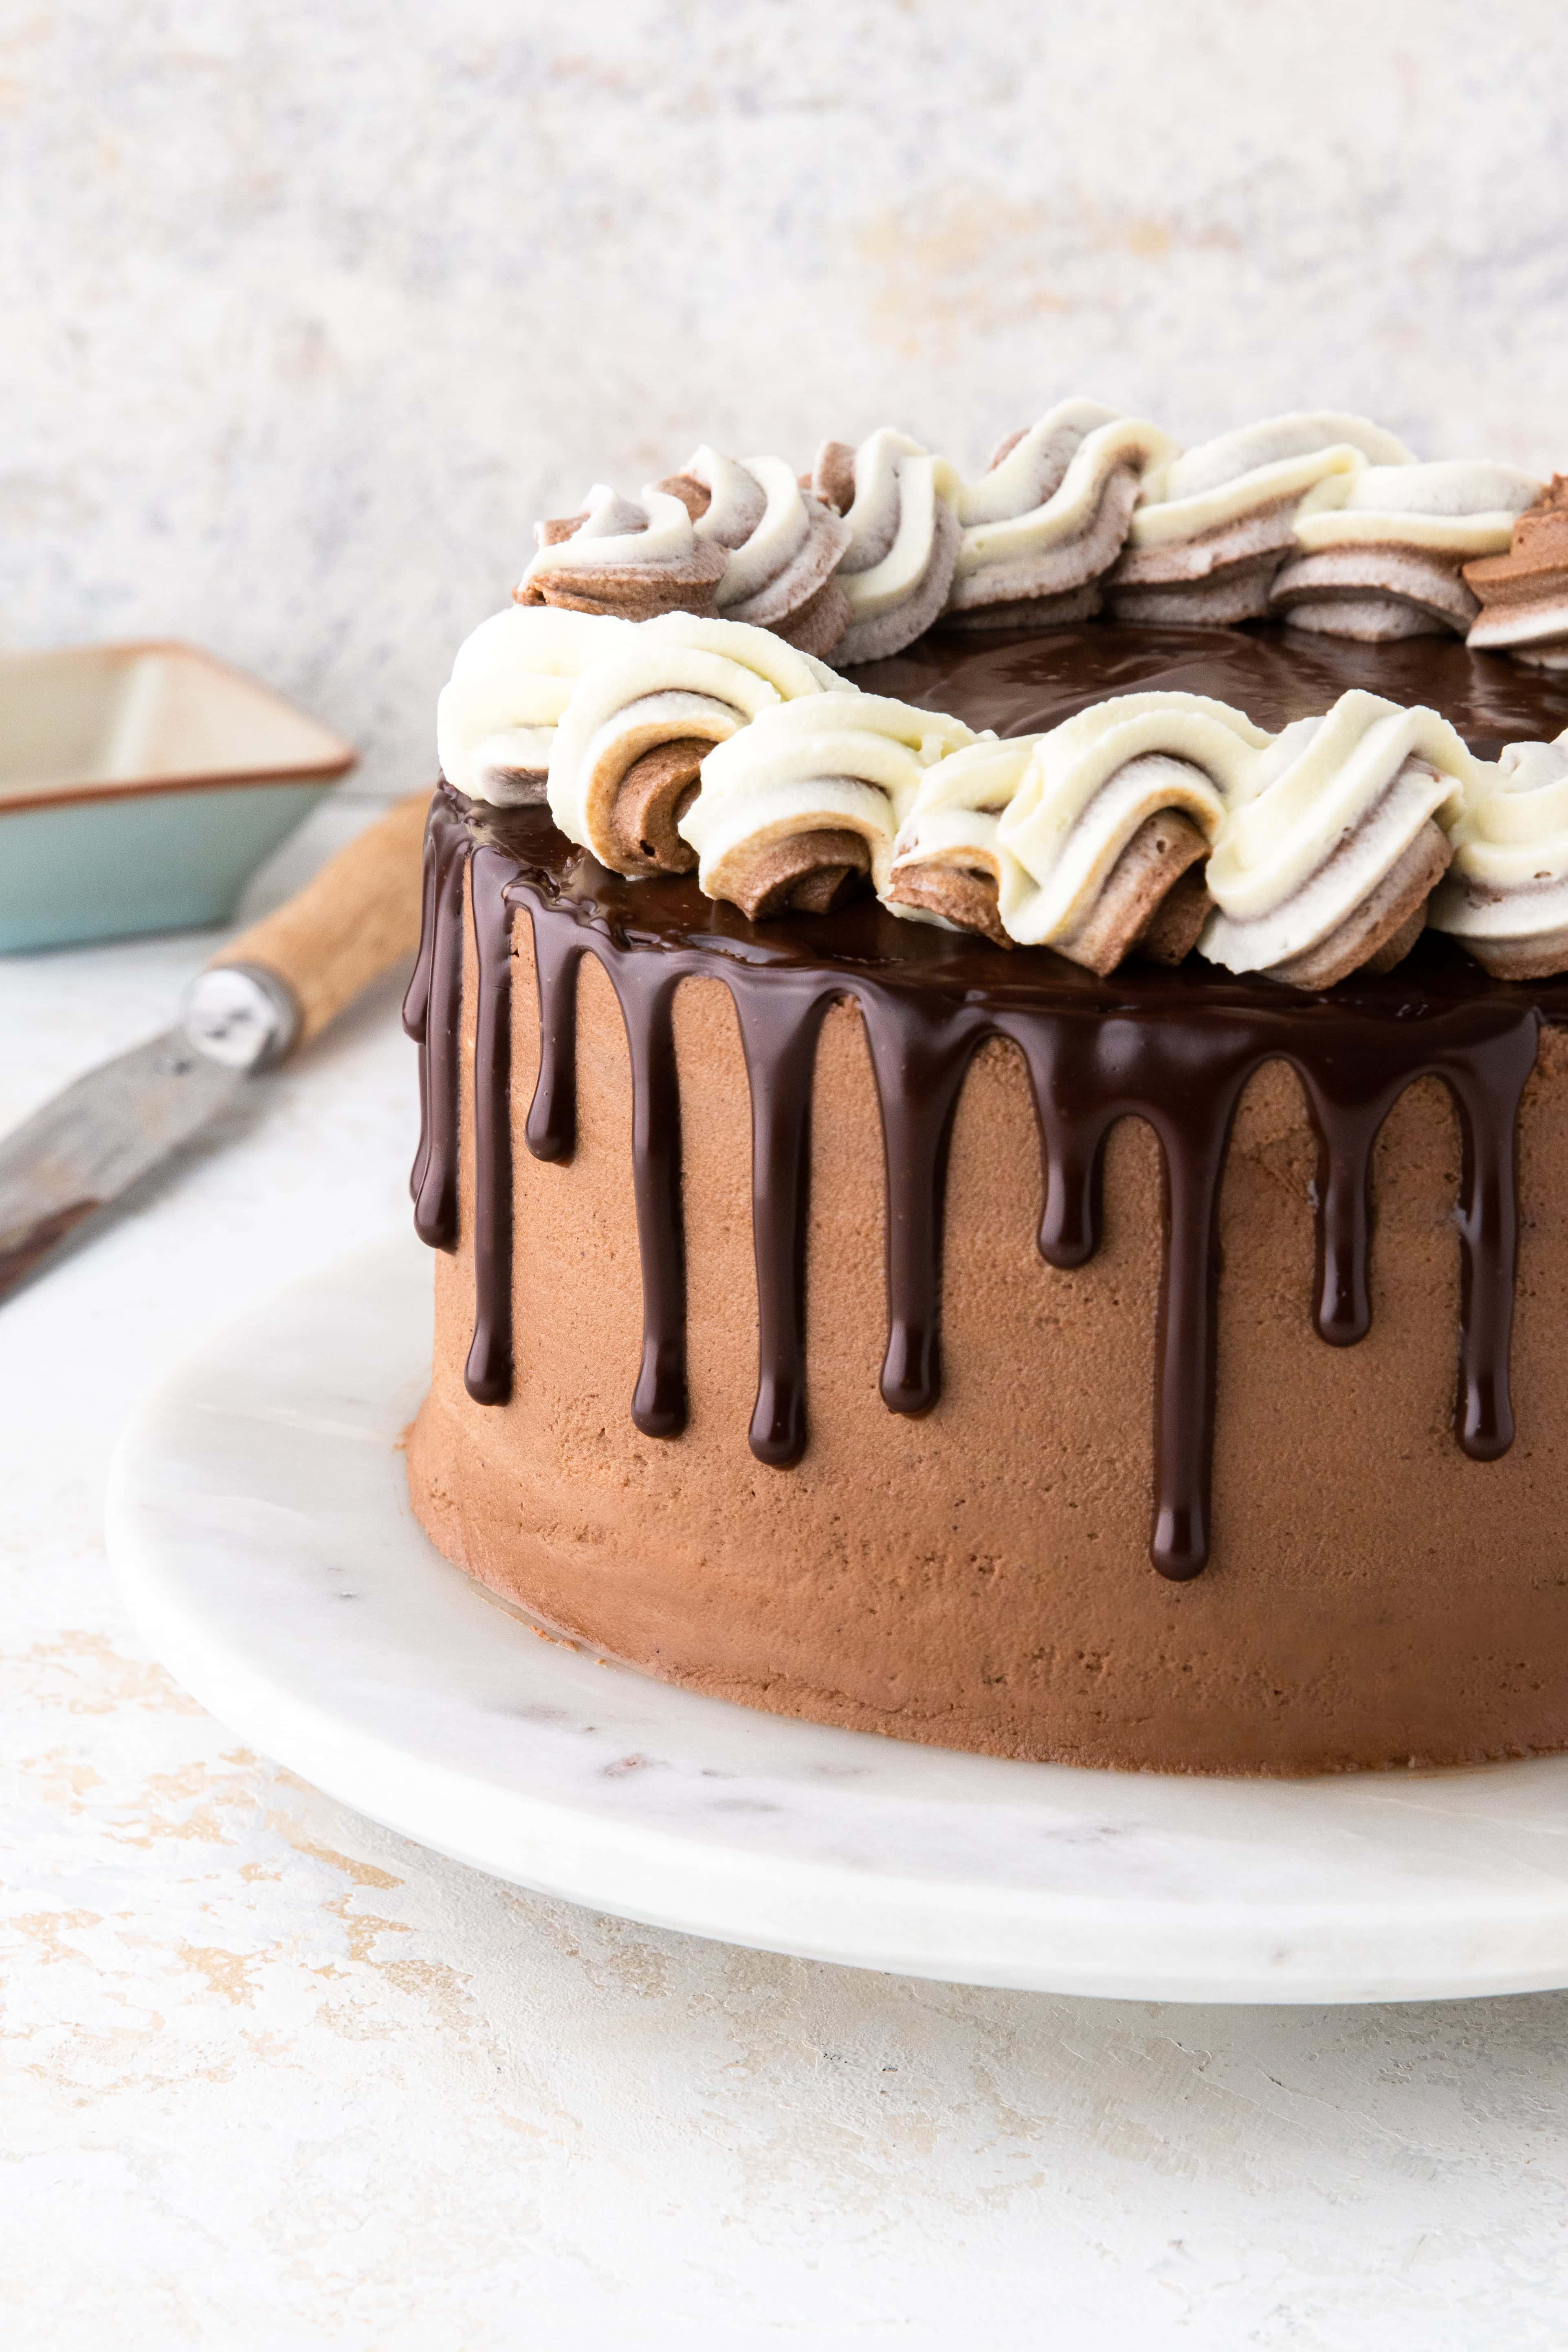
- Chocolate ganache drip: dark chocolate and double cream are heated to make a shiny, smooth ganache. You can use a spoon or piping bag to drip the ganache around the edge of the cake. Learn how to pipe the perfect ganache drip here.
- Buttercream rope border: leftover milk and white chocolate buttercream are spooned into a piping bag fitted with an open star nozzle. The buttercream is piped around the outside edge of the cake to create a rope border. Read more how to pipe the perfect rope border here.


How to pipe a ganache drip
Here are my top 5 tips that will help you pipe the perfect ganache drip onto your cake:
- Chill your cake for 1 hour before adding the drip: this will stop the drips from running too far down and help them stay put afterwards.
- Check the consistency of the ganache: it sounds obvious, but the ganache needs to be the perfect ‘drip’ consistency. Too thin, it will run down and pour at the bottom. Too thick, it will blob at the top and not drip down at all. Test the consistency by scooping up the ganache with a spoon and holding it over the bowl; it should run off the spoon in a consistent stream for 1-2 seconds and then stop.
- Use a piping bag for best results: you will be able to control the drips better; the more pressure applied to the piping bag the longer the drip. The less pressure the shorter the drip. No piping bag? You can use a small spoon or plastic squeezy bottle instead.
- Do a few test drips: practice makes perfect, but there’s no reason to ruin your cake with test drips, instead use a tall glass and pipe a few test drips around the rim of the glass.
- Use a turntable if you have one: you can turn the cake round with one hand, whilst piping the drip with the other. It will make it much easier!
Check out this video to watch me pipe the drip onto this double chocolate cake:
How to pipe a buttercream rope border
This recipe makes enough chocolate buttercream to fill and coat the cake and decorate the top with a roper border. If you haven’t piped a rope border before, don’t worry… I’ve got you 😉 Here’s everything you need to know:
- What piping tip to use? I used this large open star piping tip; it creates a lovely swirl.
- What piping bag to use? You’ll need lots of buttercream to create a rope border, so a large piping bag is a must. Here’s a link to the exact ones I used.
- What texture should the buttercream be? Creamy and light so it’s easy to squeeze out of the piping bag. Free from any air pockets so it pipes smoothly.
- How to pipe a buttercream rope border? Give this video a watch with your sound on:
Equipment used for this recipe
Let’s catch up
Death by Double Chocolate Cake
Rate this Recipe
Print Pin Rate this RecipeIngredients
For the double chocolate sponge
- 75 g Menier Milk Chocolate
- 75 g Menier White Chocolate
- 2 tbsp Menier 100% Cocoa Powder
- 1 tsp Espresso powder
- 4 tbsp Boiling water
- 200 g Unsalted butter soft at room temperature
- 250 g Golden caster sugar
- 1 tsp Vanilla extract
- 3 Large Eggs at room temperature
- 300 g Self-raising flour
- 100 ml Milk full-fat or semi-skimmed
For the double chocolate buttercream
- 150 g Menier Milk Chocolate
- 150 g Menier White Chocolate
- 300 g Salted butter soft at room temperature
- 600 g Icing sugar
- 4 tbsp Milk full-fat or semi-skimmed
For the chocolate ganache drip:
- 60 g Menier 70% Dark Chocolate
- 100 ml Double cream
Instructions
Start by making the double chocolate sponges
- Preheat the oven to 160°C (fan assisted).
- Lightly grease two 7inch round cake tins with butter or spray oil. Line the base and sides with greaseproof paper.
- Break up both chocolates into separate bowls and melt in the microwave in 30-second blasts, stirring in-between, until smooth. Set aside.
- In a small bowl, mix the cocoa powder, espresso powder and boiling water together to make a chocolatey paste. Set aside.
- In a large bowl, cream the butter, sugar and vanilla together until light and fluffy. Beat in the eggs one at a time until well combined. Now fold in the flour and milk to make a smooth cake mixture.
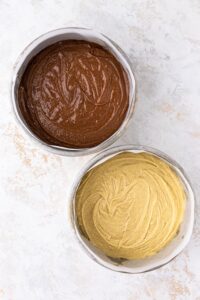
- Divide the mixture evenly between two bowls. Fold the melted white chocolate into one bowl. Fold the melted milk chocolate and chocolatey paste into the other bowl.
- Spoon the cake mixtures into the baking tins, smoothing out the tops. Bake for 35-40 minutes until risen and springy to the touch. Leave to cool completely.
Now make the chocolate buttercreams
- Break up both chocolates into separate bowls and melt in the microwave in 30-second blasts, stirring in-between, until smooth. Set aside for now.
- Beat the butter until soft and lump-free. Sift in the icing sugar in stages and beat until well combined and smooth.
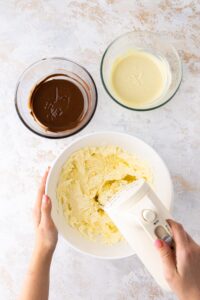
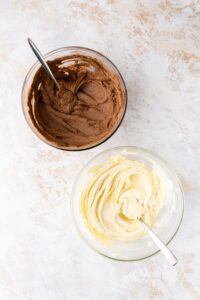
- Divide evenly between two bowls. Mix the melted white chocolate and 2 tbsp milk into one bowl. Mix the melted milk chocolate and 2 tbsp milk into the other bowl.
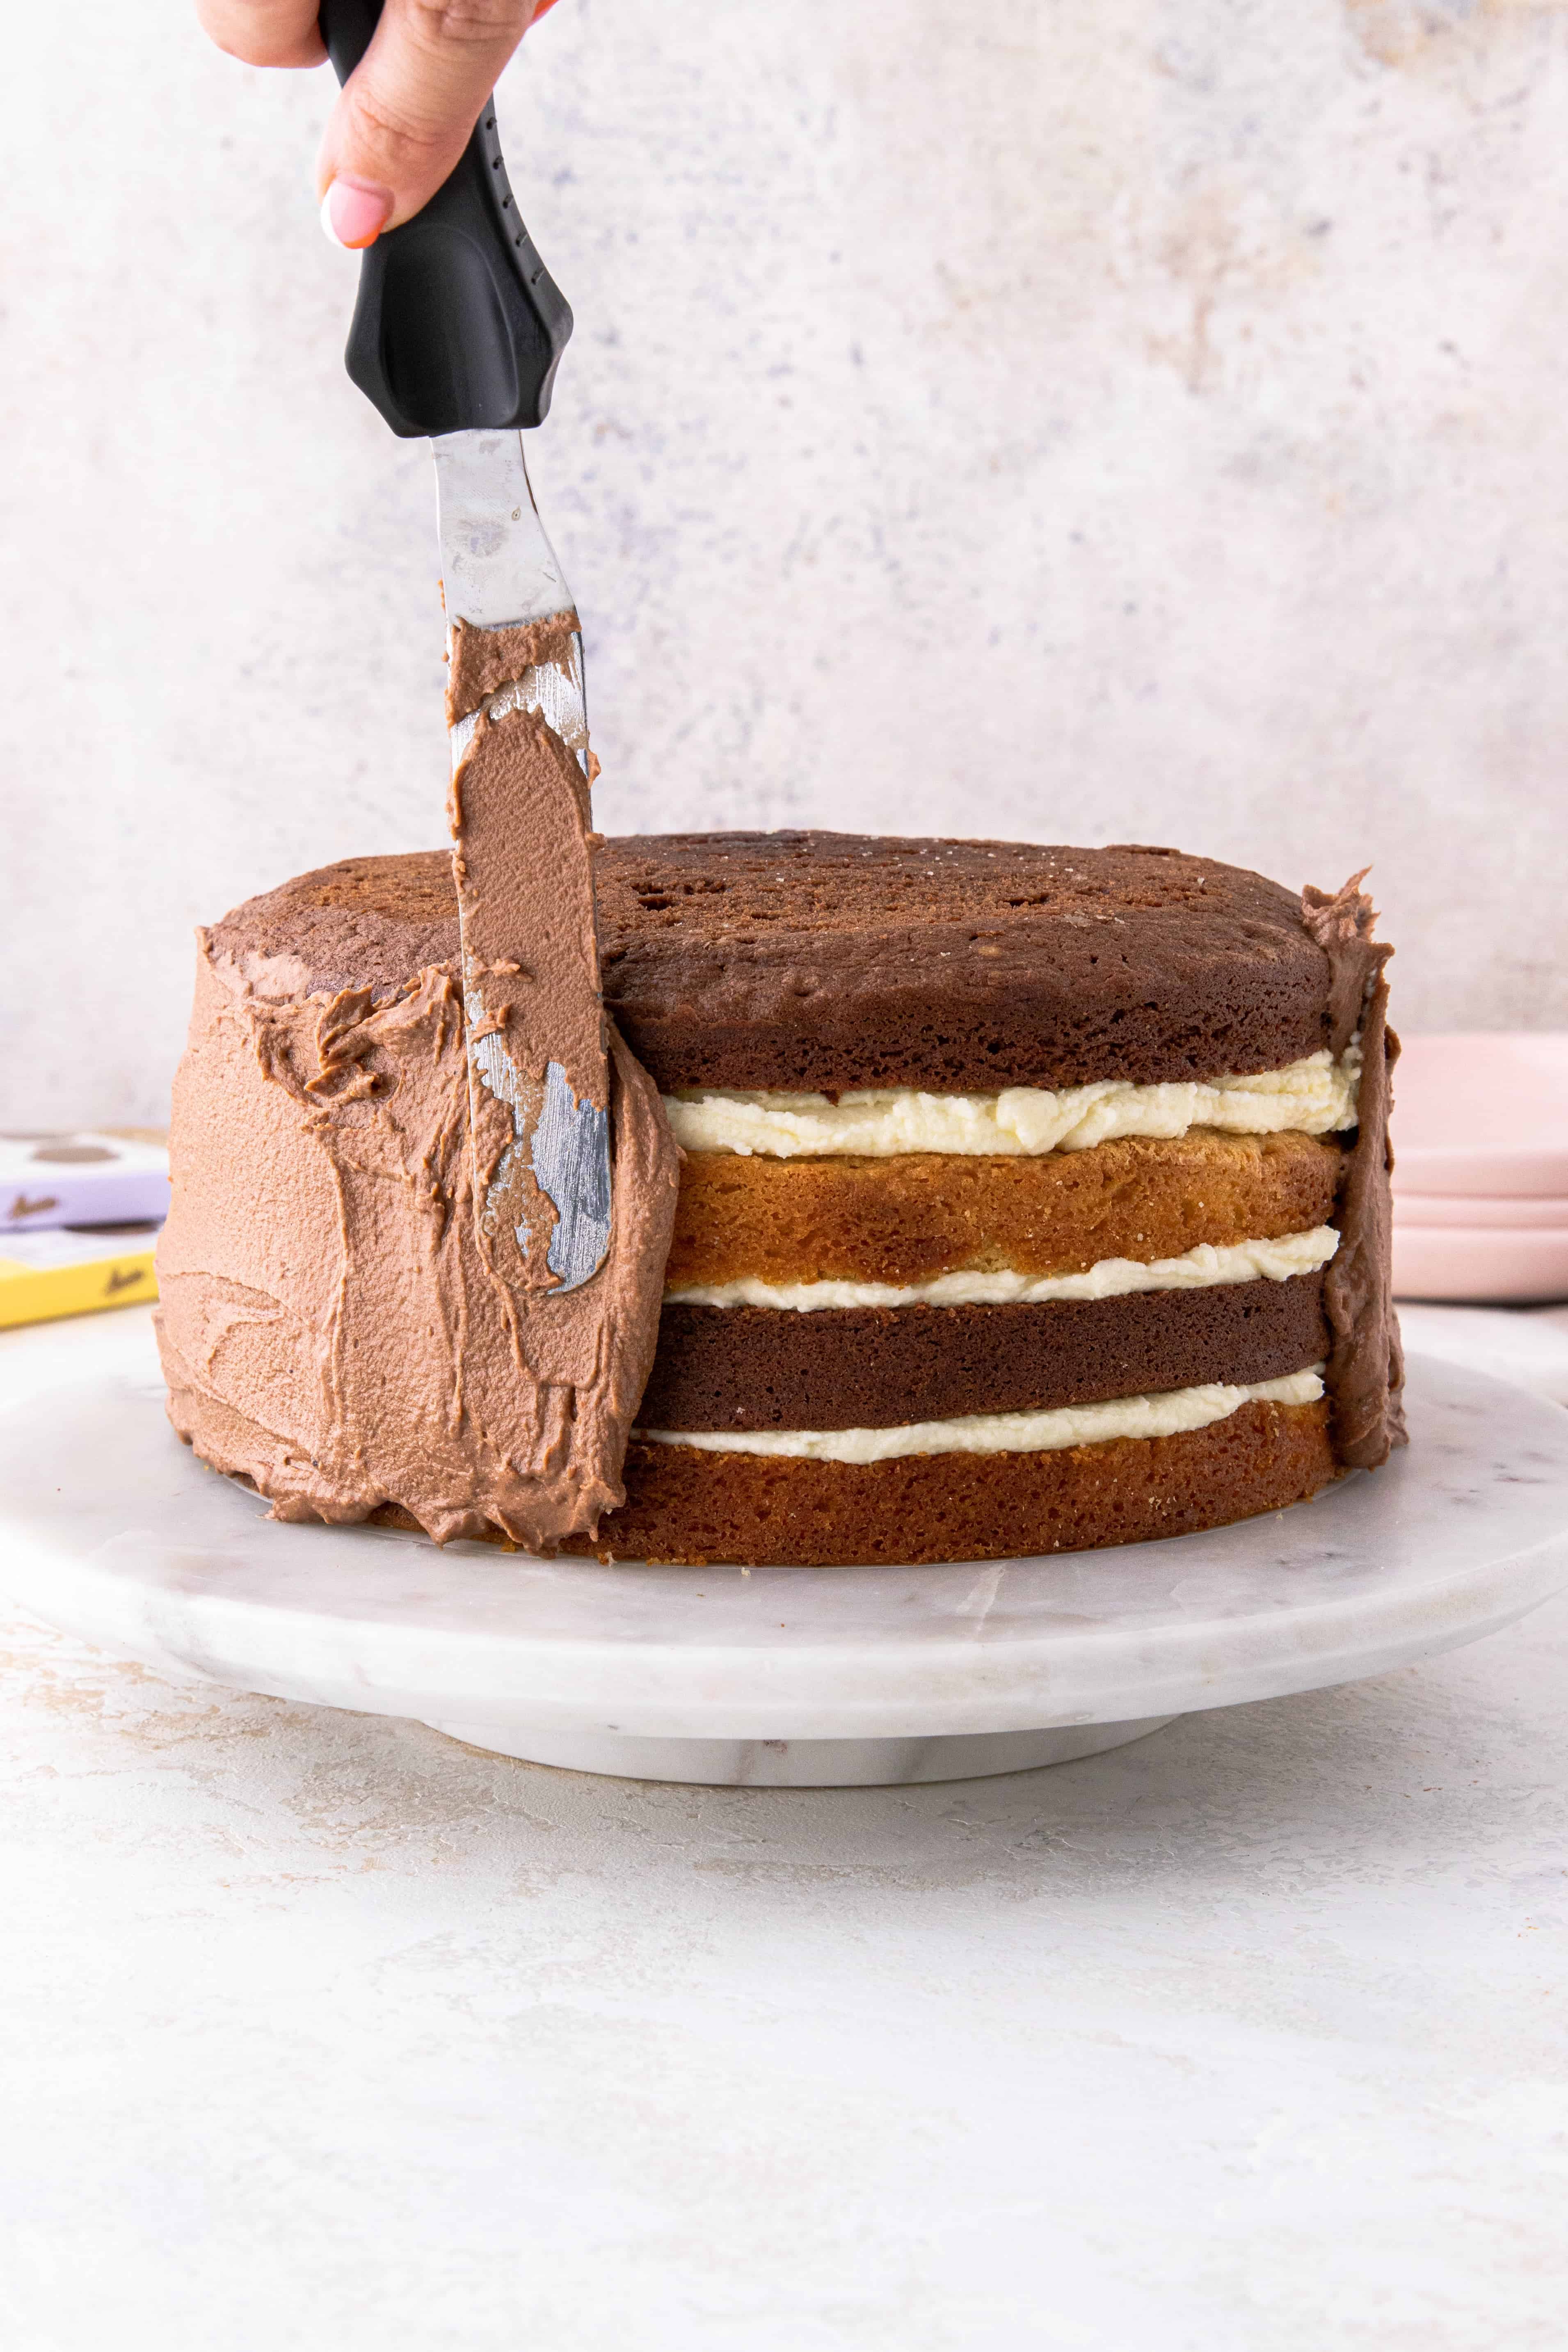
Slice and assemble the cakes
- Use a sharp flat knife to slice each cake into two layers. This should give you 2 white chocolate sponges and 2 milk chocolate sponges.
- Sandwich the sponges together using the white chocolate buttercream (saving roughly a third of the buttercream for the rope border), alternating the sponges between white, milk, white, milk.
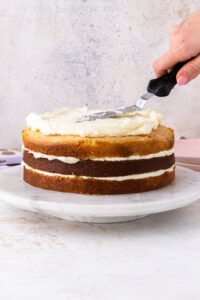
- Coat the outside and top of the cake using the milk chocolate buttercream (again saving roughly a third of the buttercream for the rope border).
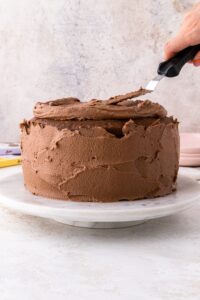
- Place the fridge for at least 1 hour to chill and firm up (this is important for the ganache drip).
- Meanwhile spoon the leftover buttercream into a large piping bag fitted with a large open star piping nozzle. Set aside for now.
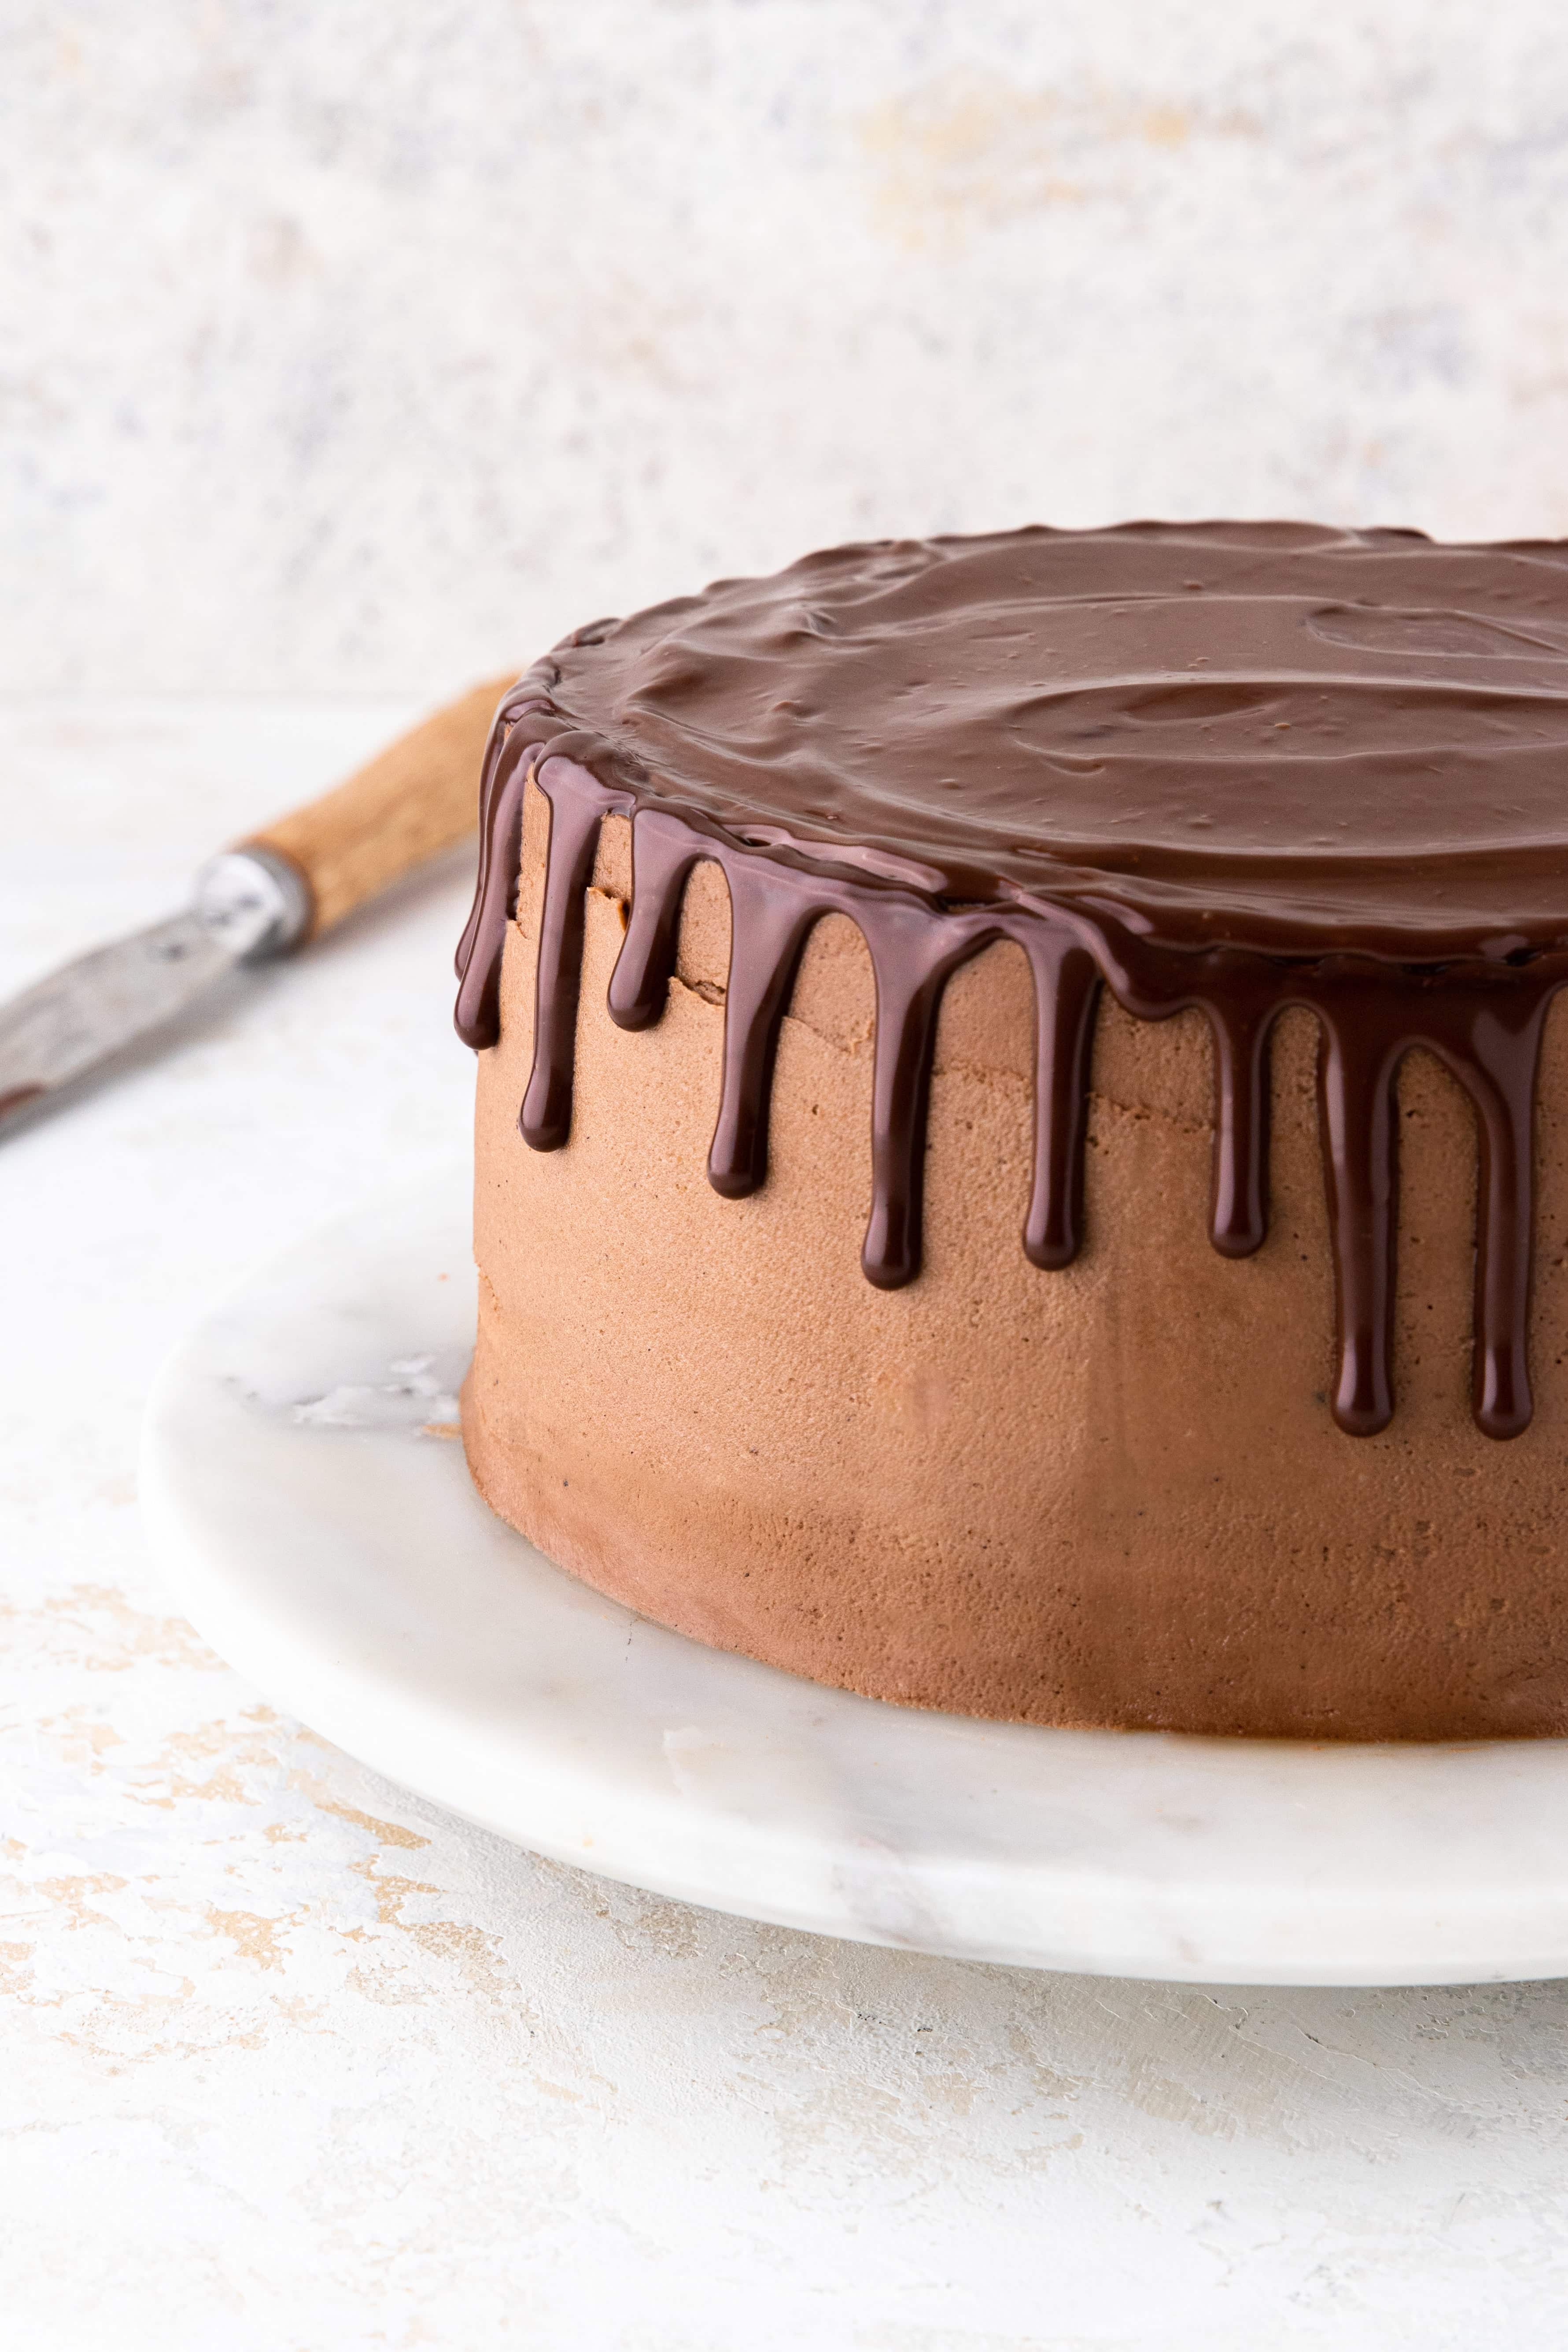
Make the chocolate ganache drip
- Very finely chop the dark chocolate and place in a microwave-safe bowl. Pour the cream on top of the chocolate.
- Microwave in 10-20 second blasts, stirring in-between each, until the chocolate starts to melt and the cream is piping hot but not boiling. Once you reach this stage, keep stirring the mixture until the ganache is smooth and glossy.
- Leave to cool for 5 minutes, until the ganache reaches the perfect 'drip' consistency (check out the blog post above for more help with this).
- Pour the ganache into a piping bag and snip off the very end. If you don't have a piping bag, you can instead do the drip with a spoon.
- Take the chilled cake out of the fridge and pipe the ganache around the outside edge of the cake, applying more pressure for longer drips and less pressure for shorter drips.
- Use the leftover ganache to fill in the top of the cake, smoothing it out with a palette knife. Leave the ganache to set for 30 minutes.
Pipe the rope border
- Start by piping a dot of buttercream on top of the cake. Then turn your piping bag on a 45° angle and pipe the buttercream in a circular motion moving around the outside edge of the cake.
Serve and enjoy!
- Slice the cake into 12 and serve straightaway. If you have leftovers, store the cake in an airtight container, at room temperature, and eat within 3-4 days.
Have you made this recipe?
More chocolate recipes to try
This post contains affiliate links which means I will make a small commission if you purchase through those links. I only recommend products that I know, trust and love!
Unreal cake. Really easy to follow recipe
So happy to hear this Sam! Thanks for your review 😊
this looks amazing, can’t wait to try it!!
What butter brand did you use? I find with some it’s hit and miss haha
Thanks so much Danielle 🥰
For cakes I always use Stork margarine, it makes the texture soft and fluffy. For buttercream I like to use Lurpak Slightly Salted.
Very good, clearly explained
Thank you 😊
Thanks so much 😊