No-bake Chocolate Cheesecake
By Jessie
Updated: November 12, 2025
Rate This Recipe
By: Jessie
Updated: November 12, 2025
Rate This Recipe:
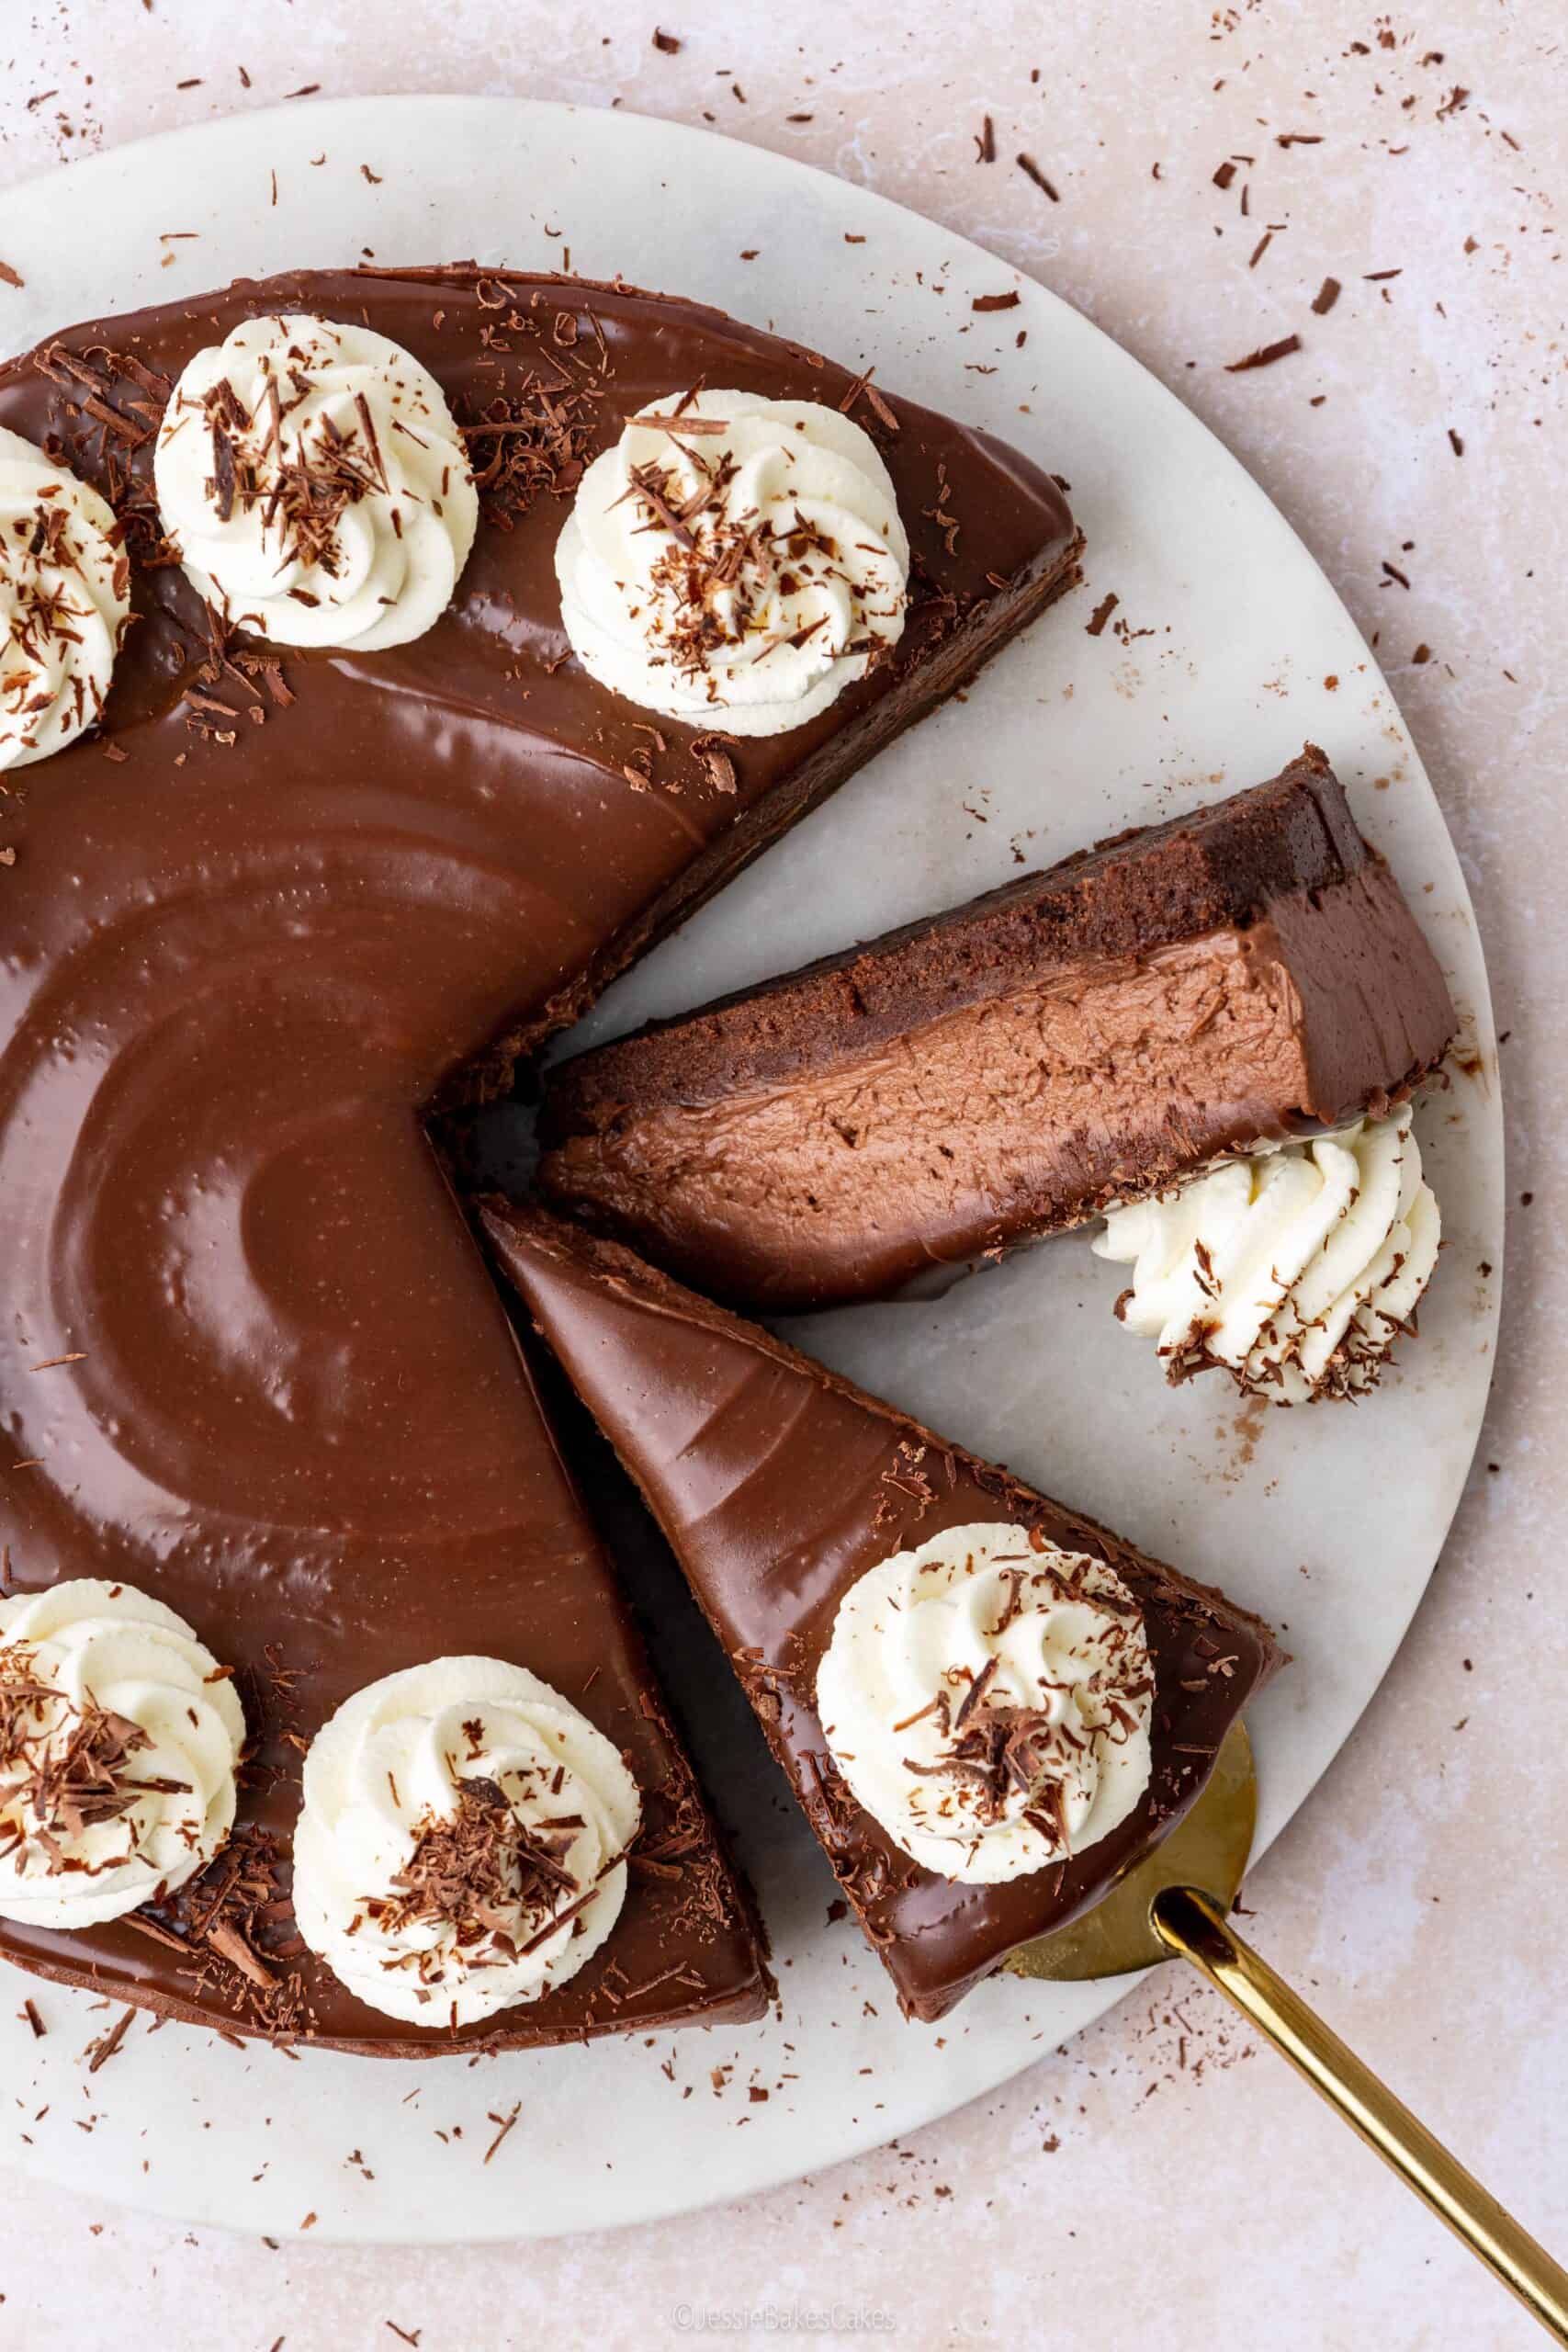
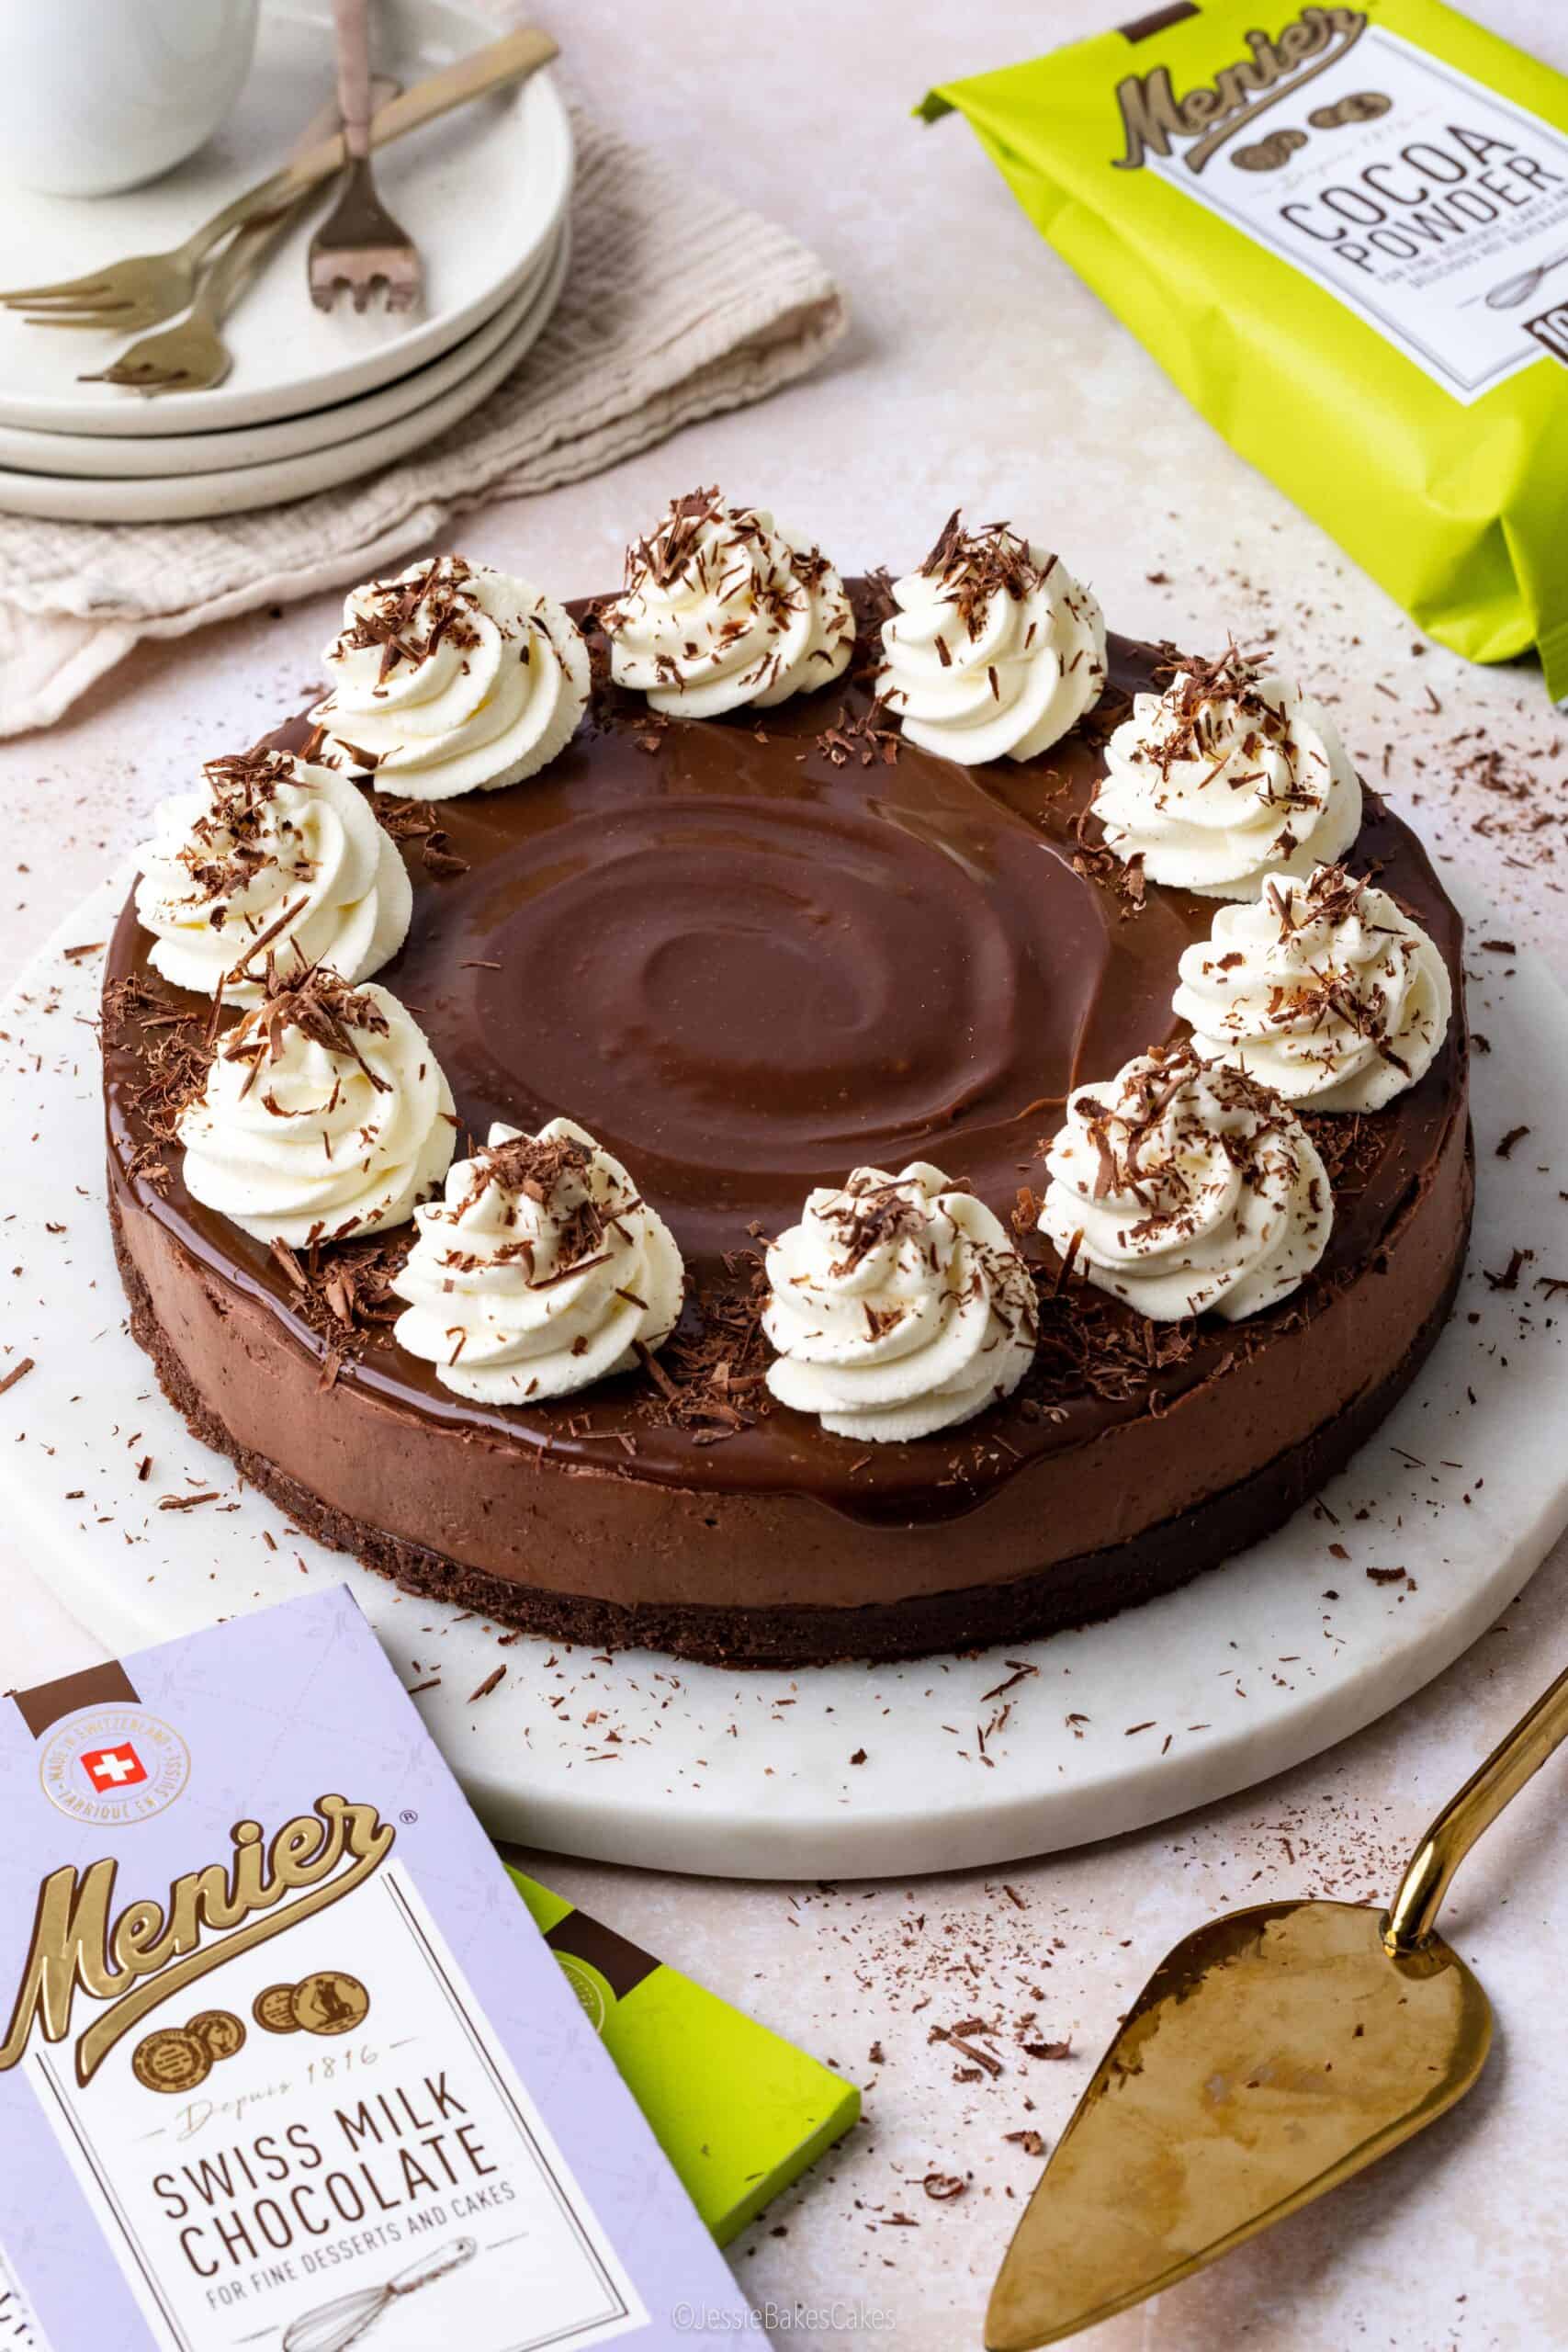
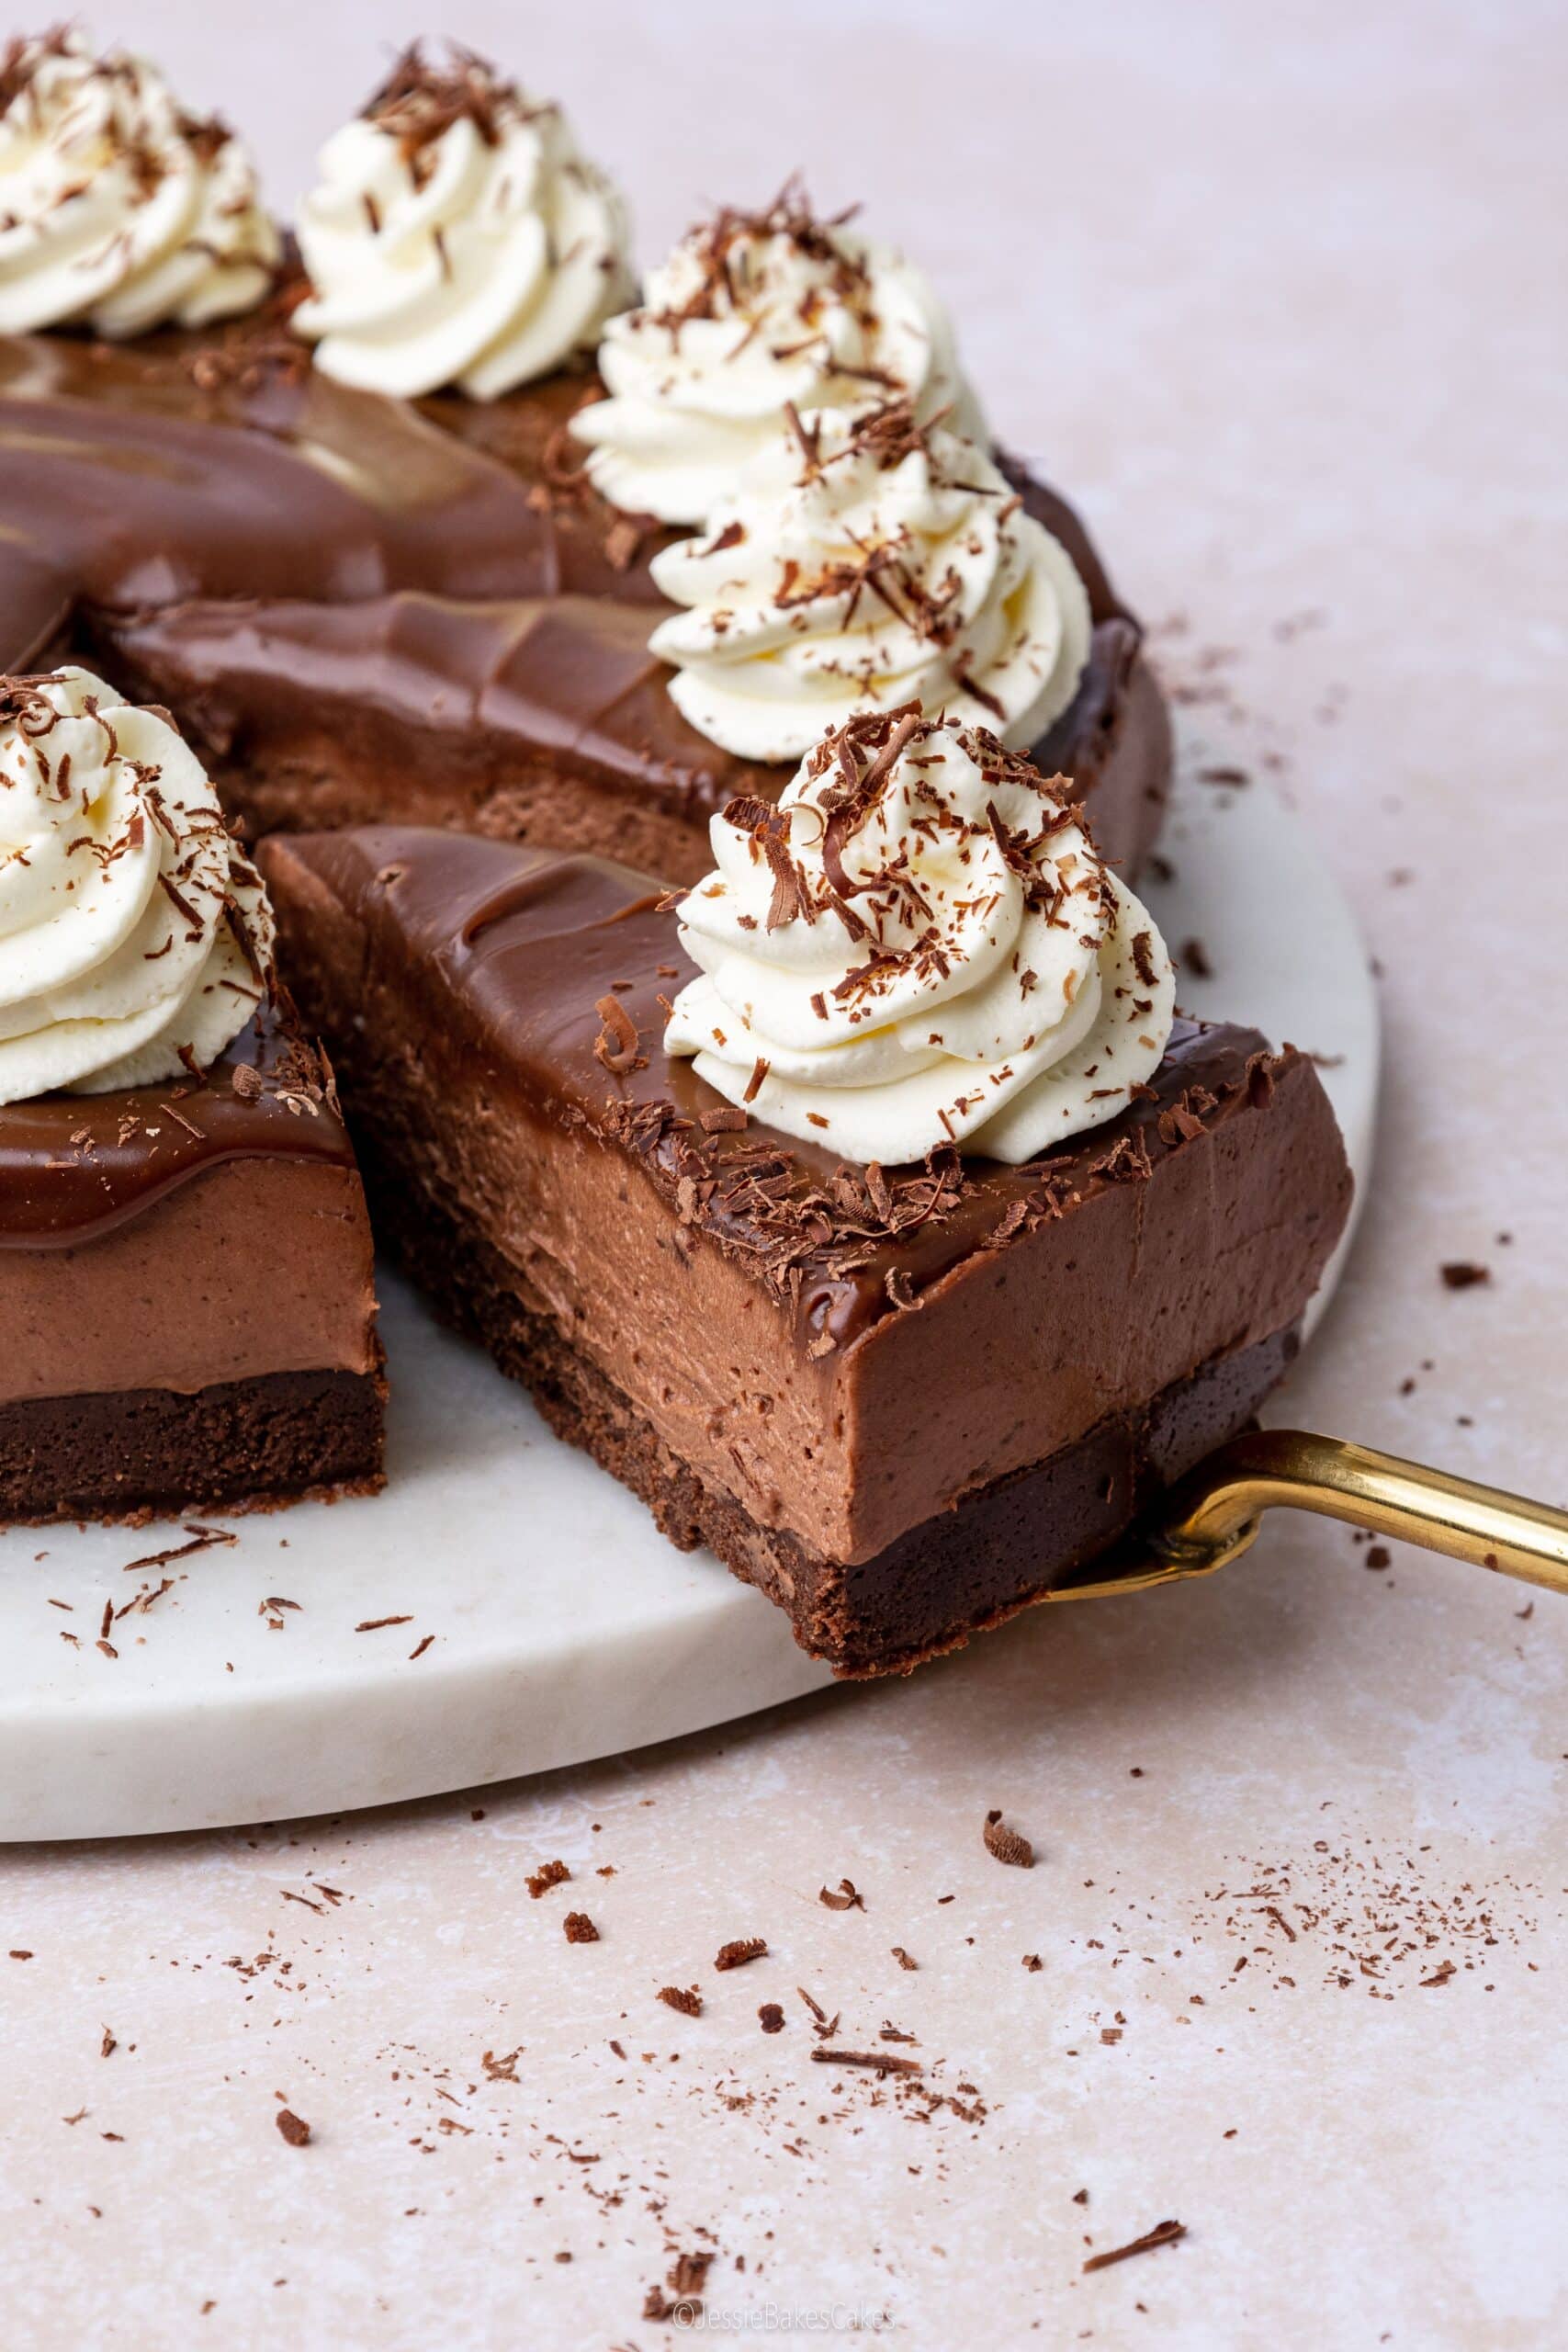
If there’s one dessert that never fails to impress, it’s this no-bake chocolate cheesecake. It’s rich, creamy, and ridiculously indulgent, the kind of dessert that makes everyone go quiet for a second bite. With layers of buttery chocolate biscuit, ultra fluffy chocolate cheesecake, and a glossy milk chocolate ganache topping, it’s heaven on a plate. And the best bit? No oven required.
This recipe is kindly sponsored by Menier Chocolate. I only recommend products I personally use, trust and love!
Your Ingredients List
- Bourbon or Oreo biscuits: These form the buttery, chocolatey base of your chocolate cheesecake. You can switch them up with digestives or chocolate chip cookies if that’s what you have.
- Salted butter: Helps bind the biscuit crumbs together and adds a touch of saltiness to balance all that rich chocolate flavour.
- 70% Dark chocolate: Melted and folded into the cheesecake mixture. Choose a good-quality dark chocolate like Menier 70% for that deep, indulgent flavour that cuts through the sweetness beautifully.
- Full-fat cream cheese: Philadelphia Original works best here. It gives the cheesecake that creamy, slightly tangy flavour and helps it set perfectly without baking.
- Icing sugar: Sweetens the filling while keeping it silky smooth – no graininess here!
- Vanilla extract: An optional addition that adds a little hint of warmth to round out all the chocolatey goodness.
- Cocoa Powder: Boosts the richness of the chocolate flavour and adds that lovely dark colour to the cheesecake filling. I used Menier 100% cocoa powder for the best flavour.
- Double cream: Used three times in this recipe, once for whipping into the filling for that fluffy cloud-like texture, and again for the glossy ganache topping and chantilly cream swirls.
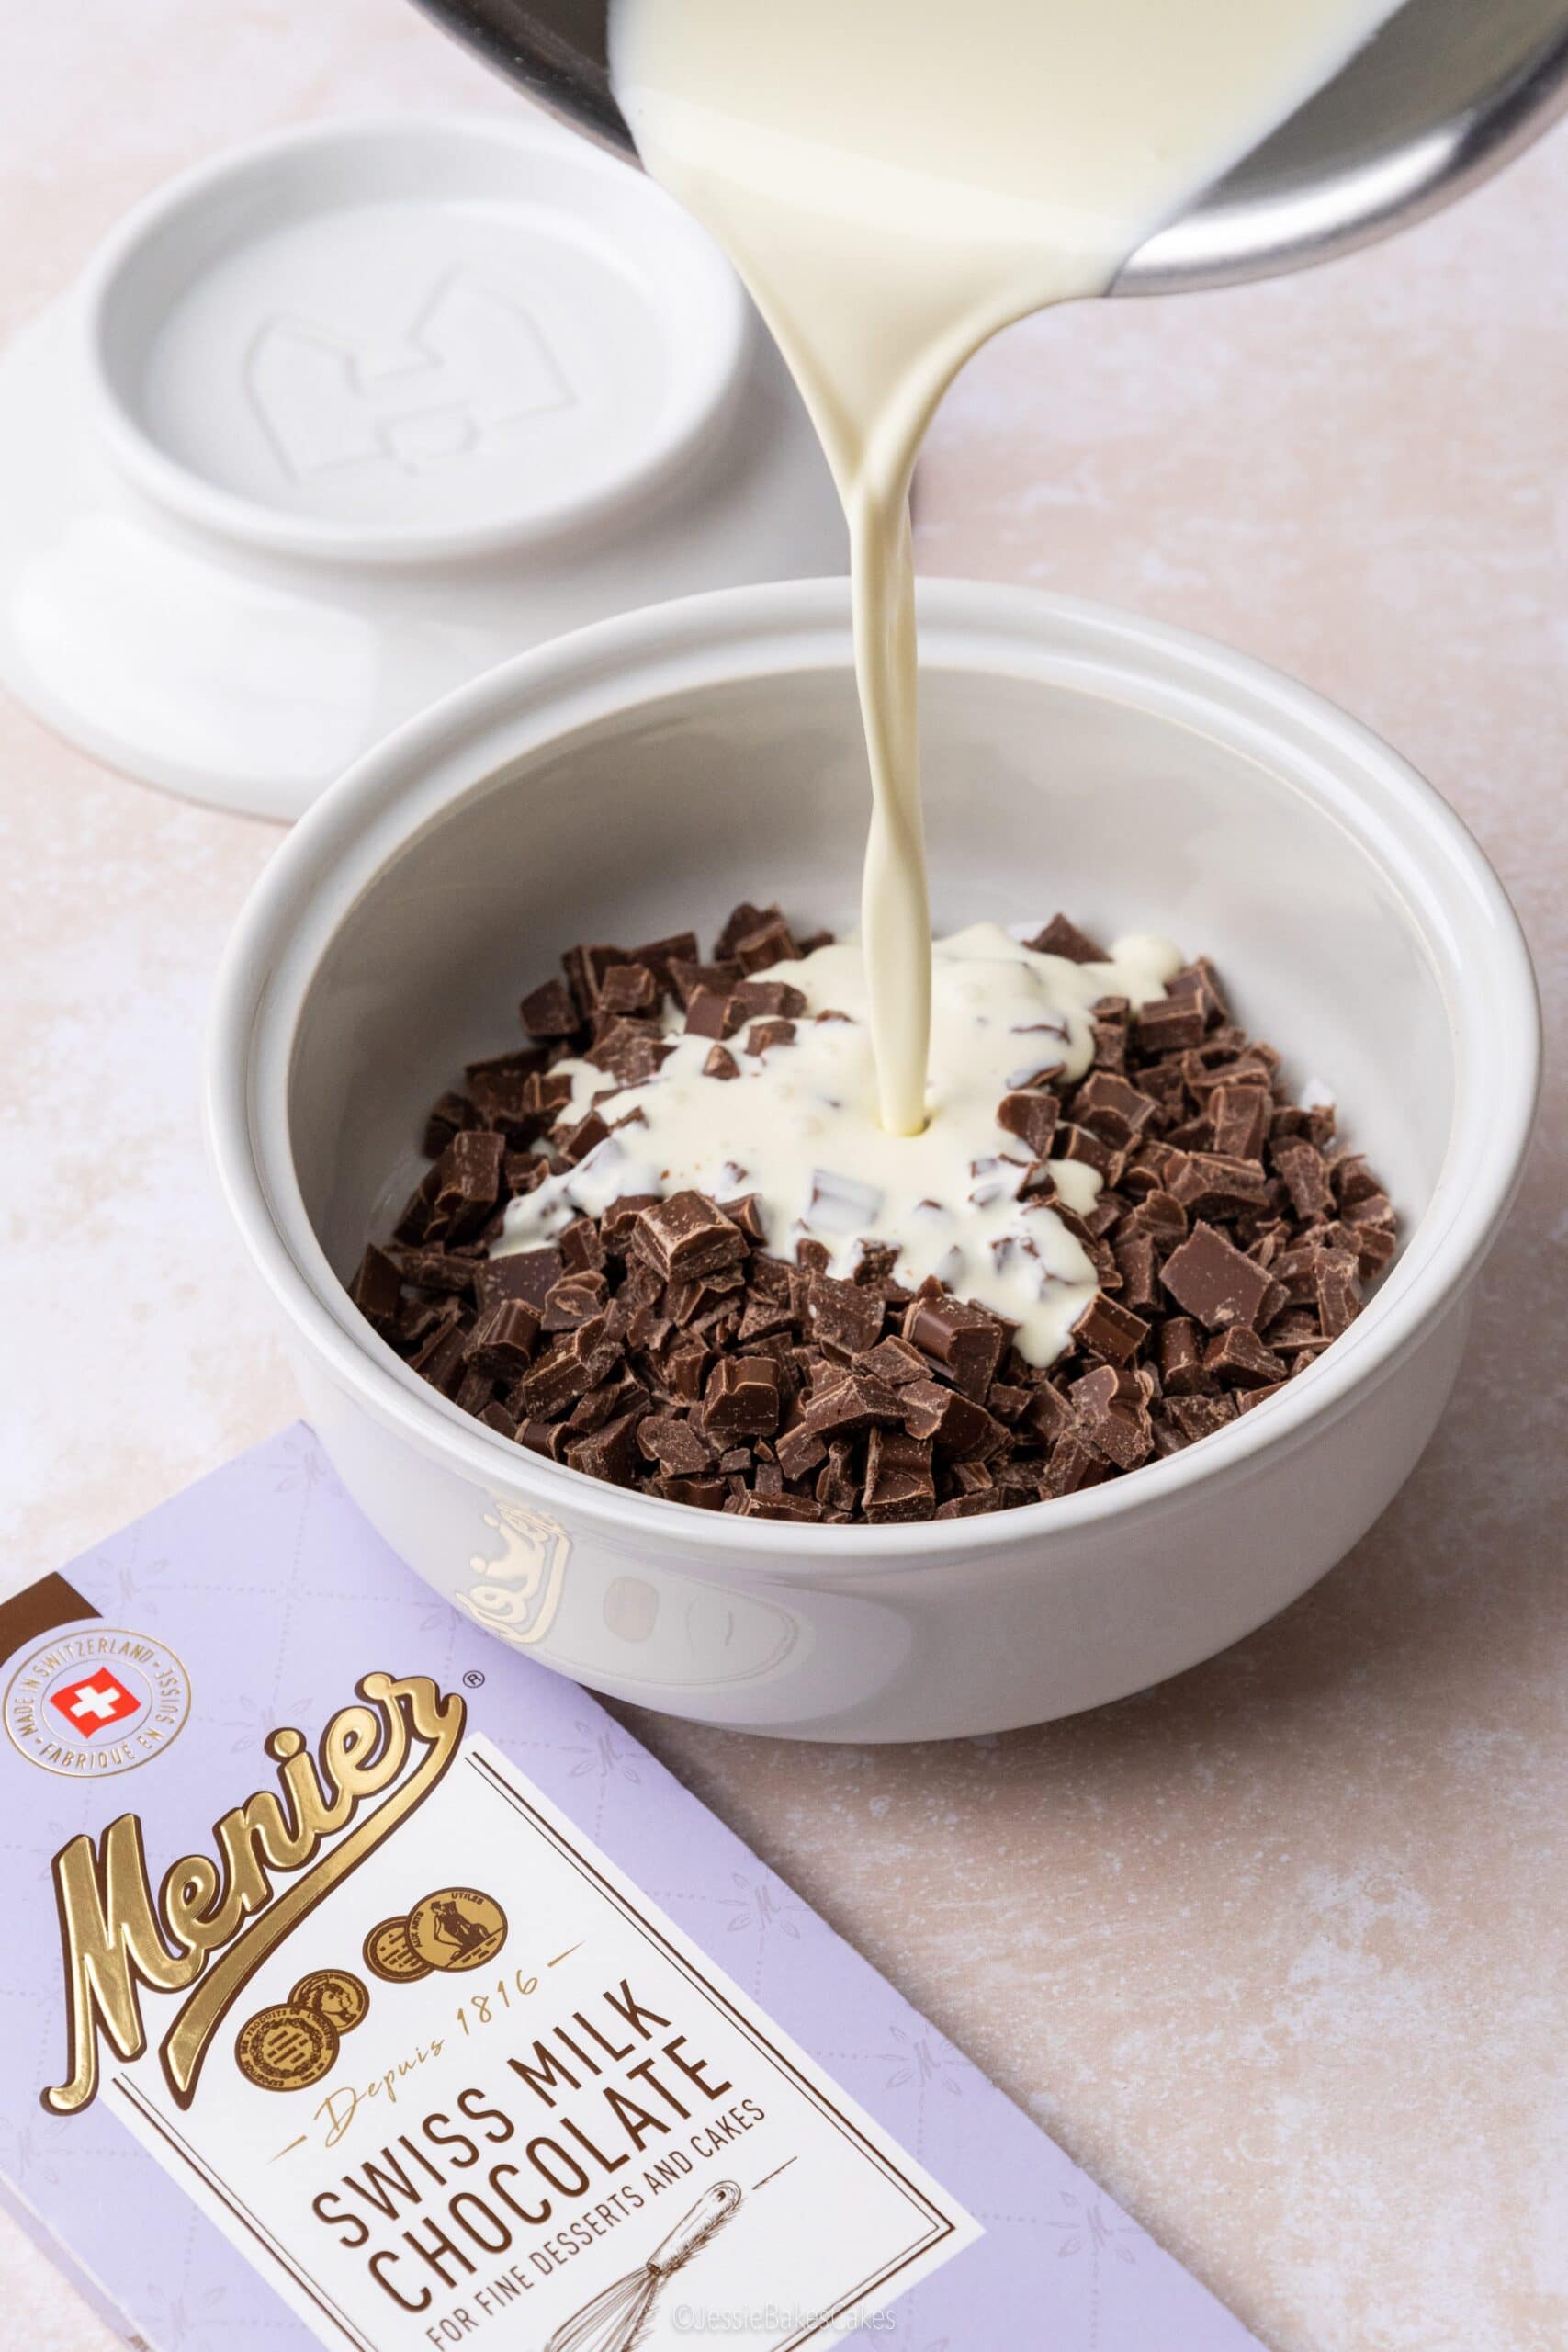
- Milk Chocolate: Melted with the double cream to make the glossy ganache layer. Again, choose a good-quality chocolate such as Menier Swiss Milk Chocolate for a creamy ganache that melts like a dream!
- Dark chocolate (for curls): A simple finishing touch that makes the cheesecake look bakery-worthy with barely any effort.
RECIPE NOTES

TASTE
Rich, deep chocolate flavours perfectly balanced by creamy, tangy cheesecake and a buttery biscuit base.

TEXTURE
Smooth, fluffy, and a little crunchy. The layers of crisp biscuit, airy cheesecake, and silky ganache make every bite melt-in-your-mouth delicious.

SKILL
Surprisingly easy using only 10 ingredients! No baking, no fuss, and no fancy kit needed. If you can whisk and layer, you can make this!

SERVES
Makes 10-12 slices of chocolate cheesecake, perfect for sharing at parties, as a Sunday lunch pudding, or scooping into bowls for a more relaxed dessert.
What Tin is Best for Making No-bake Cheesecake?
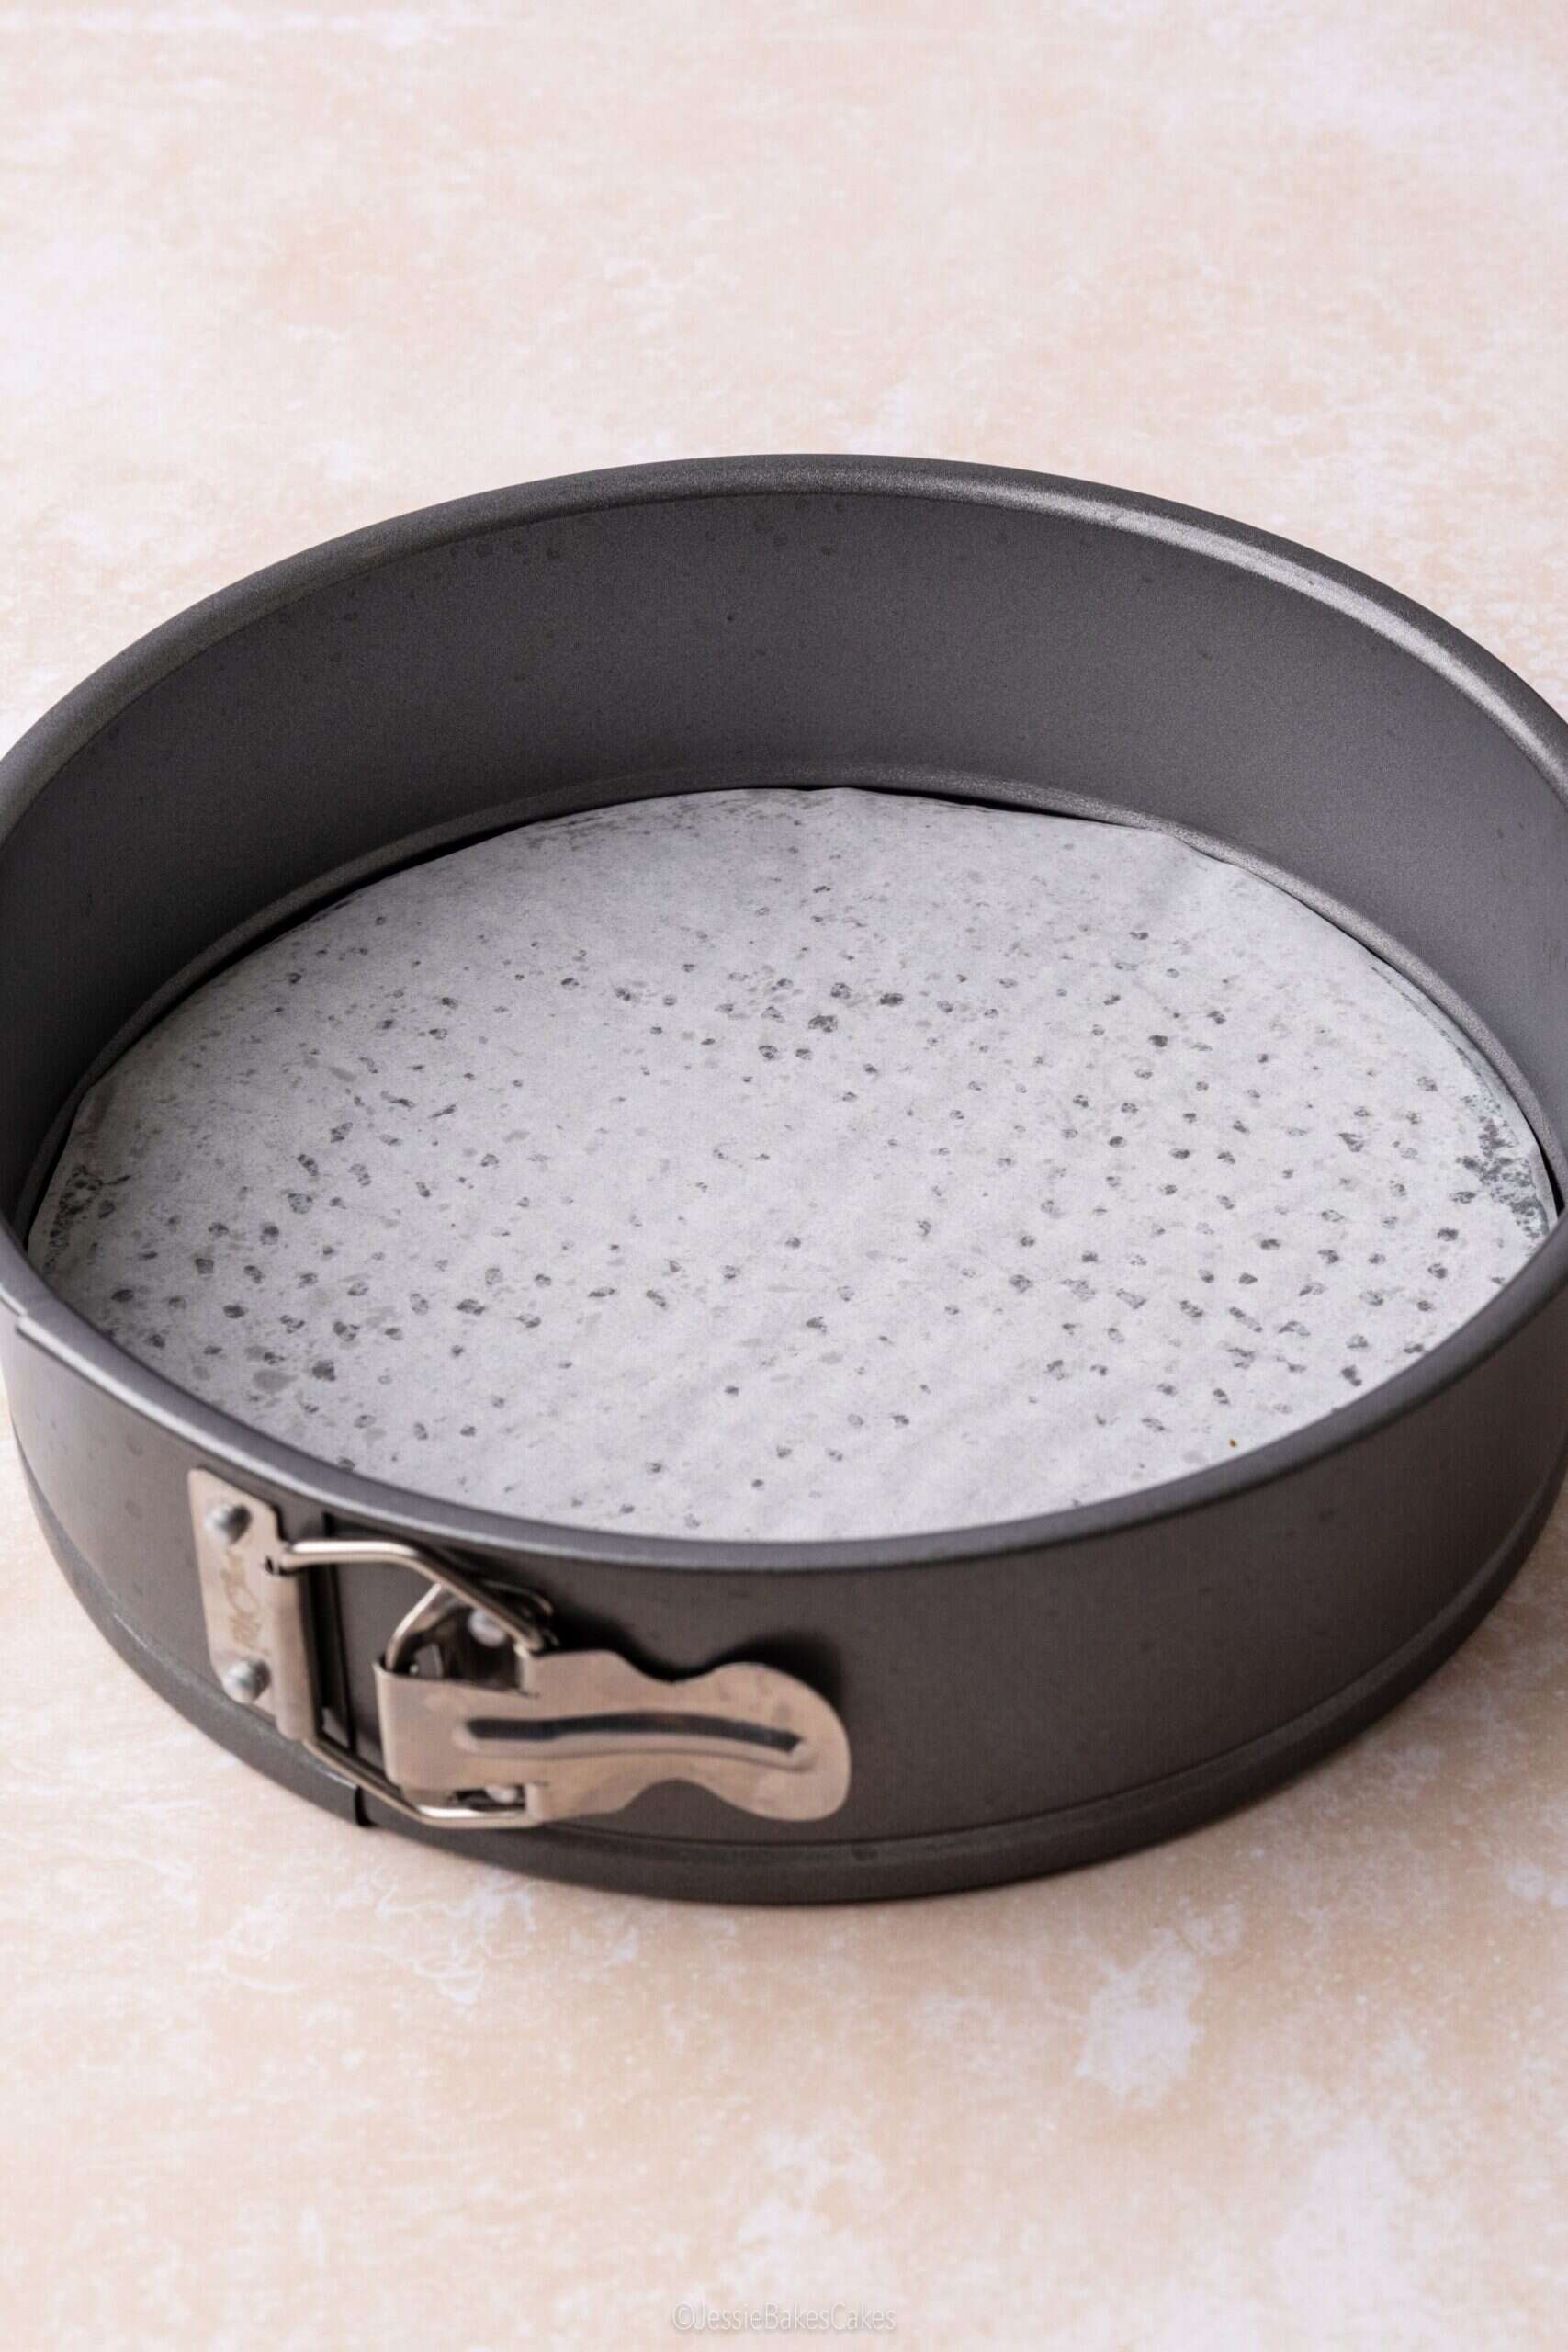
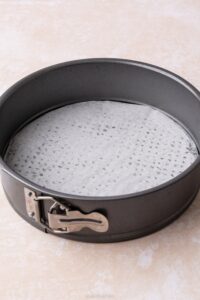
Before we dive into the recipe steps, first up let’s talk about baking tins. The best tin to use for a no-bake cheesecake is a springform round baking tin. It keeps everything neat and helps you release the cheesecake easily once it’s set.
This no-bake chocolate cheesecake recipe was developed using a 9-inch (23cm) springform tin with a 7cm depth. You can use a bigger or smaller tin if needed, but just remember… the smaller the tin, the thicker the layers. The bigger the tin, the thinner the layers. This will affect the setting time and the overall look of your cheesecake. Also, if you use a smaller tin, it must be deep enough to hold all the biscuit base and filling mixtures.
I always line the base of the tin with greaseproof paper as it helps to easily remove the cheesecake once it’s set. You can slide the cheesecake out of the tin and onto a plate or cake tin using the greaseproof paper.
TOP TIP
Flip the base of your springform tin upside down and lock it in using the clip. Your cheesecake base will now have smooth, neat sides with no groove from the tin.
How To Make No-bake Chocolate Cheesecake
Step 1: Prepare the chocolate biscuit base
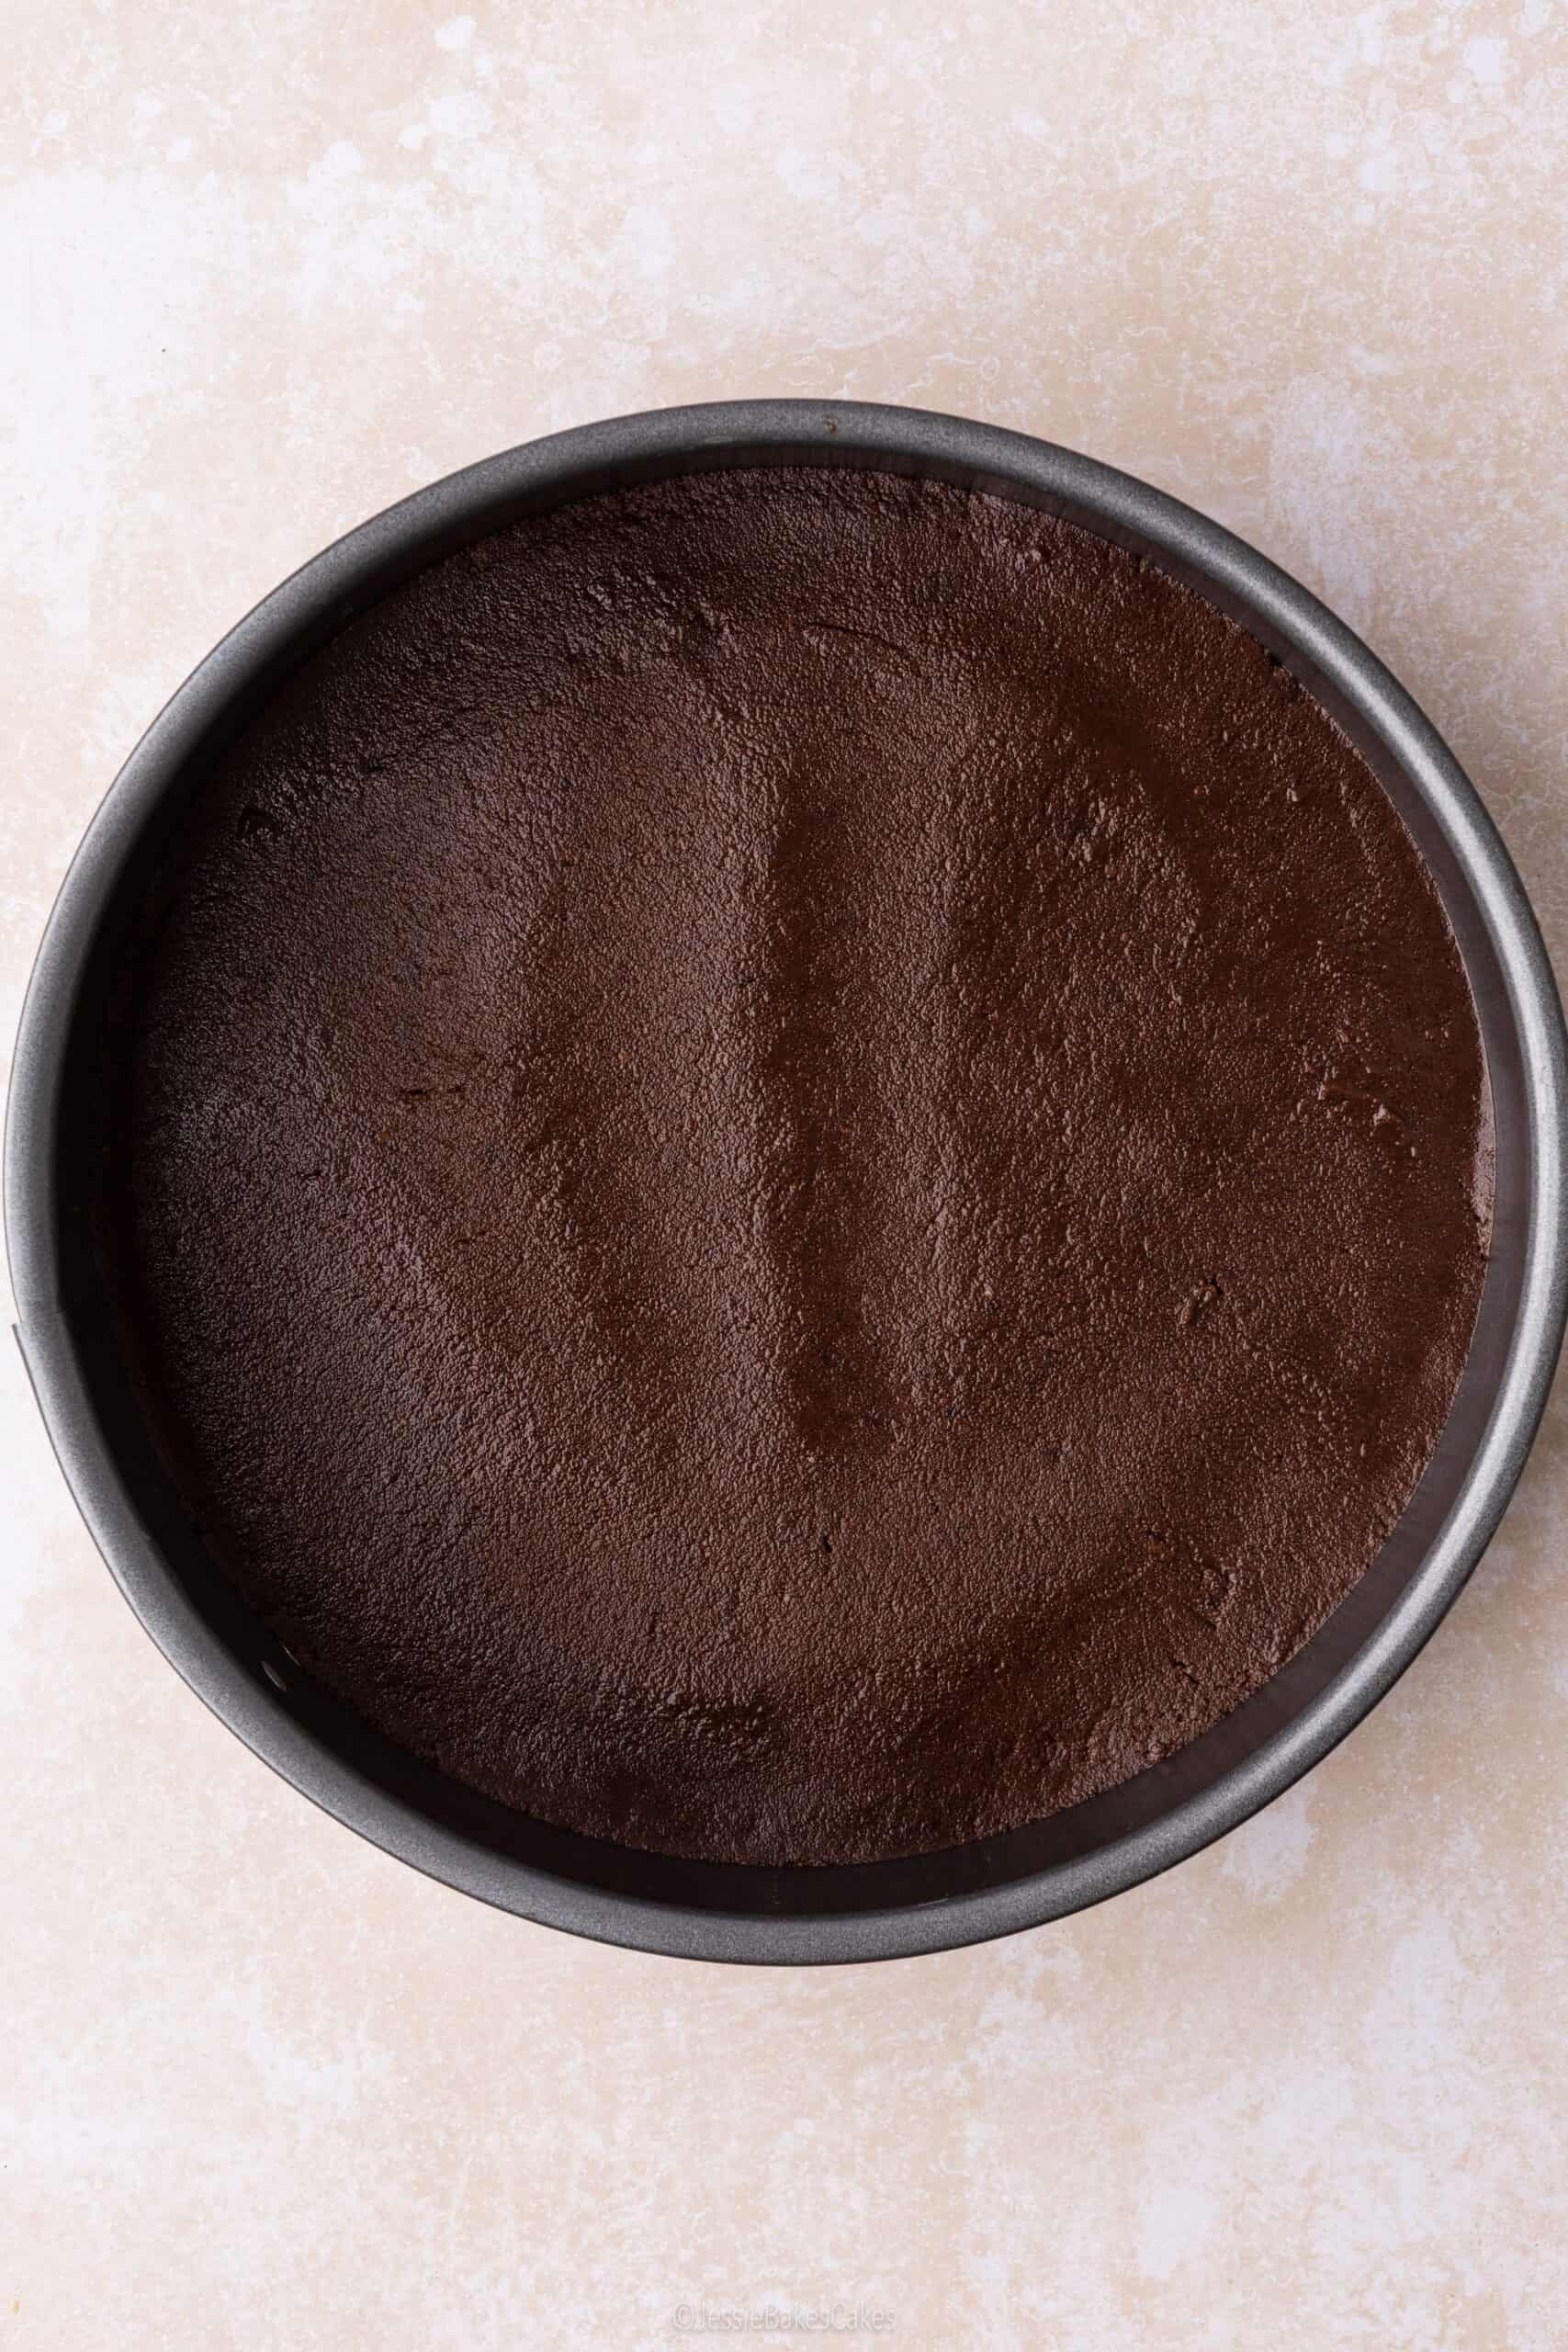
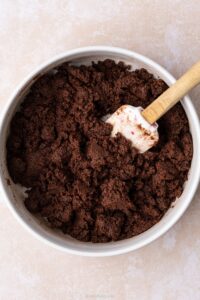
Let’s kick things off with the biscuit base. Blitz Bourbons, Oreos, or even chocolate chip cookies into fine crumbs (I used a NutriBullet, but a food processor works too). Mix in melted salted butter (the salt helps balance the sweetness) until the mixture looks like wet sand. Press the mixture firmly into the tin, smoothing out the top so it’s nice and even. Pop the base in the fridge to chill while you whip up the cheesecake – layer 1 done, how simple and easy was that!

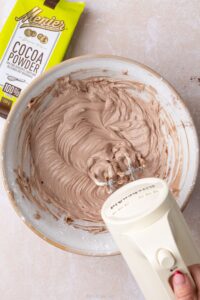
Step 2: Now make the chocolate cheesecake filling
Time to whip up the no-bake chocolate cheesecake filling, which I like to break down into three parts:
- Melt the dark chocolate and set aside to cool
- Whisk the cream cheese mixture together (cream cheese, icing sugar, cocoa powder and vanilla)
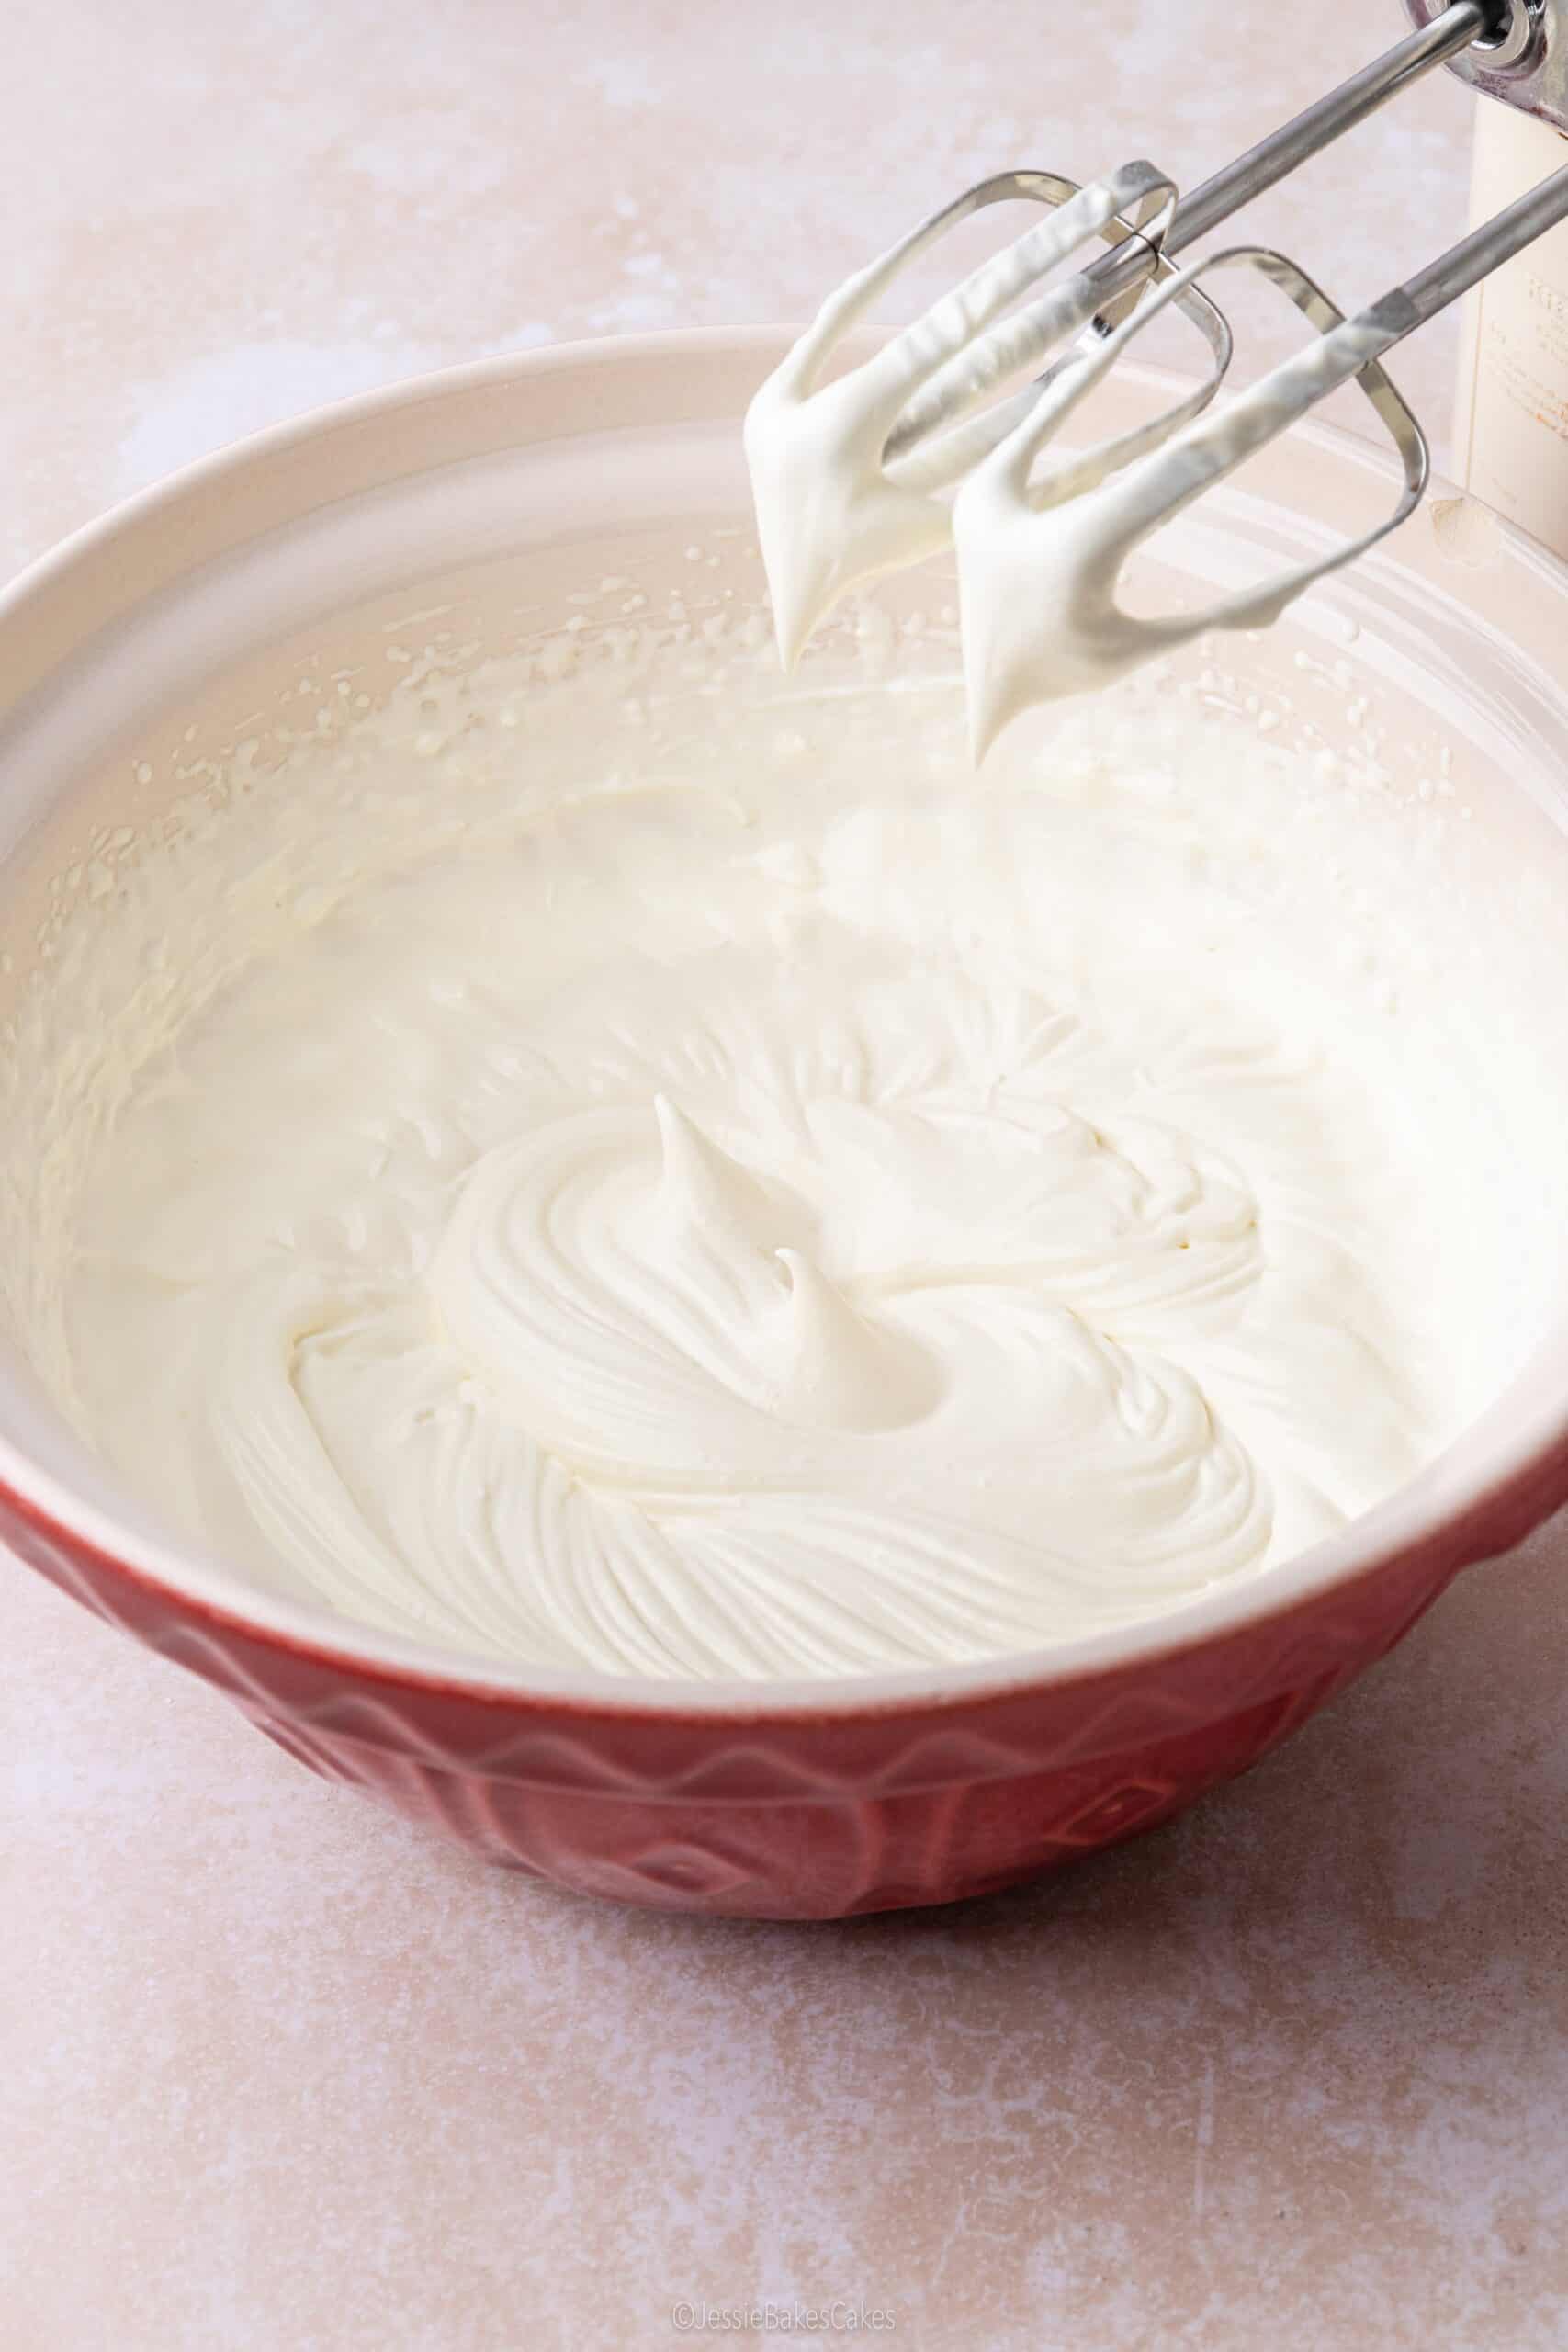
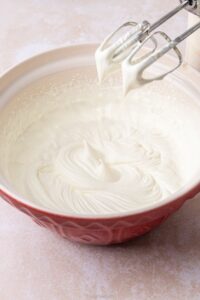
- Whip the cream to soft peaks
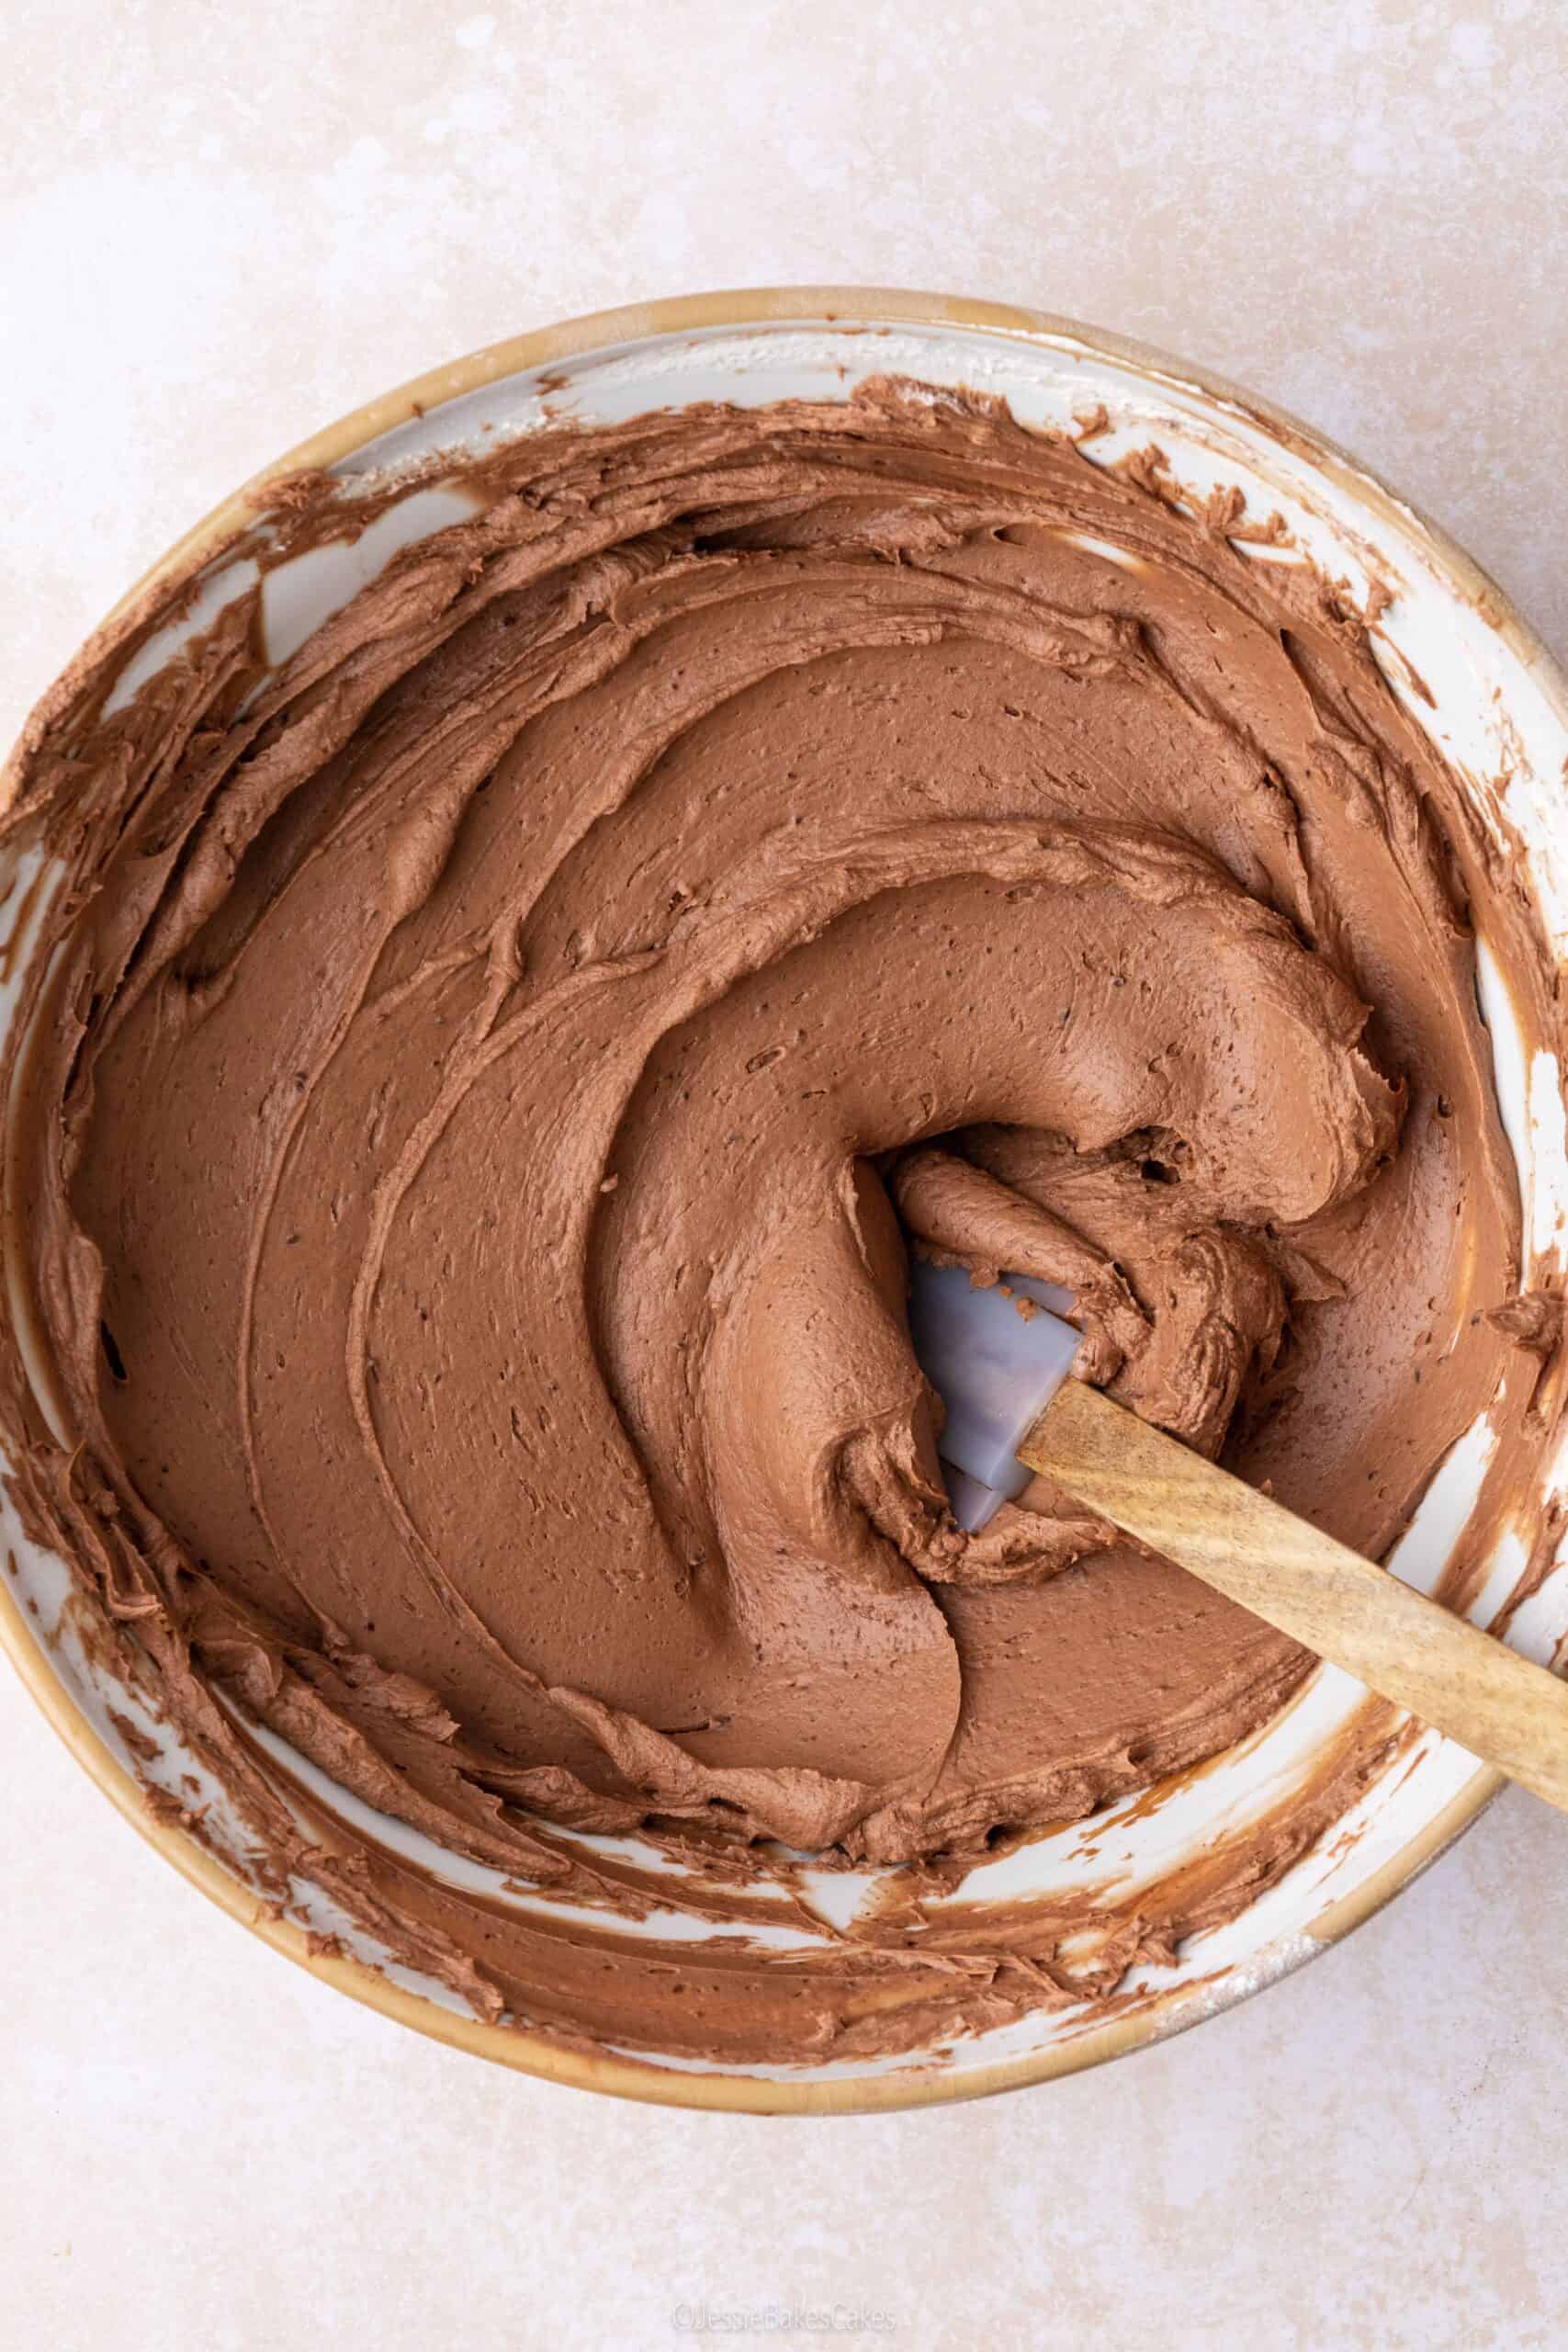
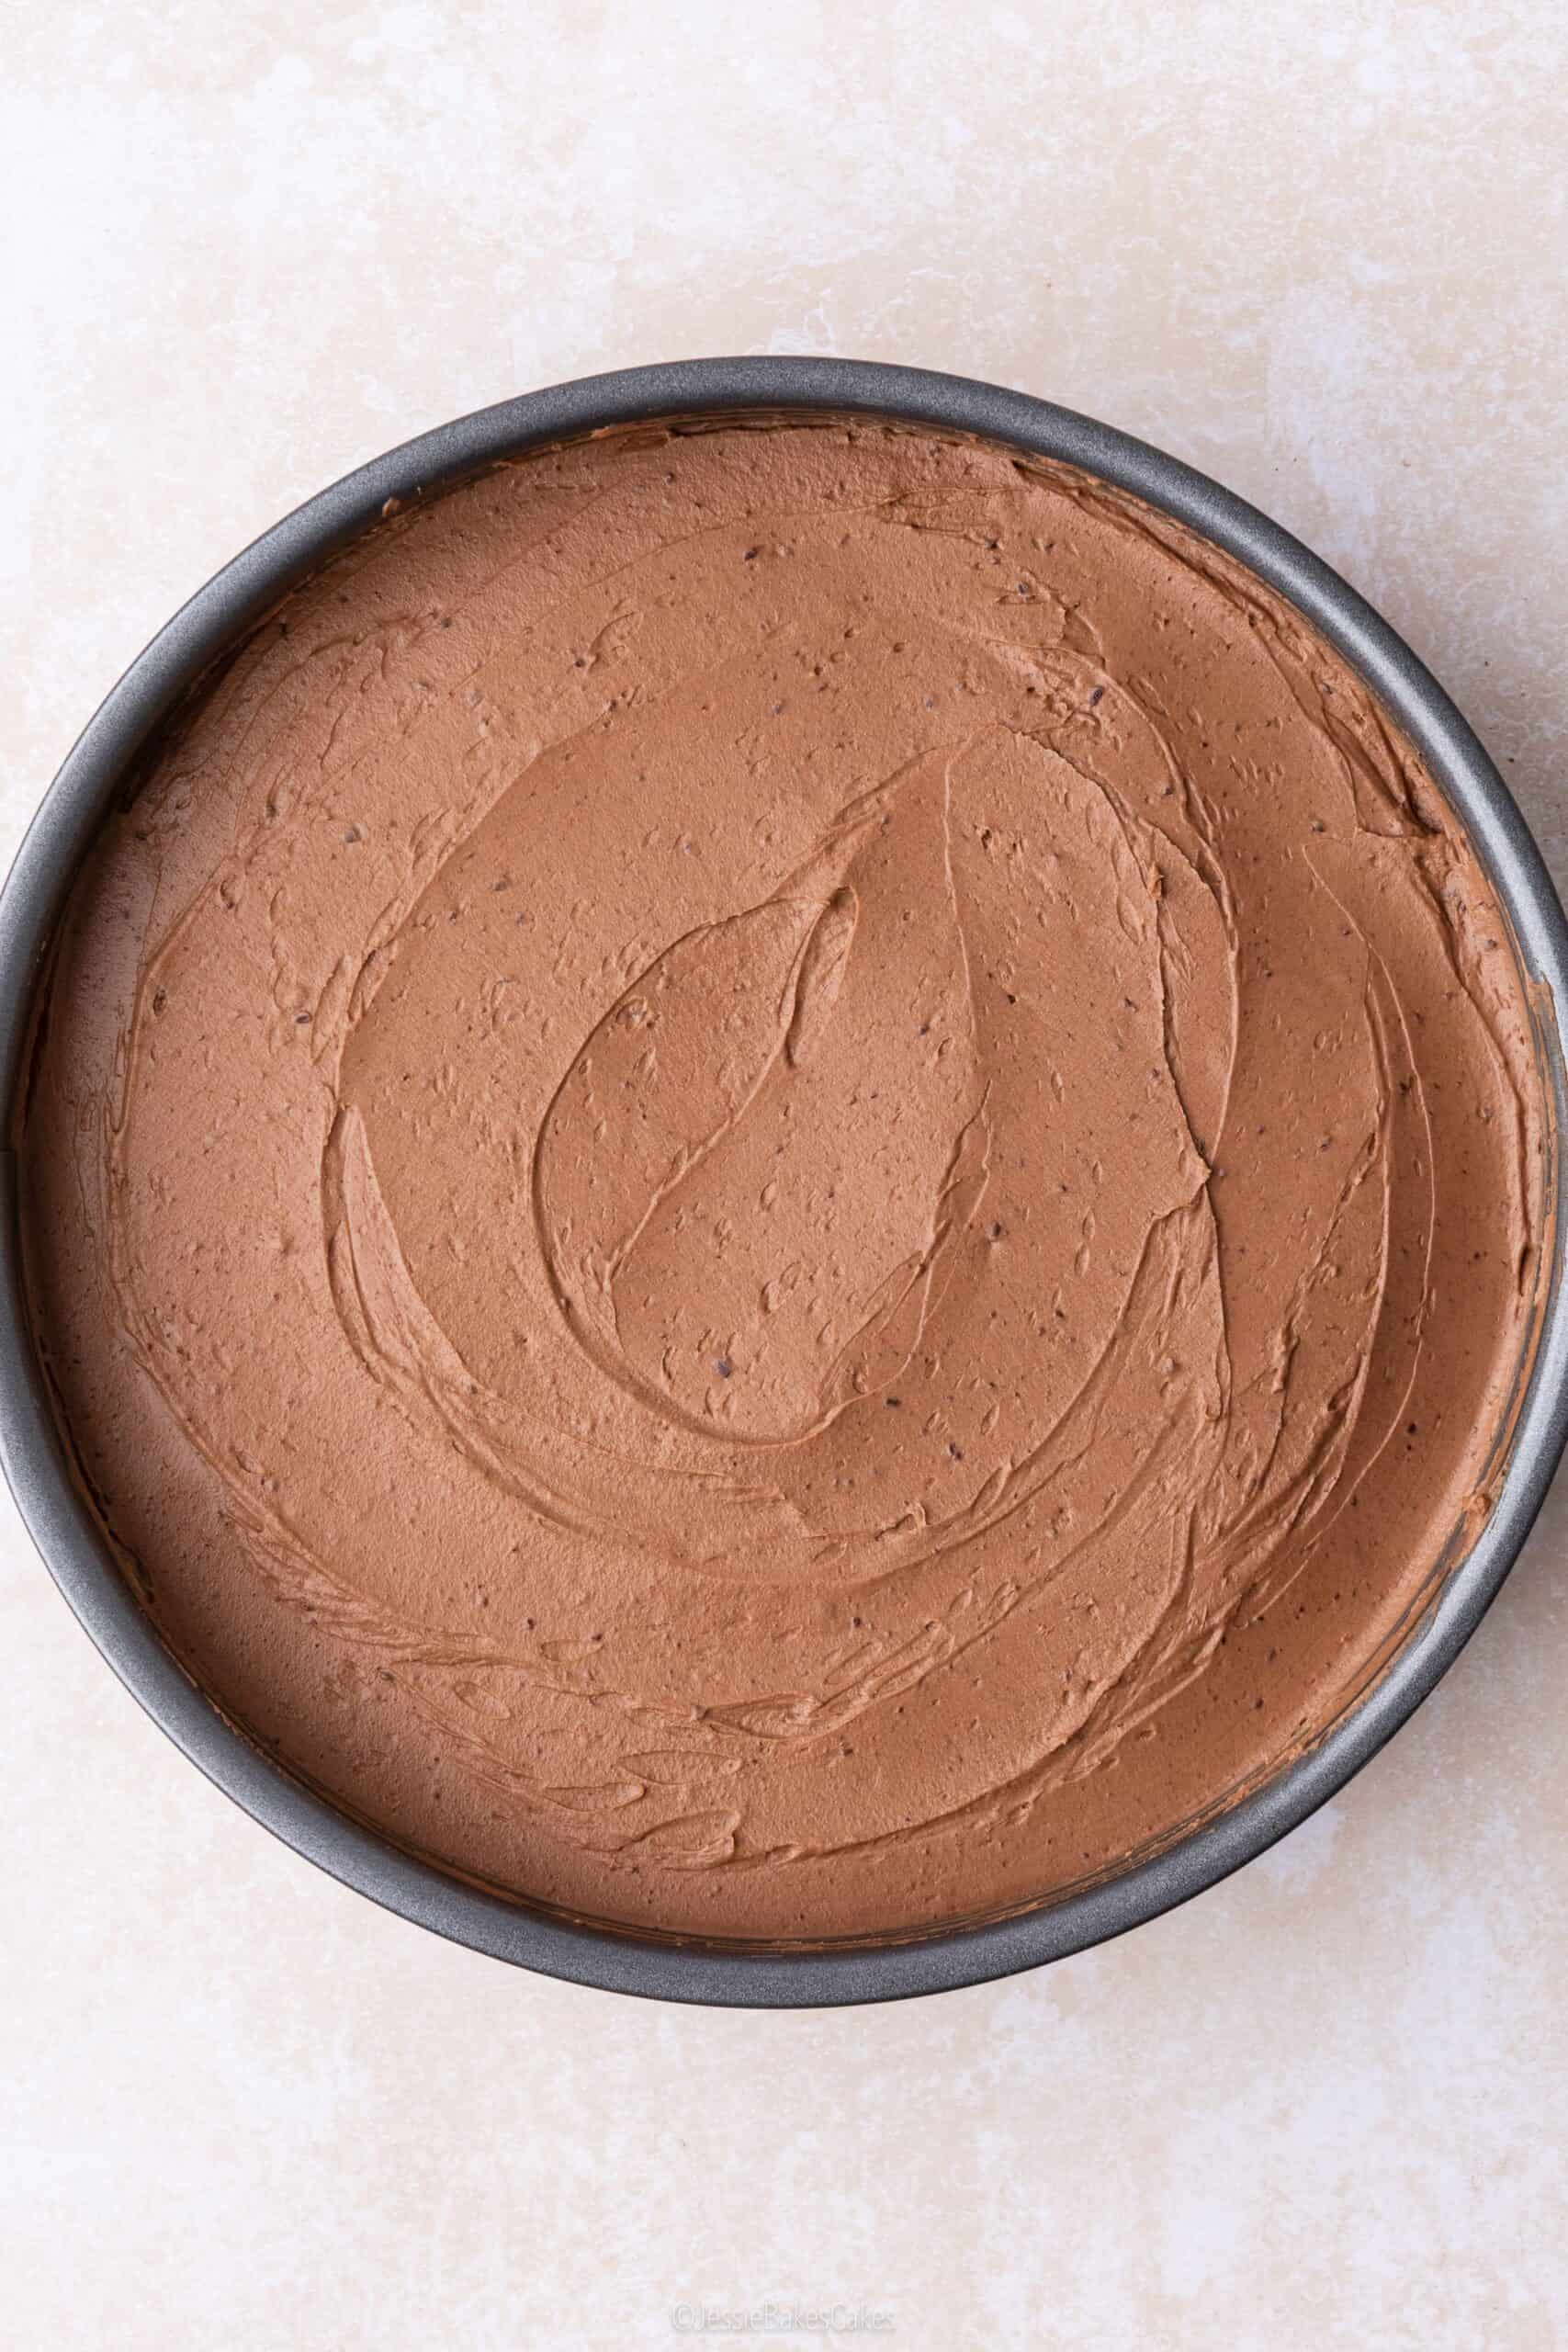
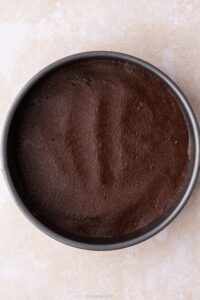
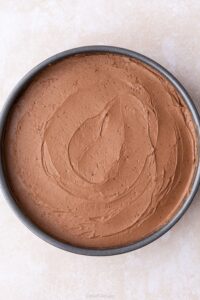
The three mixtures are then combined to create a thick, fluffy, airy chocolate cheesecake mixture. The trick is to work quickly when folding the melted chocolate into the cream cheese mix so it stays soft and silky (it will be thick!). Then you fold in the whipped cream to lighten up the mixture, giving you that fluffy, spreadable texture. Spoon half the mixture over the biscuit base and press it down so it’s nice and compact. Then repeat and smooth out the top, before placing the tin back in the fridge.
TOP TIP
Take your cream cheese out of the fridge 30 minutes before starting the recipe so it’s not fridge-cold. However, keep your double cream in the fridge until needed – cold cream whips better!
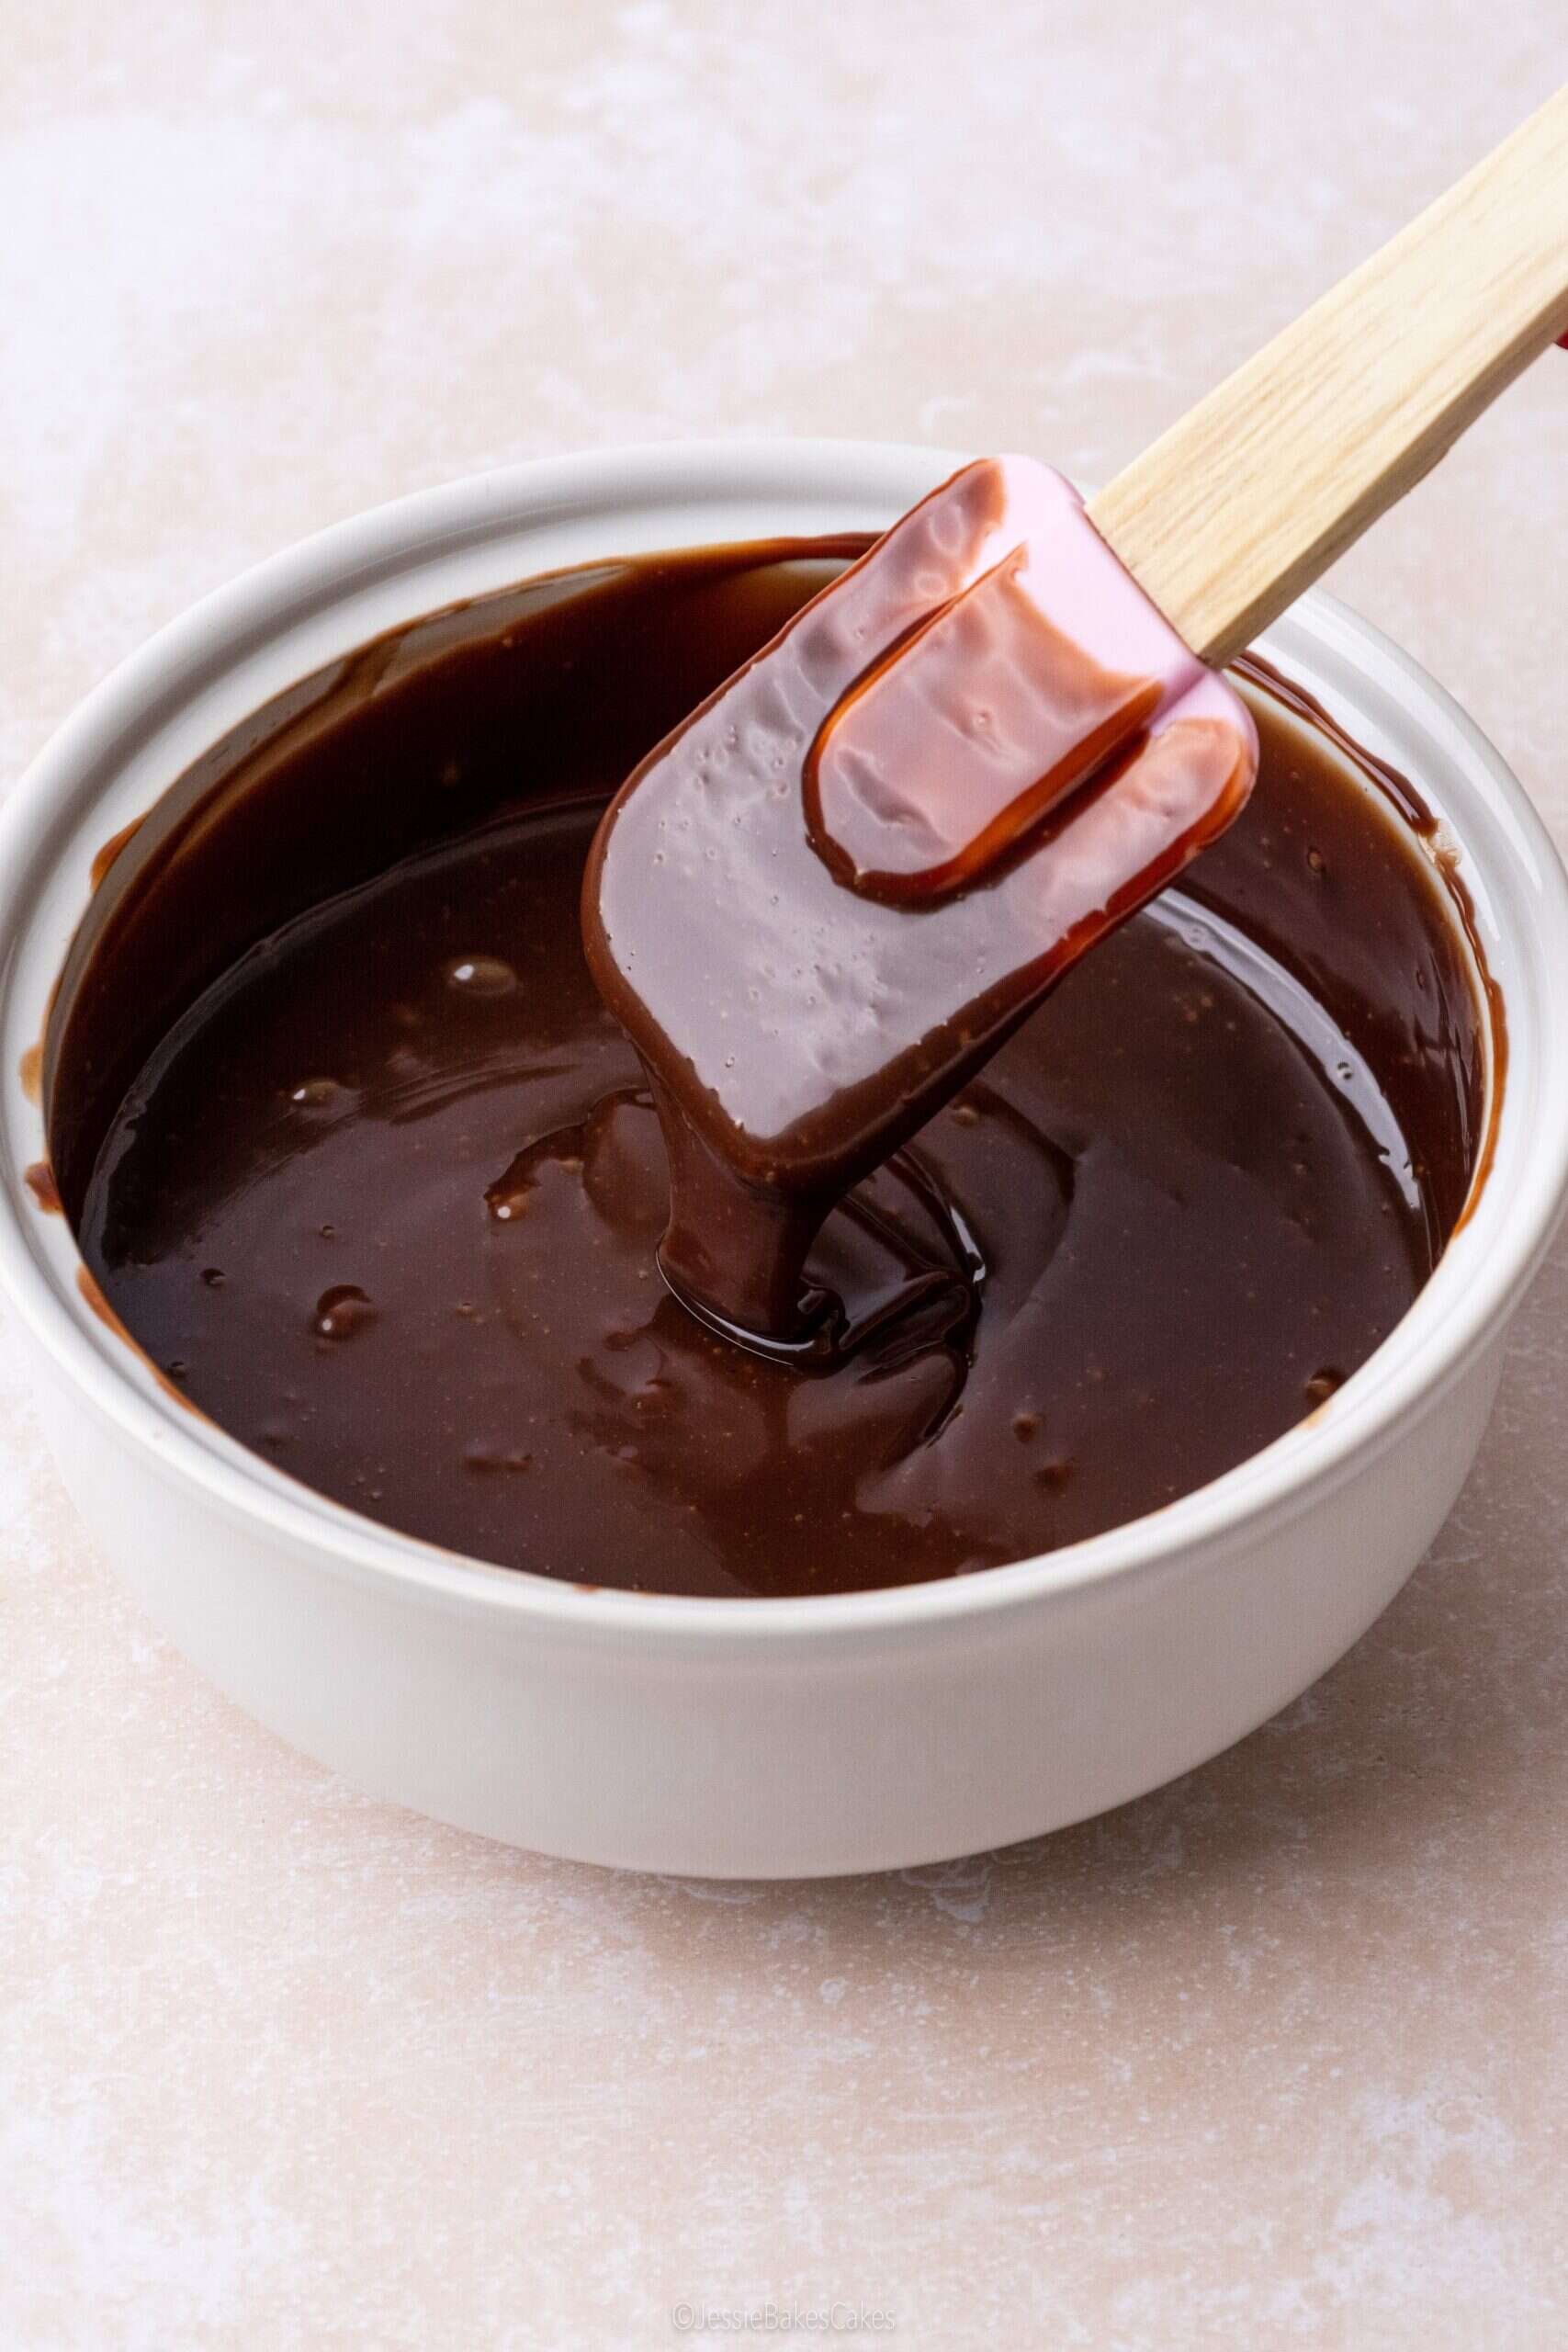

Step 3: Prepare the chocolate ganache layer
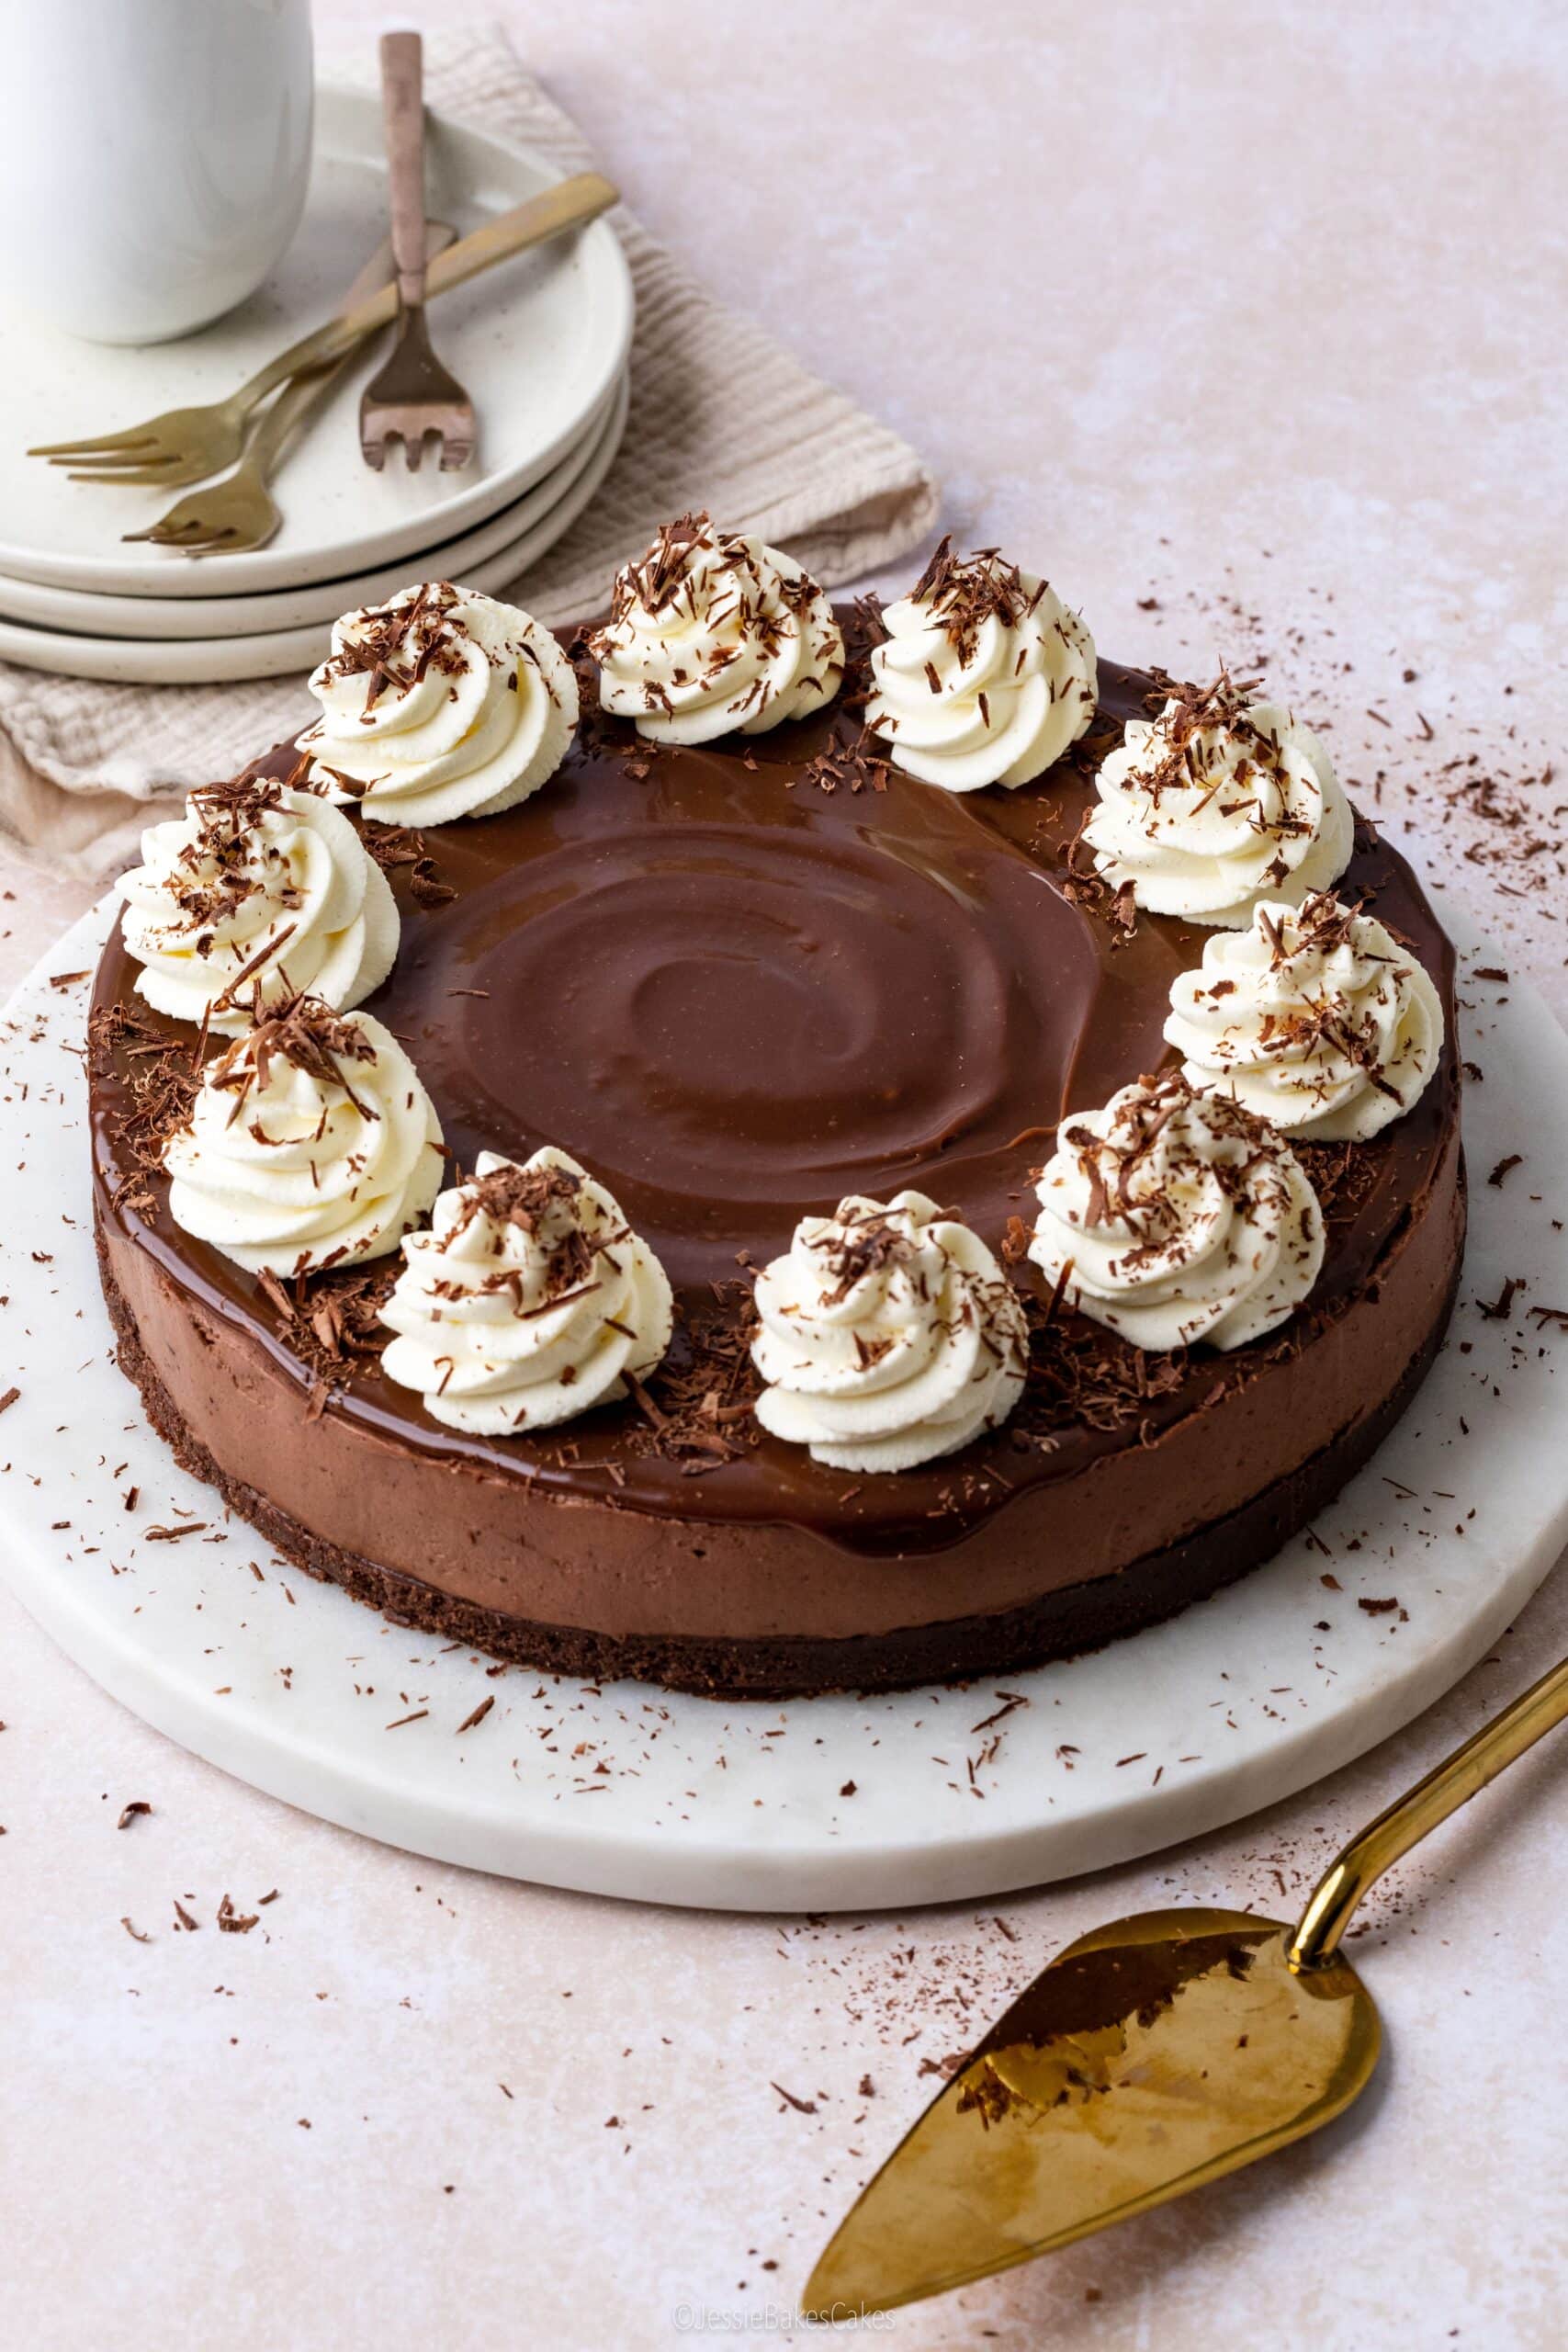
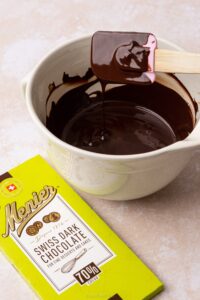
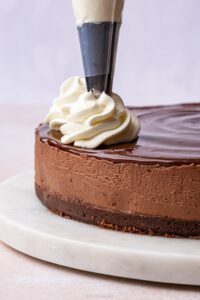
Now for the ganache layer – honestly, this part couldn’t be easier. You only need two ingredients: milk chocolate and cream. Heat the cream until it’s steaming (but not boiling) and pour it over very finely chopped chocolate, then let the heat do its melting magic before stirring until the ganache is smooth and glossy. It’s quick, fuss free, and adds that rich, glossy finish that makes your no-bake chocolate cheesecake look seriously indulgent. Give the ganache 10 minutes to cool down, then pour it over your cheesecake and use the back of a spoon to spread it to the edge.

Step 4: (Optional) Chantilly Cream Swirls
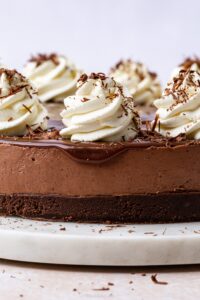
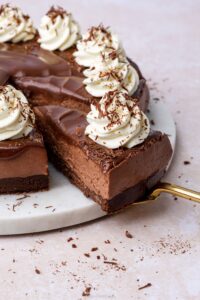
If you want to give your no-bake chocolate cheesecake a little extra decoration, try piping some swirls of chantilly cream on top using an open star nozzle. The trick here is to under-whip your cream so it’s soft and cloud-like, just shy of soft peaks. Spoon it straight into your piping bag, and as you pipe, it will naturally thicken a bit, giving you perfect, fluffy swirls without the risk of it splitting or turning grainy. I finished the cheesecake with a scattering of chocolate curls for a bit of texture.

Seasonal Decoration Ideas for this No-bake Chocolate Cheesecake
What I love about this recipe is how versatile it is. I mean who doesn’t love a slice of chocolate cheesecake at any point throughout the year? You could easily tweak the decoration to turn this cheesecake into a seasonal dessert, here’s some ideas:
- Valentine’s Day: decorate with chocolate hearts, or pink and red sprinkles.
- Easter: arrange mini eggs or creme eggs on top for extra chocolate indulgence!
- Halloween: pipe a spiral of white chocolate on top and drag through the lines to make a spiderweb effect.
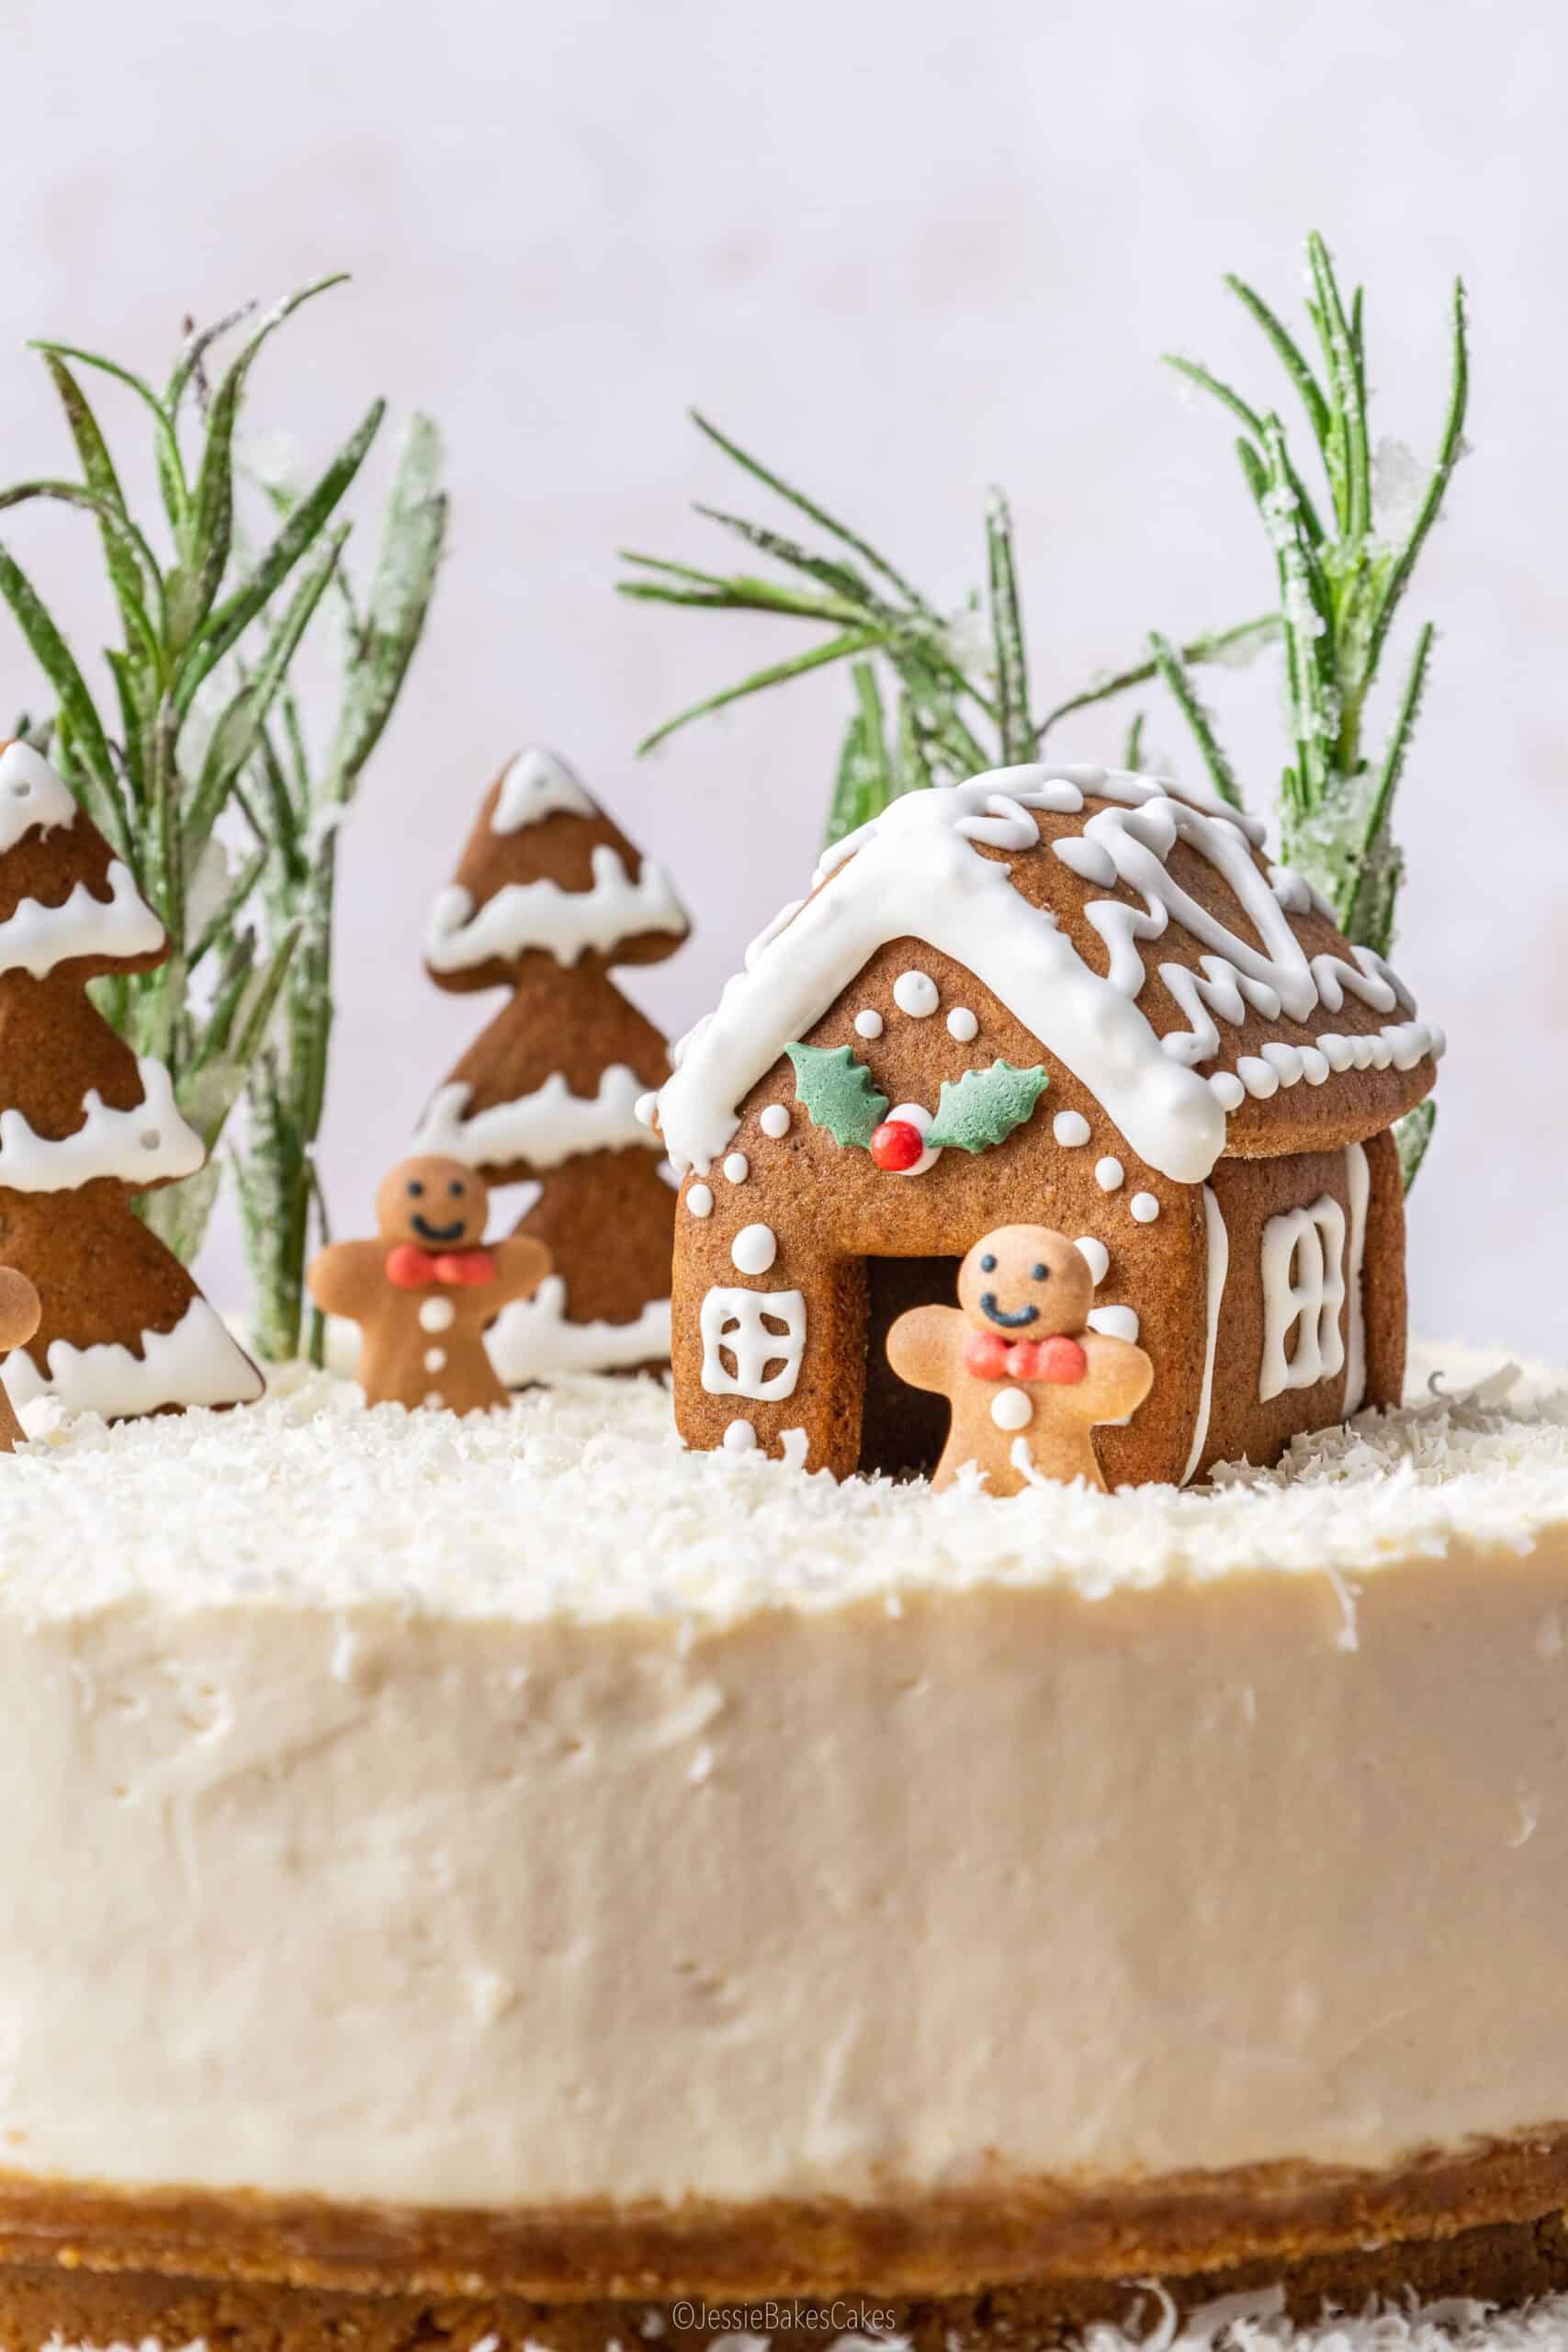
- Christmas: grate white chocolate ‘snow’ on top and decorate with mini gingerbread houses and biscuits – just like my gingerbread cream liqueur cheesecake in the photograph below.
Recipe FAQ’s
For this no-bake chocolate cheesecake, I used a 9-inch (23cm) springform tin with a 7cm depth. The removable outer ring makes it super easy to lift the cheesecake out once it’s set, giving you neat, clean edges. If you want, you can also line the base with baking paper to make sliding it onto a plate or cake stand even easier.
This no-bake chocolate cheesecake recipe doesn’t use any gelatin, but still achieves a thick and stable consistency. The secret is whipping the cream to soft peaks separately before folding it into the cream cheese mixture. This step adds lightness while giving the filling structure, helping it hold its shape once chilled. It’s also important to use full-fat cream cheese, as it contains less water and gives a firmer texture. Finally, make sure the cheesecake chills for at least 4 hours (or overnight if you can resist!) to allow the filling to fully set.
At least 4 hours, but overnight for best results.
Yes absolutely, the biscuit base and cheesecake filling can be prepped the day before. And then the ganache topping can be added the day after, along with any decoration.
Store in the fridge for up to 3 days.
No-bake Chocolate Cheesecake
Rate this Recipe
Print Pin Rate this RecipeIngredients
For the biscuit base:
- 300 grams Bourbon biscuits or Oreo biscuits
- 125 grams Salted butter melted
For the cheesecake filling:
- 200 grams Menier 70% Dark Chocolate roughly chopped
- 500 grams Philadelphia Full-fat Original Cream Cheese take out of the fridge 30 minutes before starting the recipe
- 150 grams Icing sugar
- 1 teaspoon Vanilla extract
- 2 tablespoons Menier Cocoa Powder
- 300 milliliters Double cream use cold from the fridge
For the chocolate ganache layer:
- 150 grams Menier Milk Chocolate
- 100 milliliters Double cream
For the chantilly cream and decoration:
- 200 milliliters Double cream
- 20 grams Icing sugar
- 20 grams Dark chocolate grated to make curls
Instructions
Prepare the biscuit base:
- Line the base of a 20cm (8-inch) springform tin.
- Measure the butter into a mixing bowl and microwave for 30-60 seconds or until melted.125 grams Salted butter
- Blitz the biscuits in a food processor or blender (or bash with a rolling pin) into fine crumbs. Add to the melted butter and mix until the texture resembles wet sand.300 grams Bourbon biscuits
- Press firmly into the base of the tin and smooth the surface. Chill in the fridge while you make the filling.
Make the chocolate cheesecake filling:
- Melt the dark chocolate gently in a heatproof bowl over simmering water (or in short microwave bursts). Set aside to cool.200 grams Menier 70% Dark Chocolate
- In a large bowl, use an electric handheld mixer to beat together the cream cheese, icing sugar, vanilla extract, and cocoa powder until smooth.500 grams Philadelphia Full-fat Original Cream Cheese, 150 grams Icing sugar, 1 teaspoon Vanilla extract, 2 tablespoons Menier Cocoa Powder
- In a separate bowl, whisk the double cream to soft peaks. This will take roughly 5 minutes on high speed. Be careful not to overwhisk the cream, it should look like soft, pillowy clouds.300 milliliters Double cream
- Working quickly, pour the melted chocolate into the cream cheese mixture and mix until fully incorporated. The mixture will be thick! Sometimes the cold temperature of the cream cheese can cause the chocolate to firm up, creating specks of chocolate in the mixture. Don't panic, this is totally normal and actually adds a lovely texture throughout the cheesecake filling.
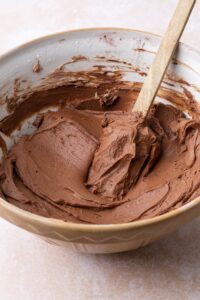
- Fold in the whipped cream with a spatula until smooth, fluffy and combined.

- Spoon the cheesecake mixture over the chilled base in two stages and press it down with the back of a spoon. Make sure you compress the mixture into the sides of the tin so it's compact, then smooth out the top. Place in the fridge to set for at least 4 hours, or overnight for the best results.
Prepare the ganache layer:
- Very finely chop the milk chocolate and place into a bowl.150 grams Menier Milk Chocolate
- Pour the double cream into a small saucepan. Heat over medium until steaming hot but not boiling.100 milliliters Double cream
- Pour the hot cream over the chocolate and cover with a plate to trap in the heat. Leave for 1 minute, then gently stir until glossy and smooth.

- Allow the ganache to cool for 10 minutes until slightly thickened but still pourable.

- Meanwhile, carefully remove the cheesecake from the baking tin. The best way to do this is to run a hot knife around the edge of the tin to release it from the sides. Then unclip the tin and use the baking paper on the base to slide the cheesecake onto a plate or cake stand. You can use an offset spatula to smooth the outside of the cheesecake.
- Pour the ganache over the chilled cheesecake and use the back of a spoon to spread it to the edge, letting it drip down the sides.

Prepare the chantilly cream:
- Whisk the double cream and icing sugar until it holds soft, cloud-like peaks. It's best to under-whip the cream as it will thicken up when piped.200 milliliters Double cream, 20 grams Icing sugar
- Transfer to a piping bag fitted with an open star nozzle and pipe neat swirls around the edge of the cheesecake (I piped 10 in total).
- Scatter the grated dark chocolate on top.20 grams Dark chocolate
To serve your no-bake chocolate cheesecake:
- Slice with a warm, dry knife for clean edges and serve chilled. Enjoy!
This cheesecake was a hit with my dinner guests, rich but not sickly sweet, a perfect balance! A really easy recipe to follow too. Thanks Jessie x
What a lovely review! I’m so pleased you picked up on the balance of sweetness, using salted butter for the biscuit base makes a big difference! Even though it’s a triple choc cheesecake, you just can’t help but go back bite after bite 😍
Delicious
Love to hear that!