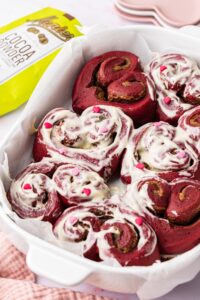
Marry Me Red Velvet Cinnamon Rolls
By Jessie
Updated: January 20, 2026
Rate This Recipe
By: Jessie
Updated: January 20, 2026
Rate This Recipe:

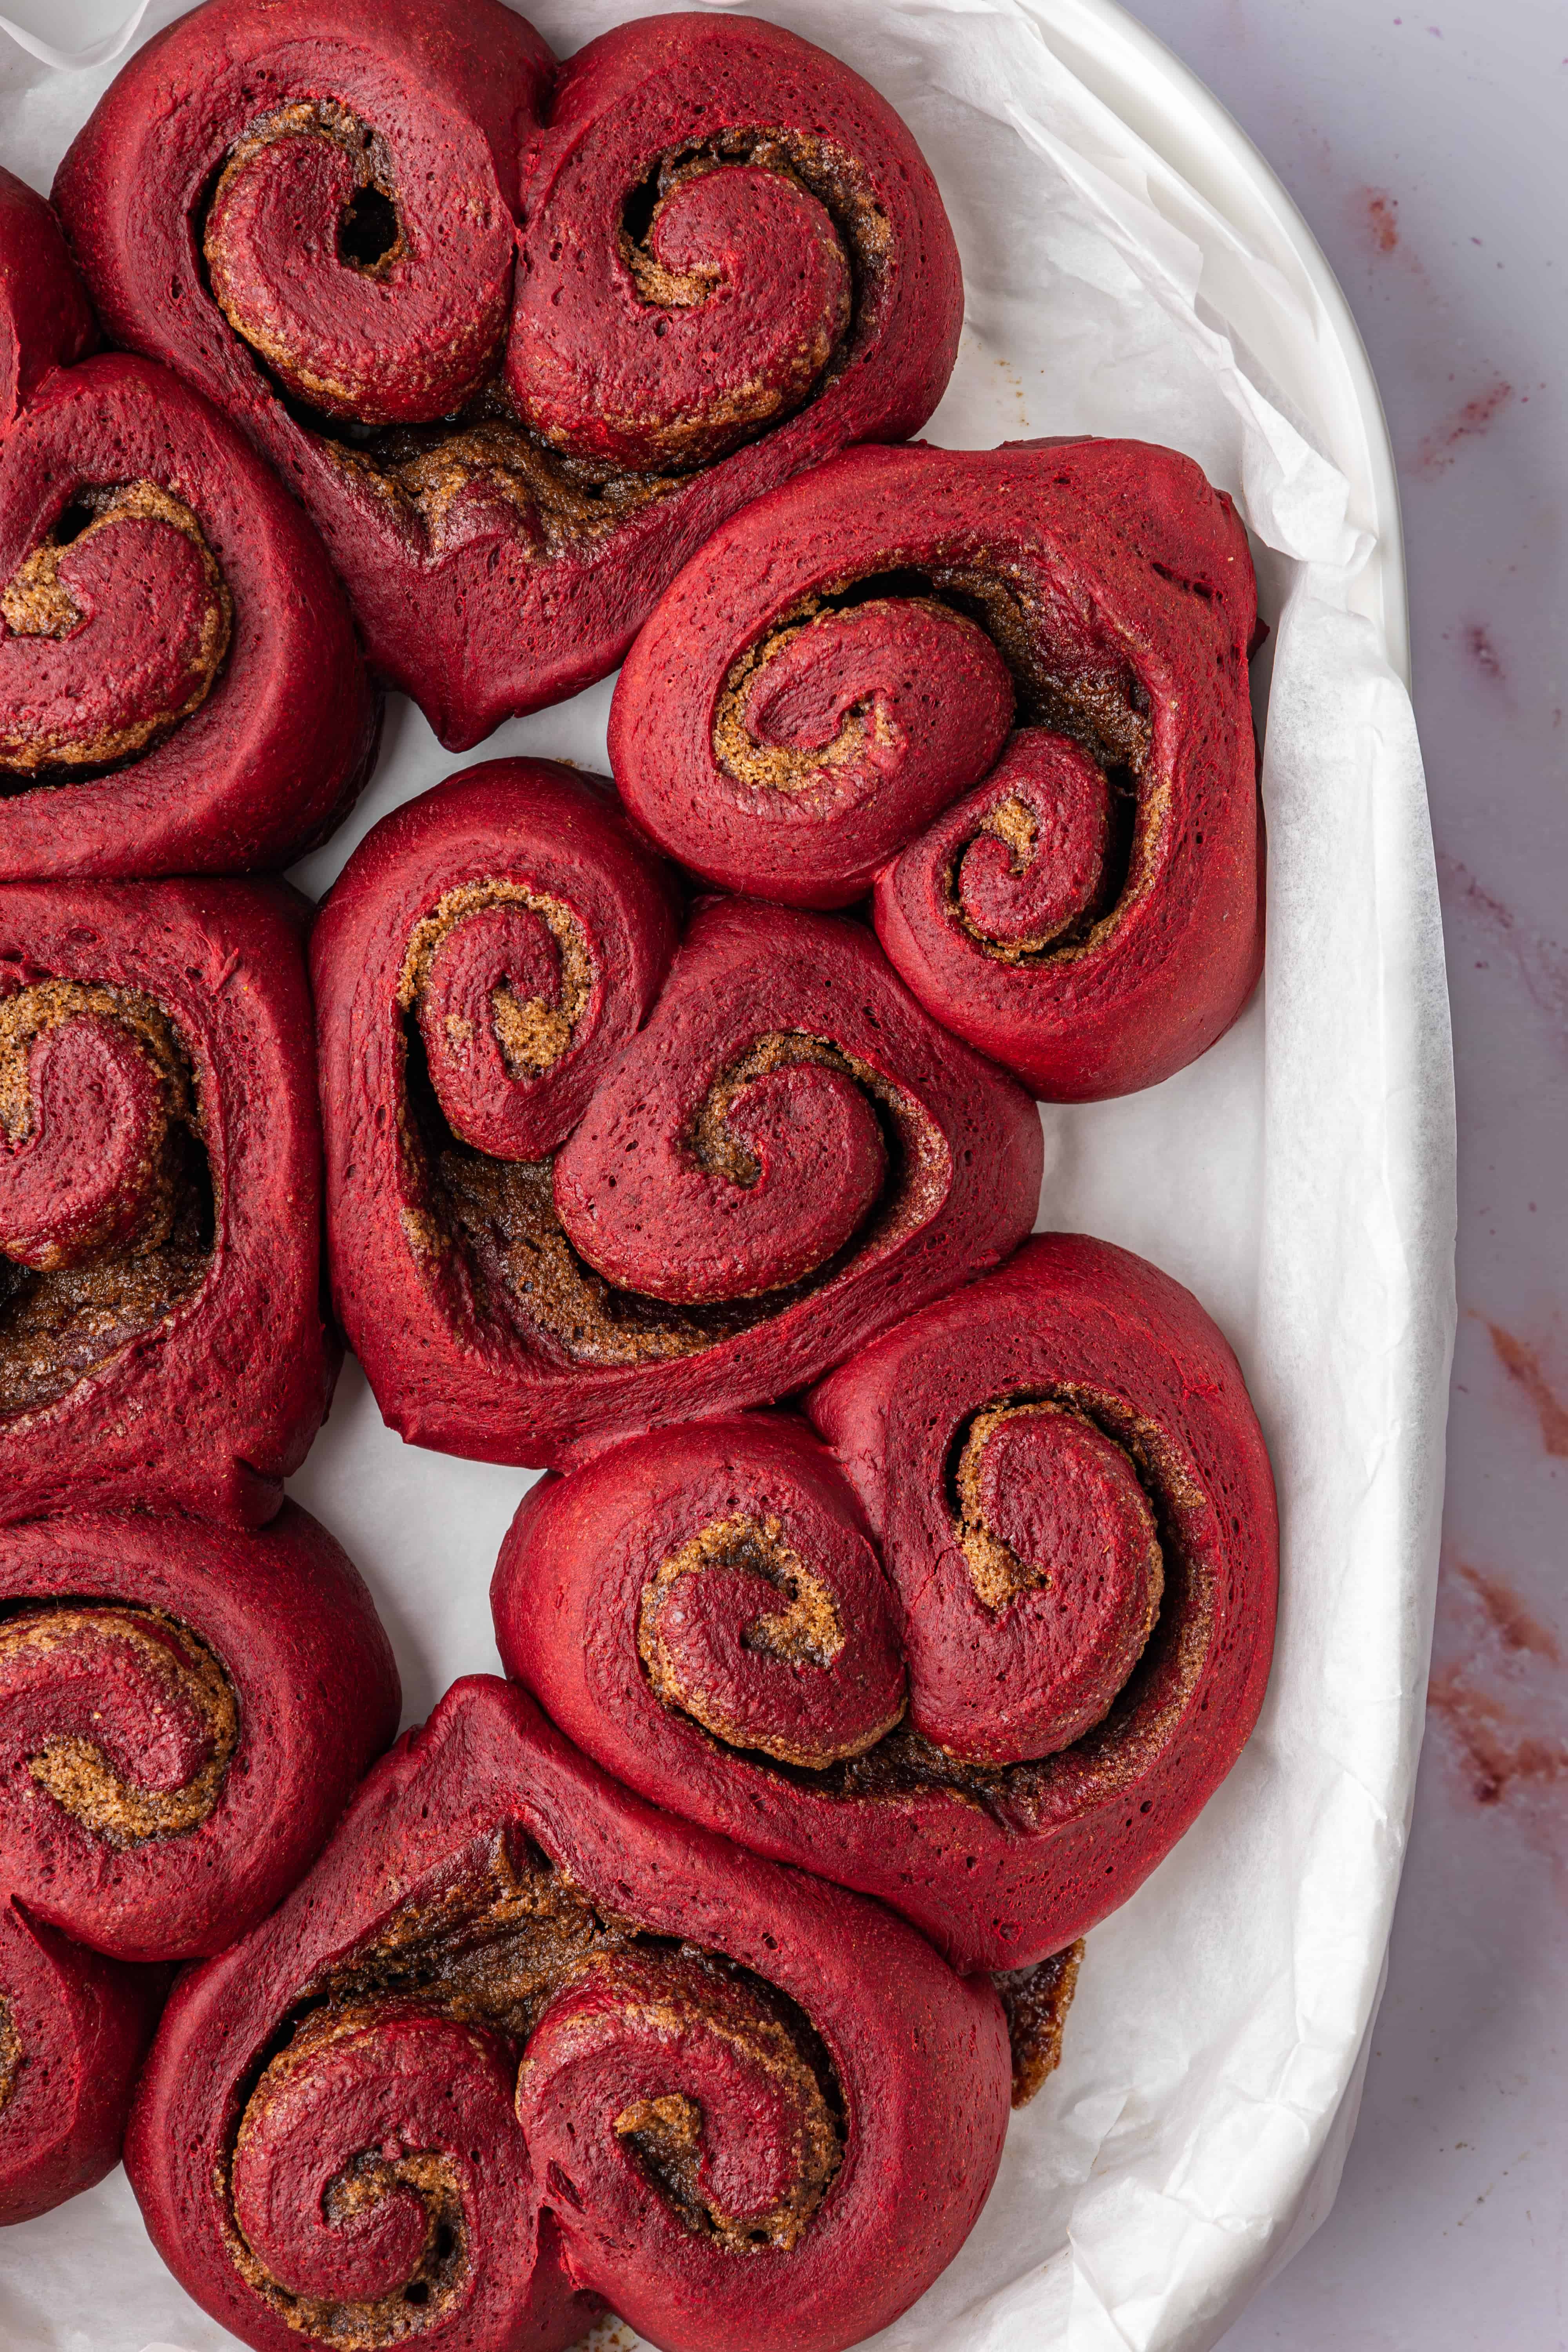
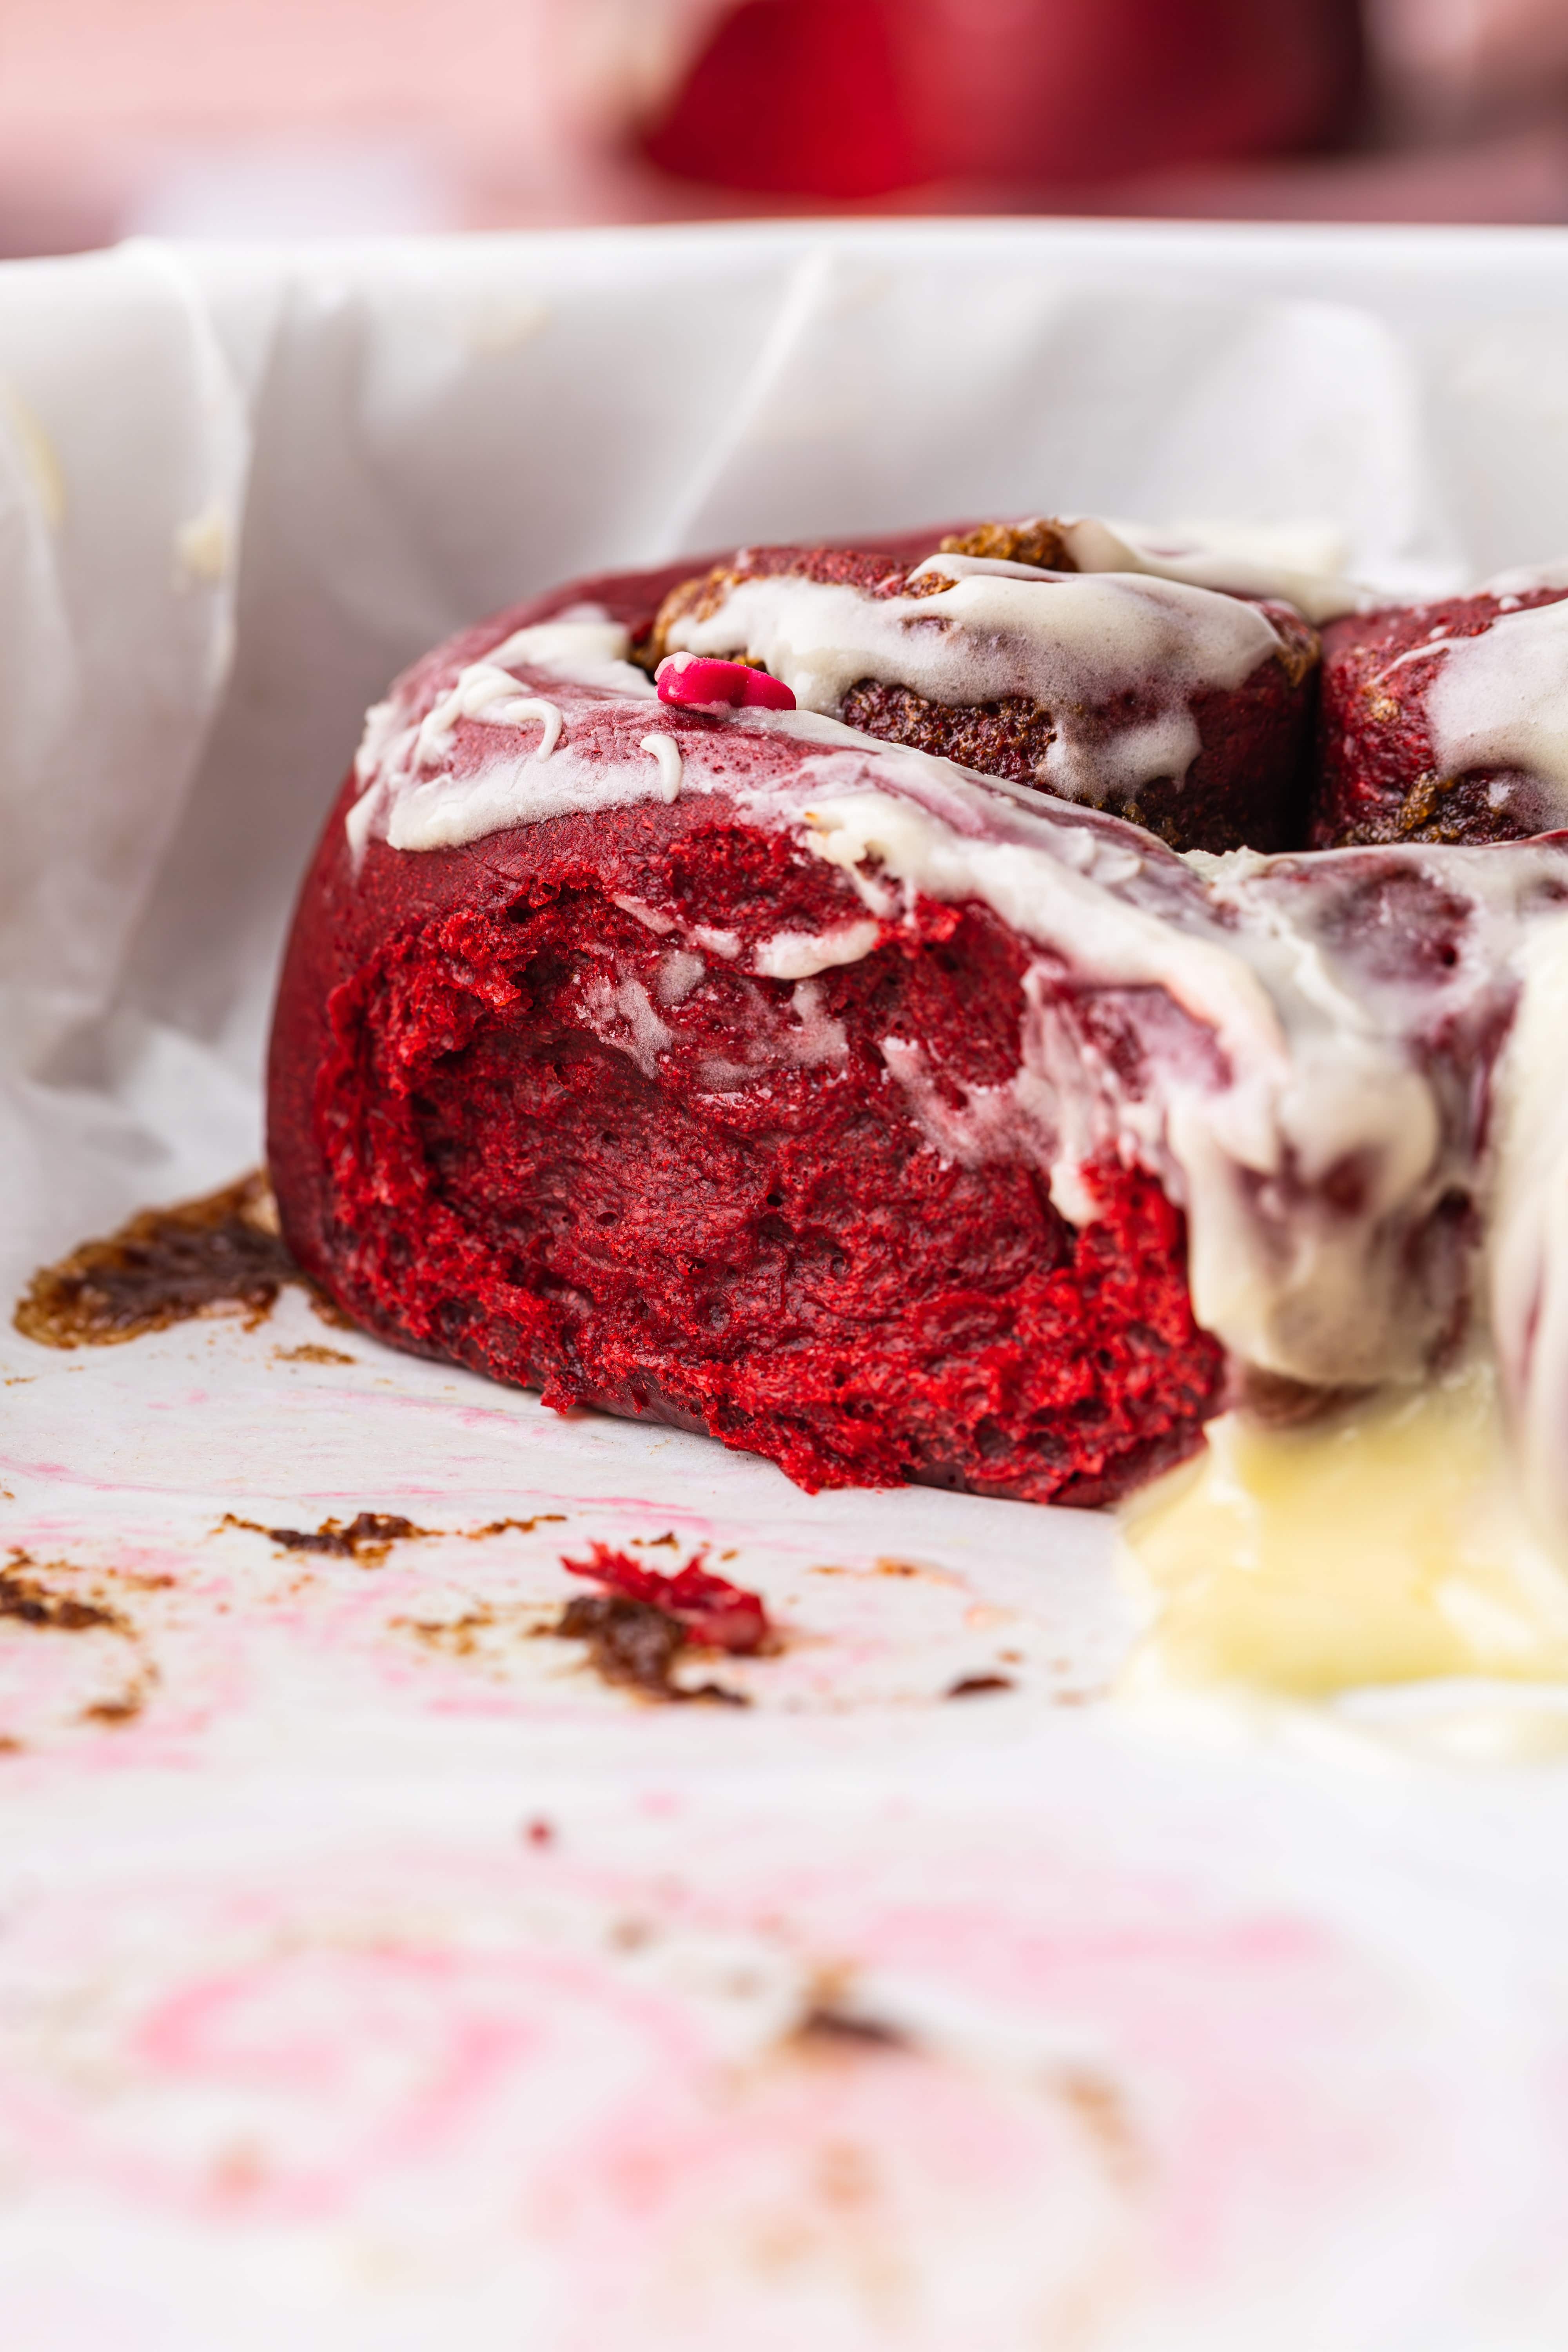
Say YES to baking these irresistible Marry Me Red Velvet Cinnamon Rolls! The perfect marriage of vanilla and chocolate, baked in soft heat-shaped rolls and swirled with a gooey cinnamon filling. They’re smothered in white chocolate cream cheese frosting and finished with heart sprinkles for extra cuteness. This recipe is perfect for Valentine’s Day, special occasions, or simply treating yourself (because you deserve it!).

This recipe is kindly sponsored by Menier Chocolate. I only recommend products I personally use, love and trust!
RECIPE AT A GLANCE

TASTE
All the flavours you love in red velvet cake but baked into cinnamon rolls! Think chocolate, vanilla and tangy cream cheese frosting, with warm cinnamon spice running throughout.

TEXTURE
Ultra soft and fluffy, with a slightly chewy finish. The filling is gooey and buttery, and the frosting melts into each cinnamon roll creating even more softness.

SKILL
This recipe will put your patience and timekeeping skills to the test, but it isn’t overly complicated. The dough comes together quickly and the cinnamon rolls are easily shaped into hearts.

SERVES
This recipe makes 10-12 heart-shaped red velvet cinnamon rolls, depending on how big you cut them.
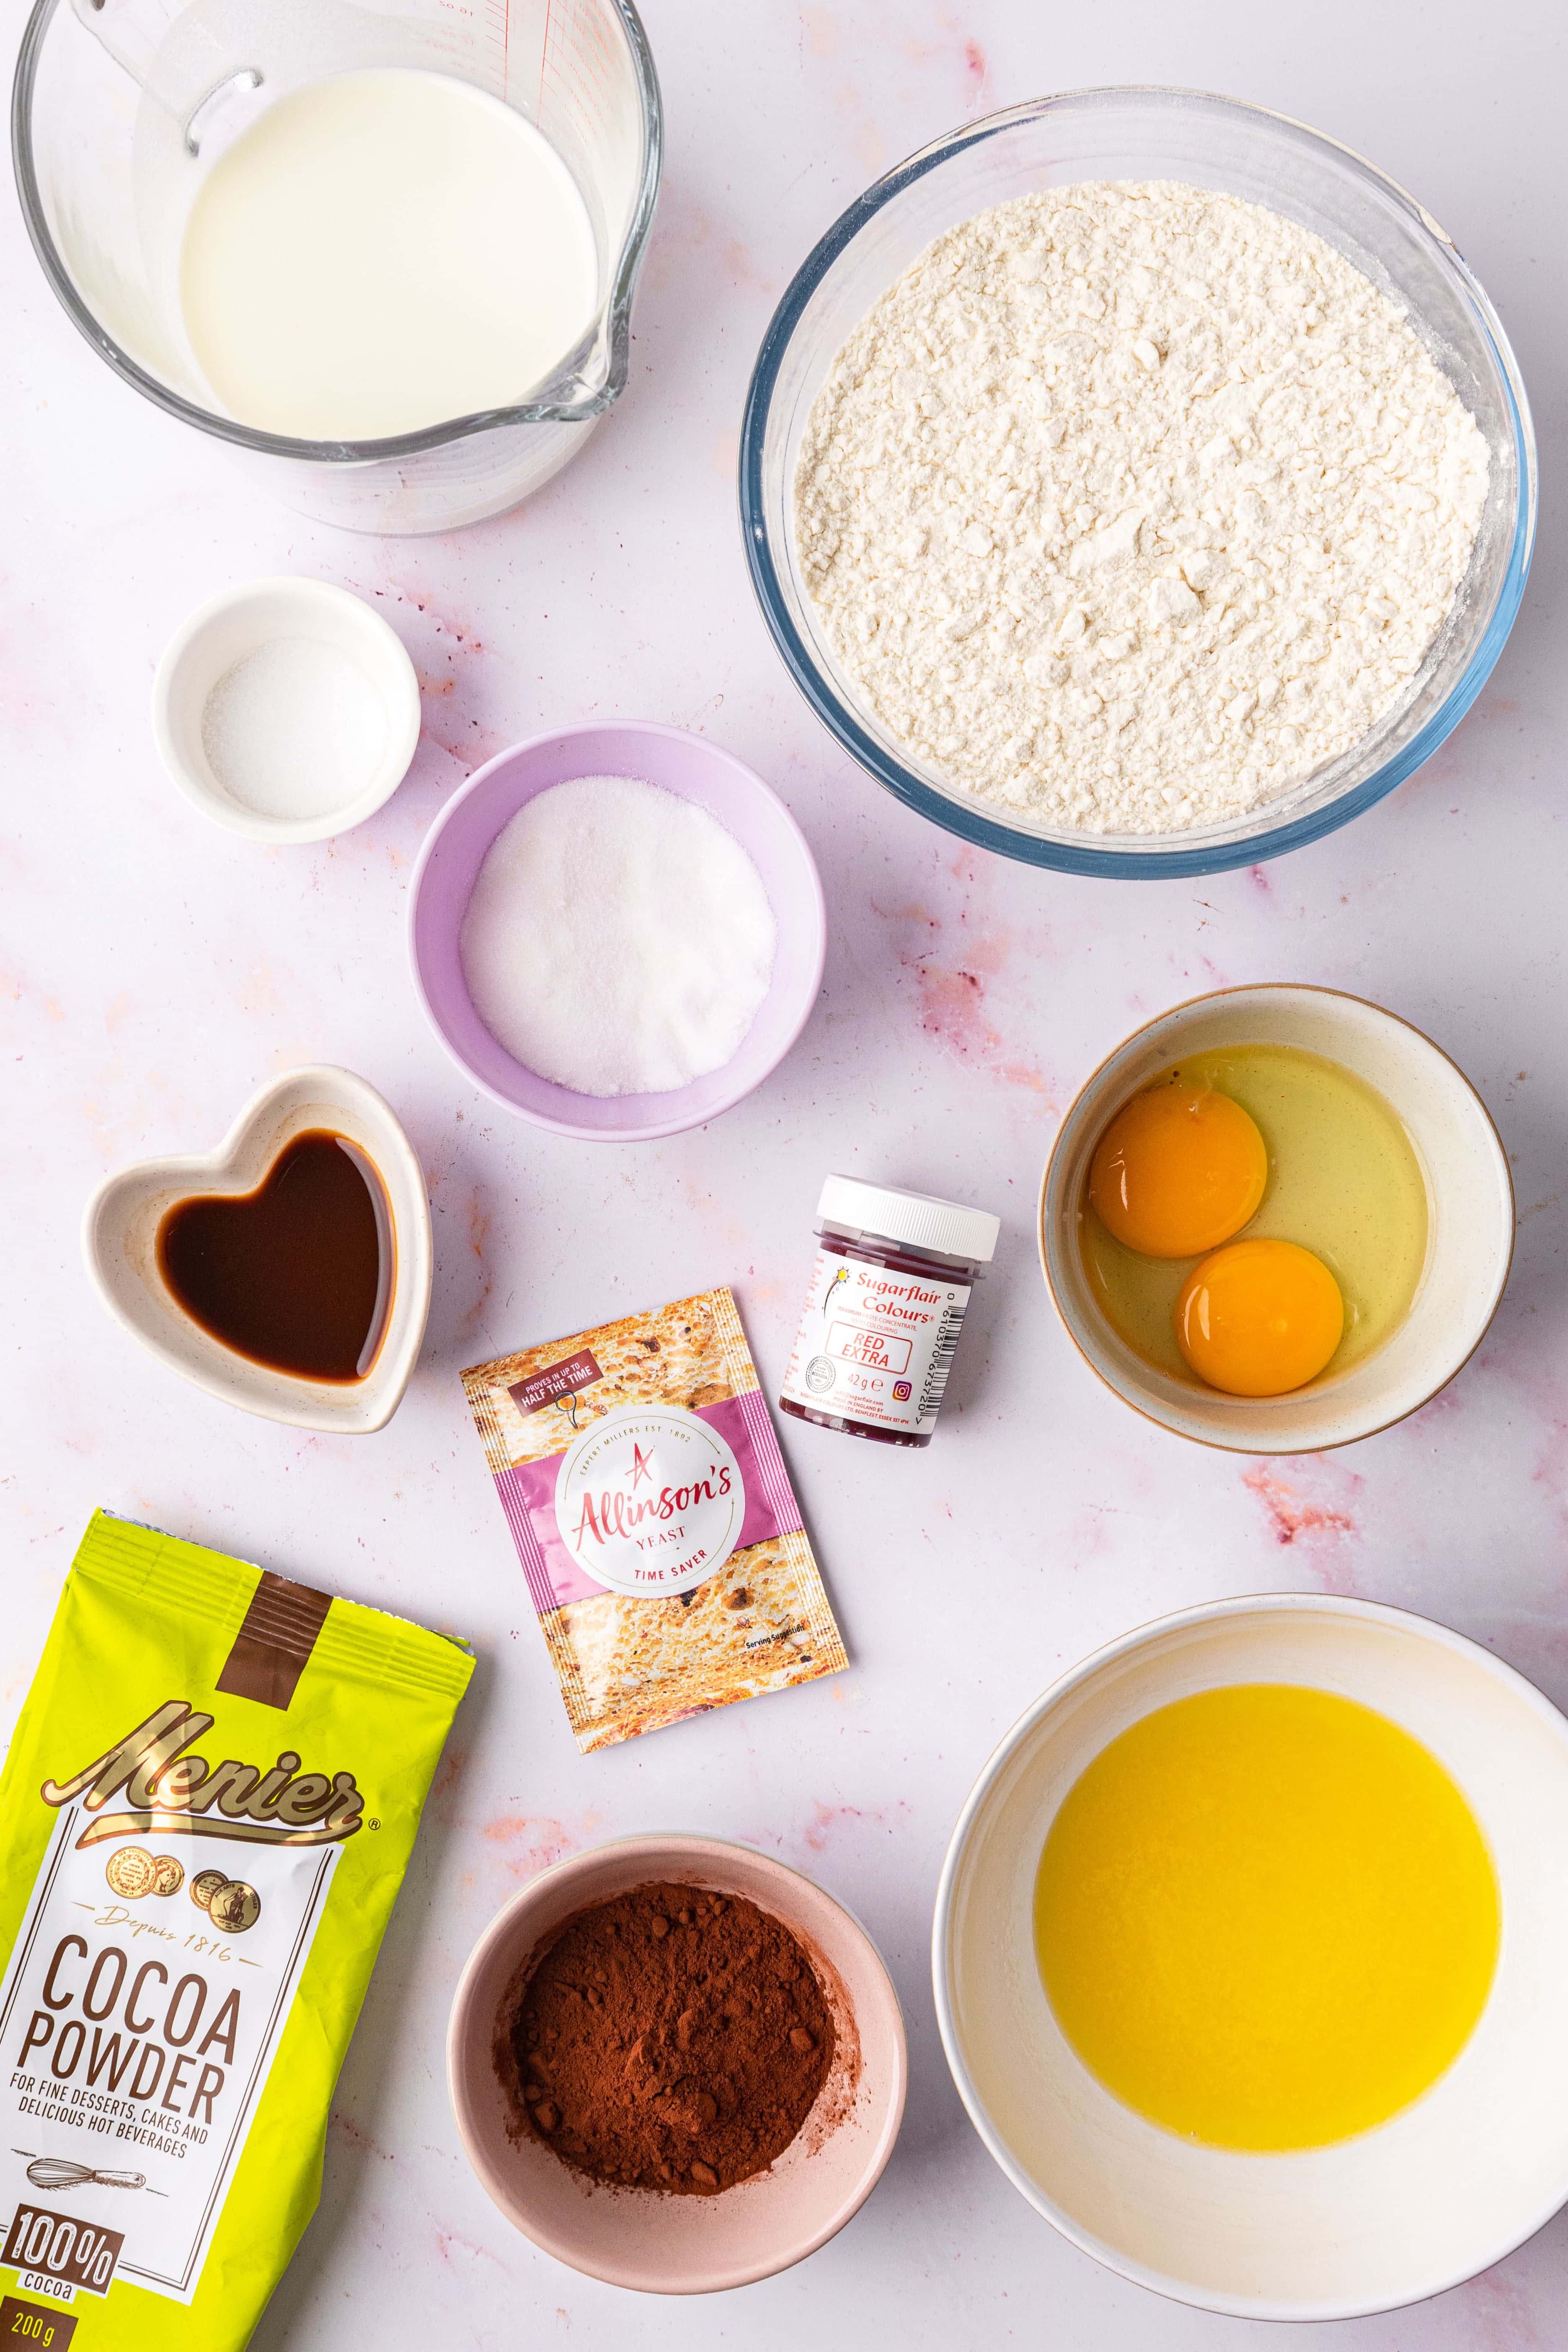
Ingredients to make Red Velvet Cinnamon Rolls
- Unsalted butter: Adds richness and a buttery flavour to the dough.
- Buttermilk: Activates the yeast and gives the rolls they’re soft, tender texture.
- Fast-action/time-saver dried yeast: The magic ingredient that makes the dough rise. For this recipe, you’ll use one 11g sachet of time-saver dried yeast.
- Caster sugar: Sweetens the dough without overpowering it.
- Eggs: Add structure and richness to the dough.
- Vanilla extract: Enhances the red velvet’s signature sweetness.
- Red gel food colouring: Creates that iconic red velvet colour. My go-to is Sugarflair Red Extra.
- Plain flour: Provides the structure needed for that soft, fluffy texture.
- Cocoa powder: The key flavour in red velvet bakes! Menier 100% Cocoa Powder is my go-to for a deep, rich and intense chocolate flavour.
- Salt: Balances the sweetness and enhances the other flavours.
- White chocolate cream cheese frosting: a simple frosting made from melted white chocolate, butter, icing sugar and cream cheese. Use full-fat cream cheese for the best flavour and a thicker consistency.
- Heart sprinkles: to add cute pops of colour on top of your rolls.
Tips For Making the Red Velvet Dough
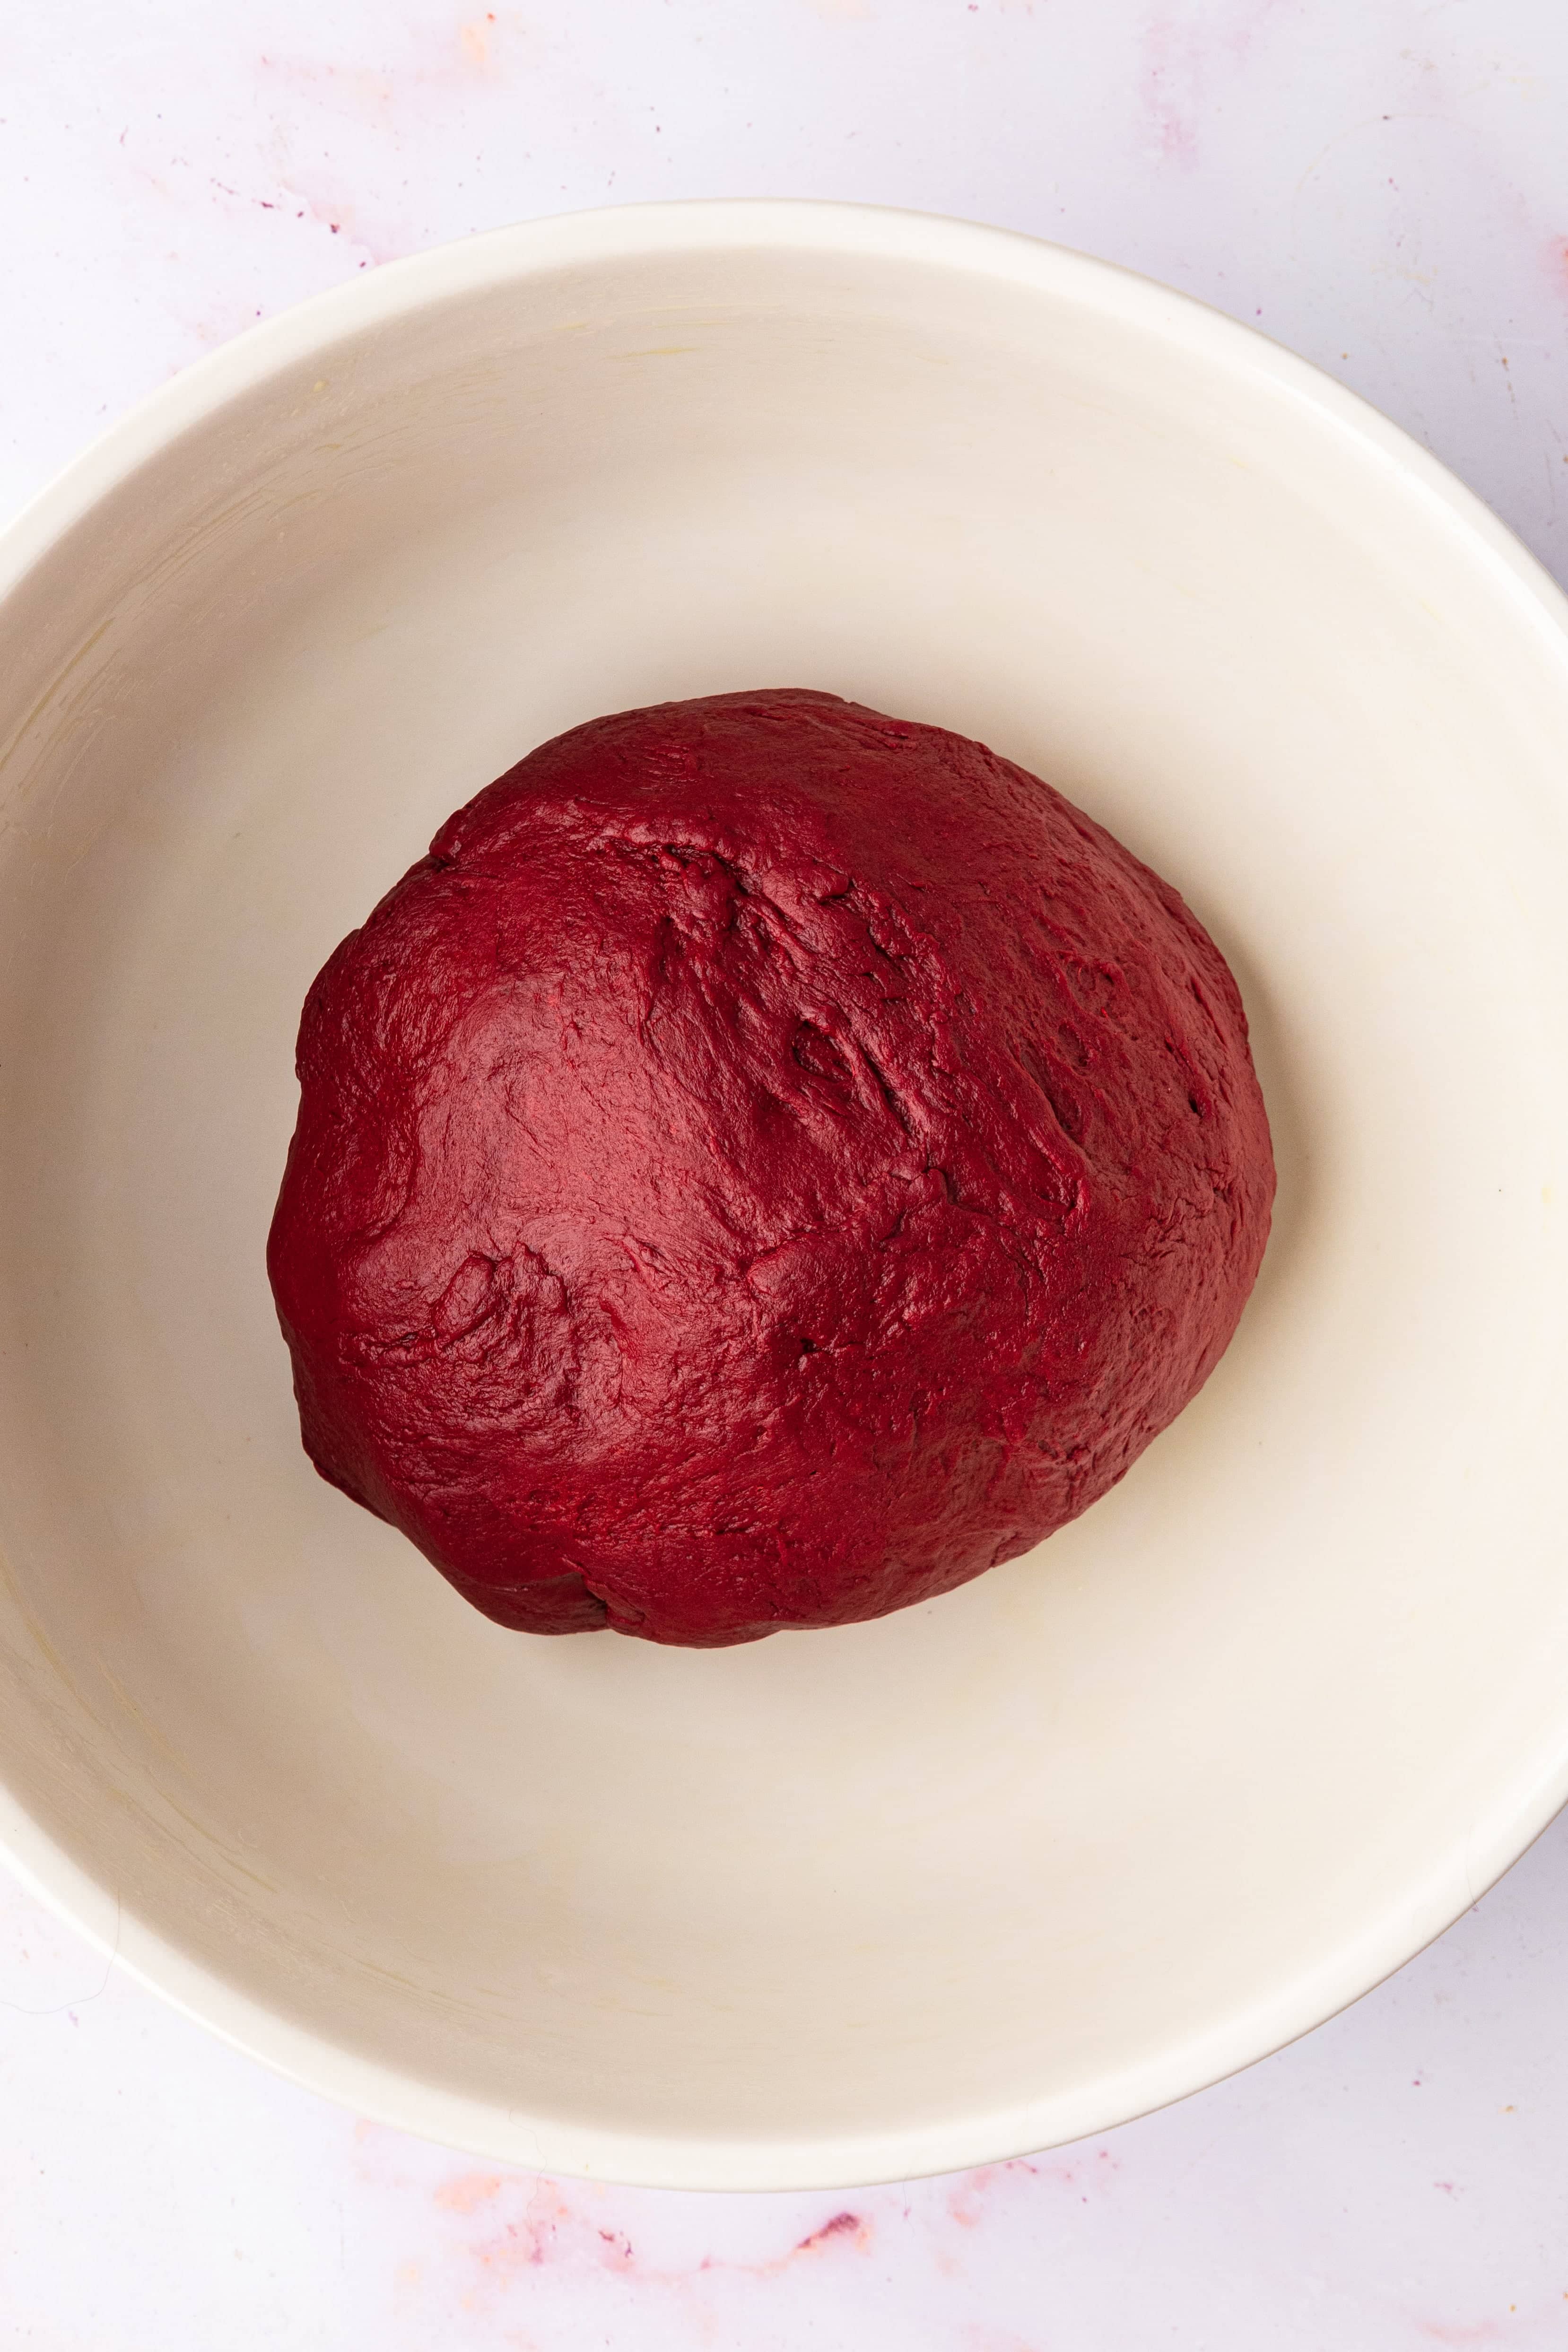
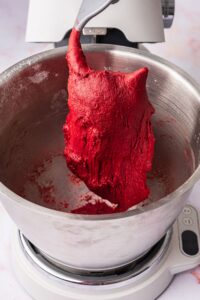
Making the red velvet dough is easier than you think. In a nutshell, the buttermilk and yeast are first combined, then we mix in the wet ingredients, followed by the dry ingredients and the food colouring. Then, knead the mixture until it comes together into a smooth and shiny dough. There’s nothing complicated about it, but there are a few tips that will make sure your dough is perfect:
- Activating the yeast: To properly activate the yeast, the buttermilk needs to be exactly 40°C/110°F. It helps to use a thermometer to get a precise temperature reading. If you don’t have a thermometer, try testing the temperature of the milk using your finger, it should feel like warm bath water.
- Dough is too sticky: If the dough keeps sticking to the bottom of the bowl, stop the mixer and use a spatula to scrape the bottom. Sprinkle in a tablespoon of flour and turn the mixer back on. Repeat if needed until the dough comes together into a ball.
- How to tell if the dough is fully kneaded: Poke the dough – if it springs back quickly, it’s good to go. Try the ‘windowpane test’ – break off a piece of dough and stretch it out, if it doesn’t break and you can see light through it, it’s ready.
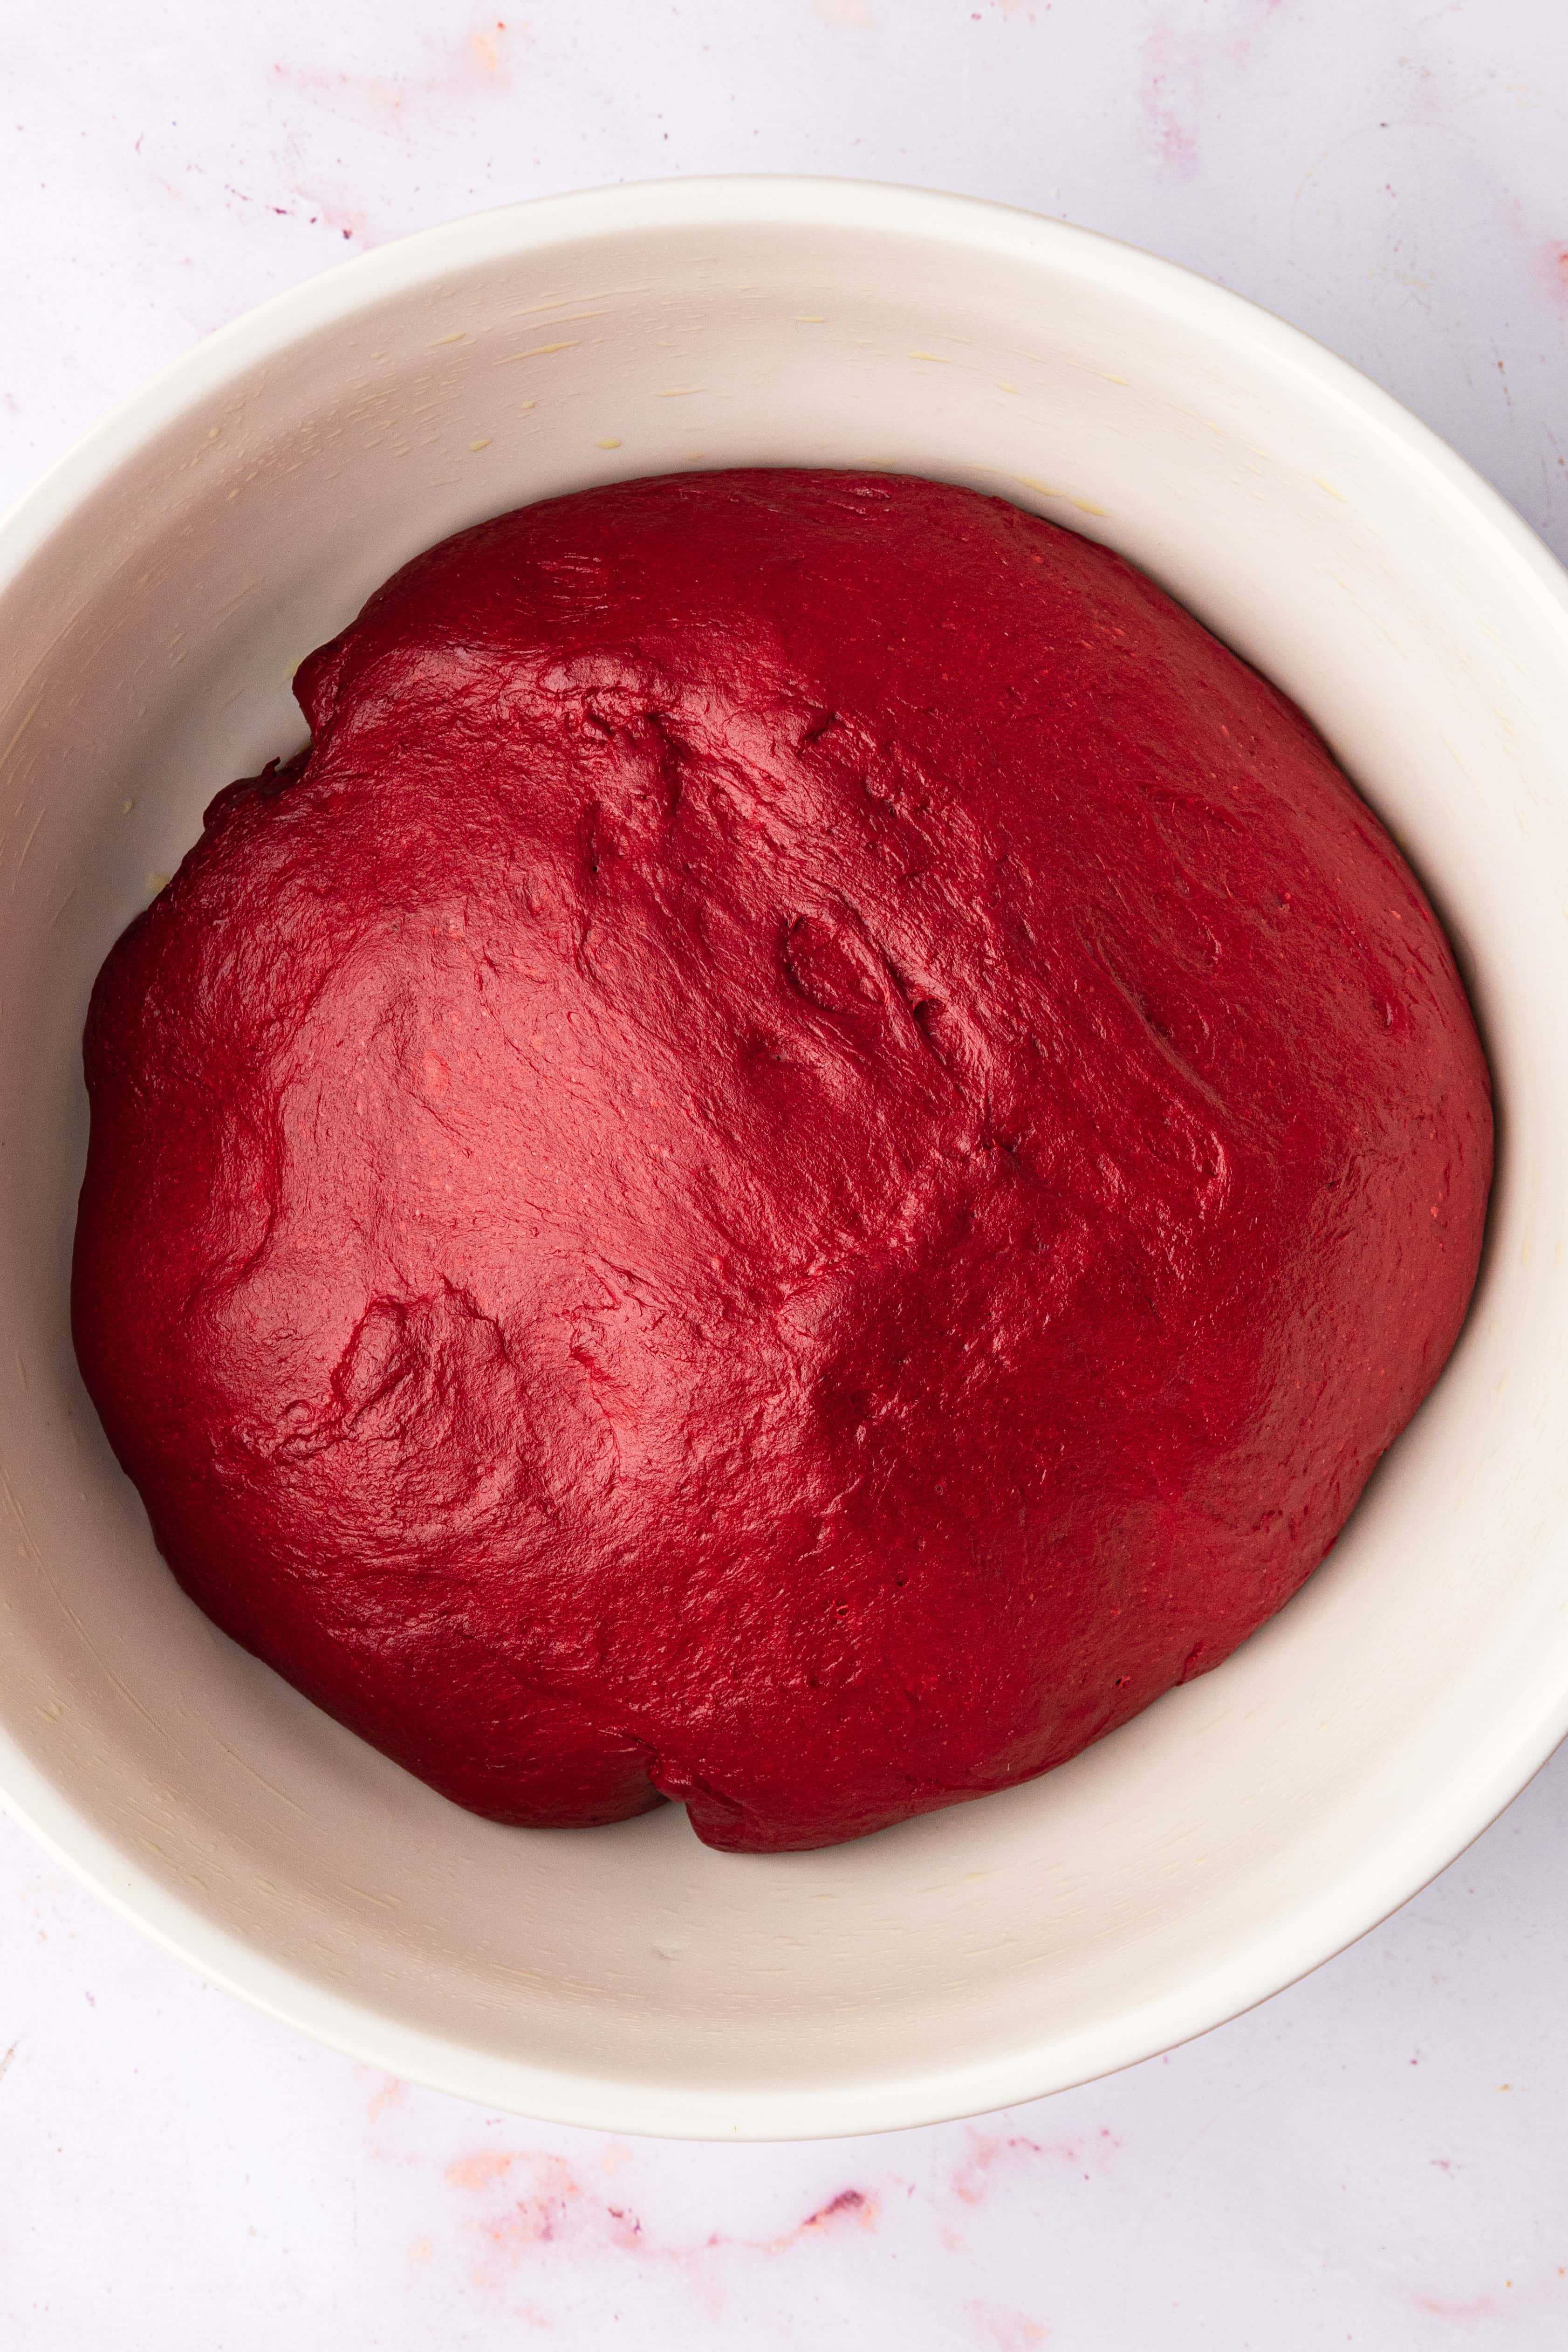
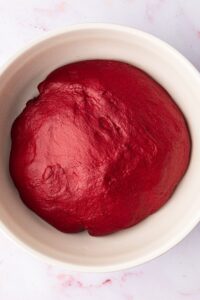
- Choose a warm proving spot: Yeast loves to be warm and cosy, so place your dough in the warmest place in your house to prove. This could be in your airing cupboard, a sunny spot, or next to a radiator. Find the perfect place and call it your proving spot from here on out. The dough will take anywhere between 90-180 minutes to prove, and it should have doubled in size (just like the photographs below).
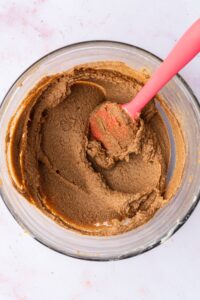
Best Ever Cinnamon Roll Filling
The filling is what makes cinnamon rolls, cinnamon rolls! You can make the filling whilst the dough is proving and cover the bowl with clingfilm until needed. My cinnamon roll filling is a simple mixture of room-temp butter, brown sugar, cinnamon and cornflour. I recently discovered adding cornflour, and wow, it really does improve the filling! It basically thickens it up during baking, making it more gooey and sticky so it stays snug inside the cinnamon swirls.
Top tip: Massage the filling into the dough using a spatula or your fingertips for a few minutes. This will help the filling seep into the dough and infuse it with all the cosy flavours.


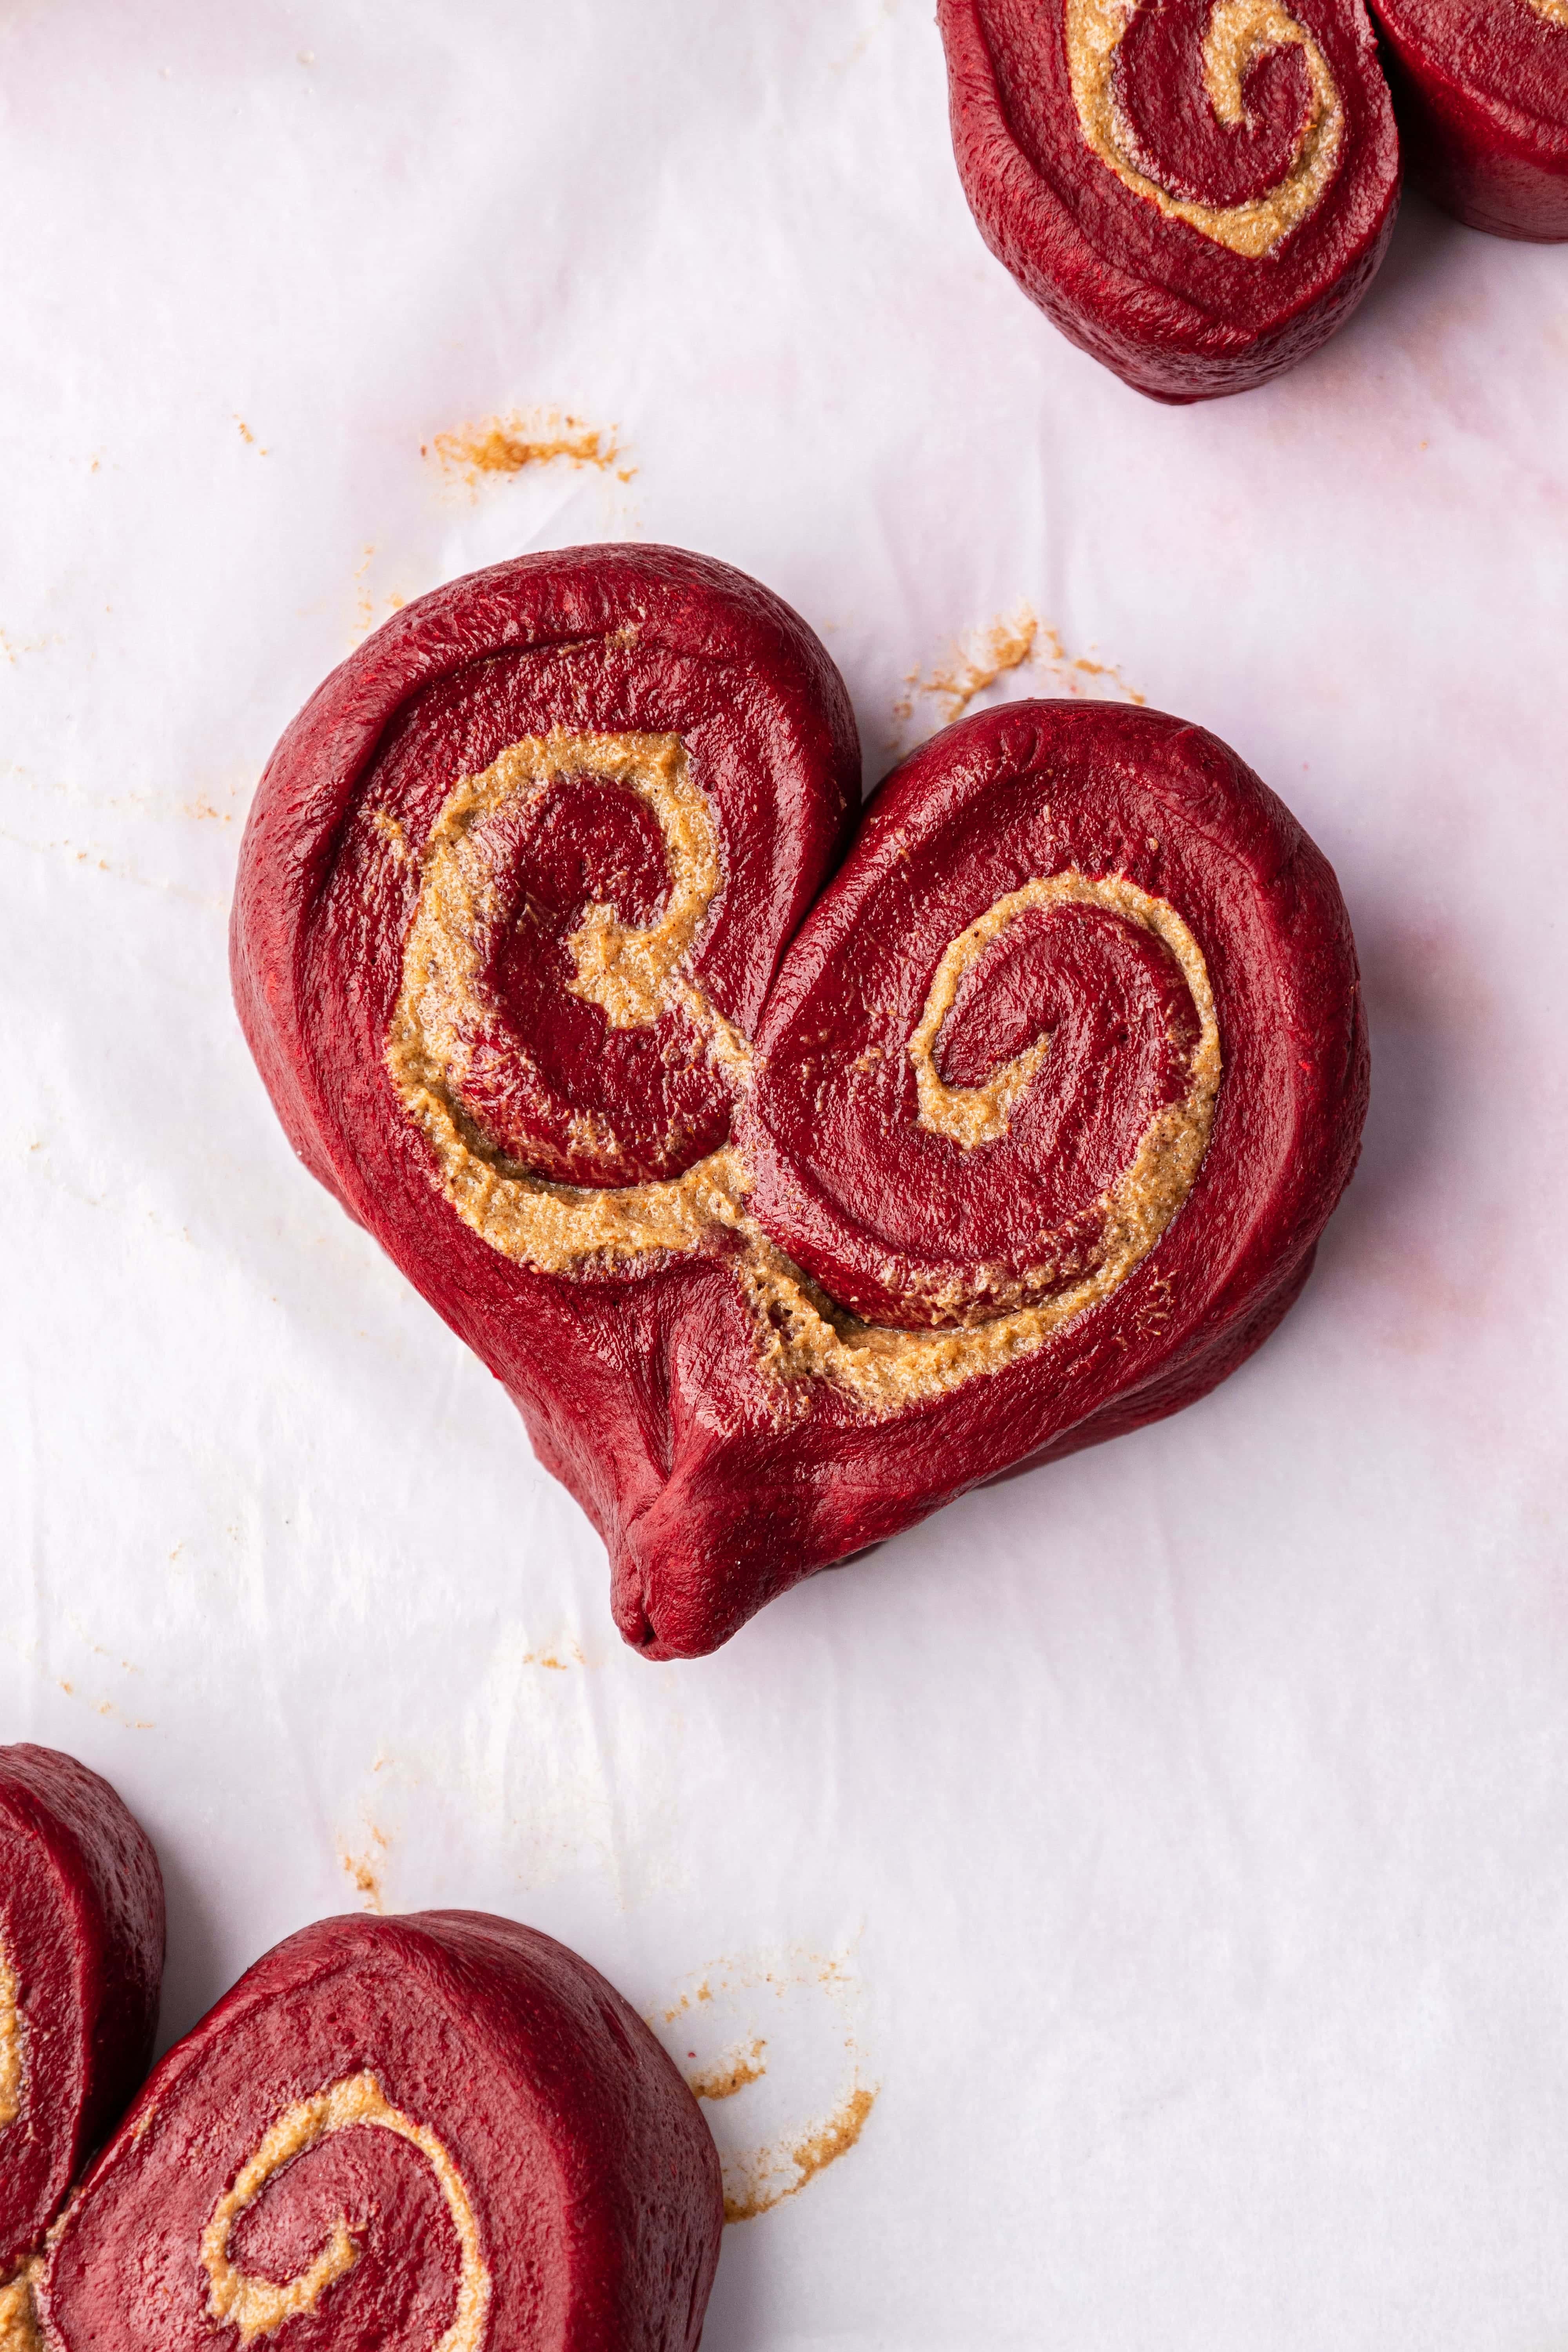
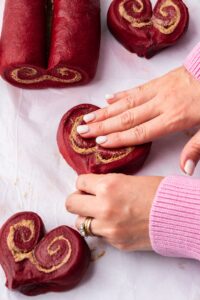
How To Shape Heart Cinnamon Rolls
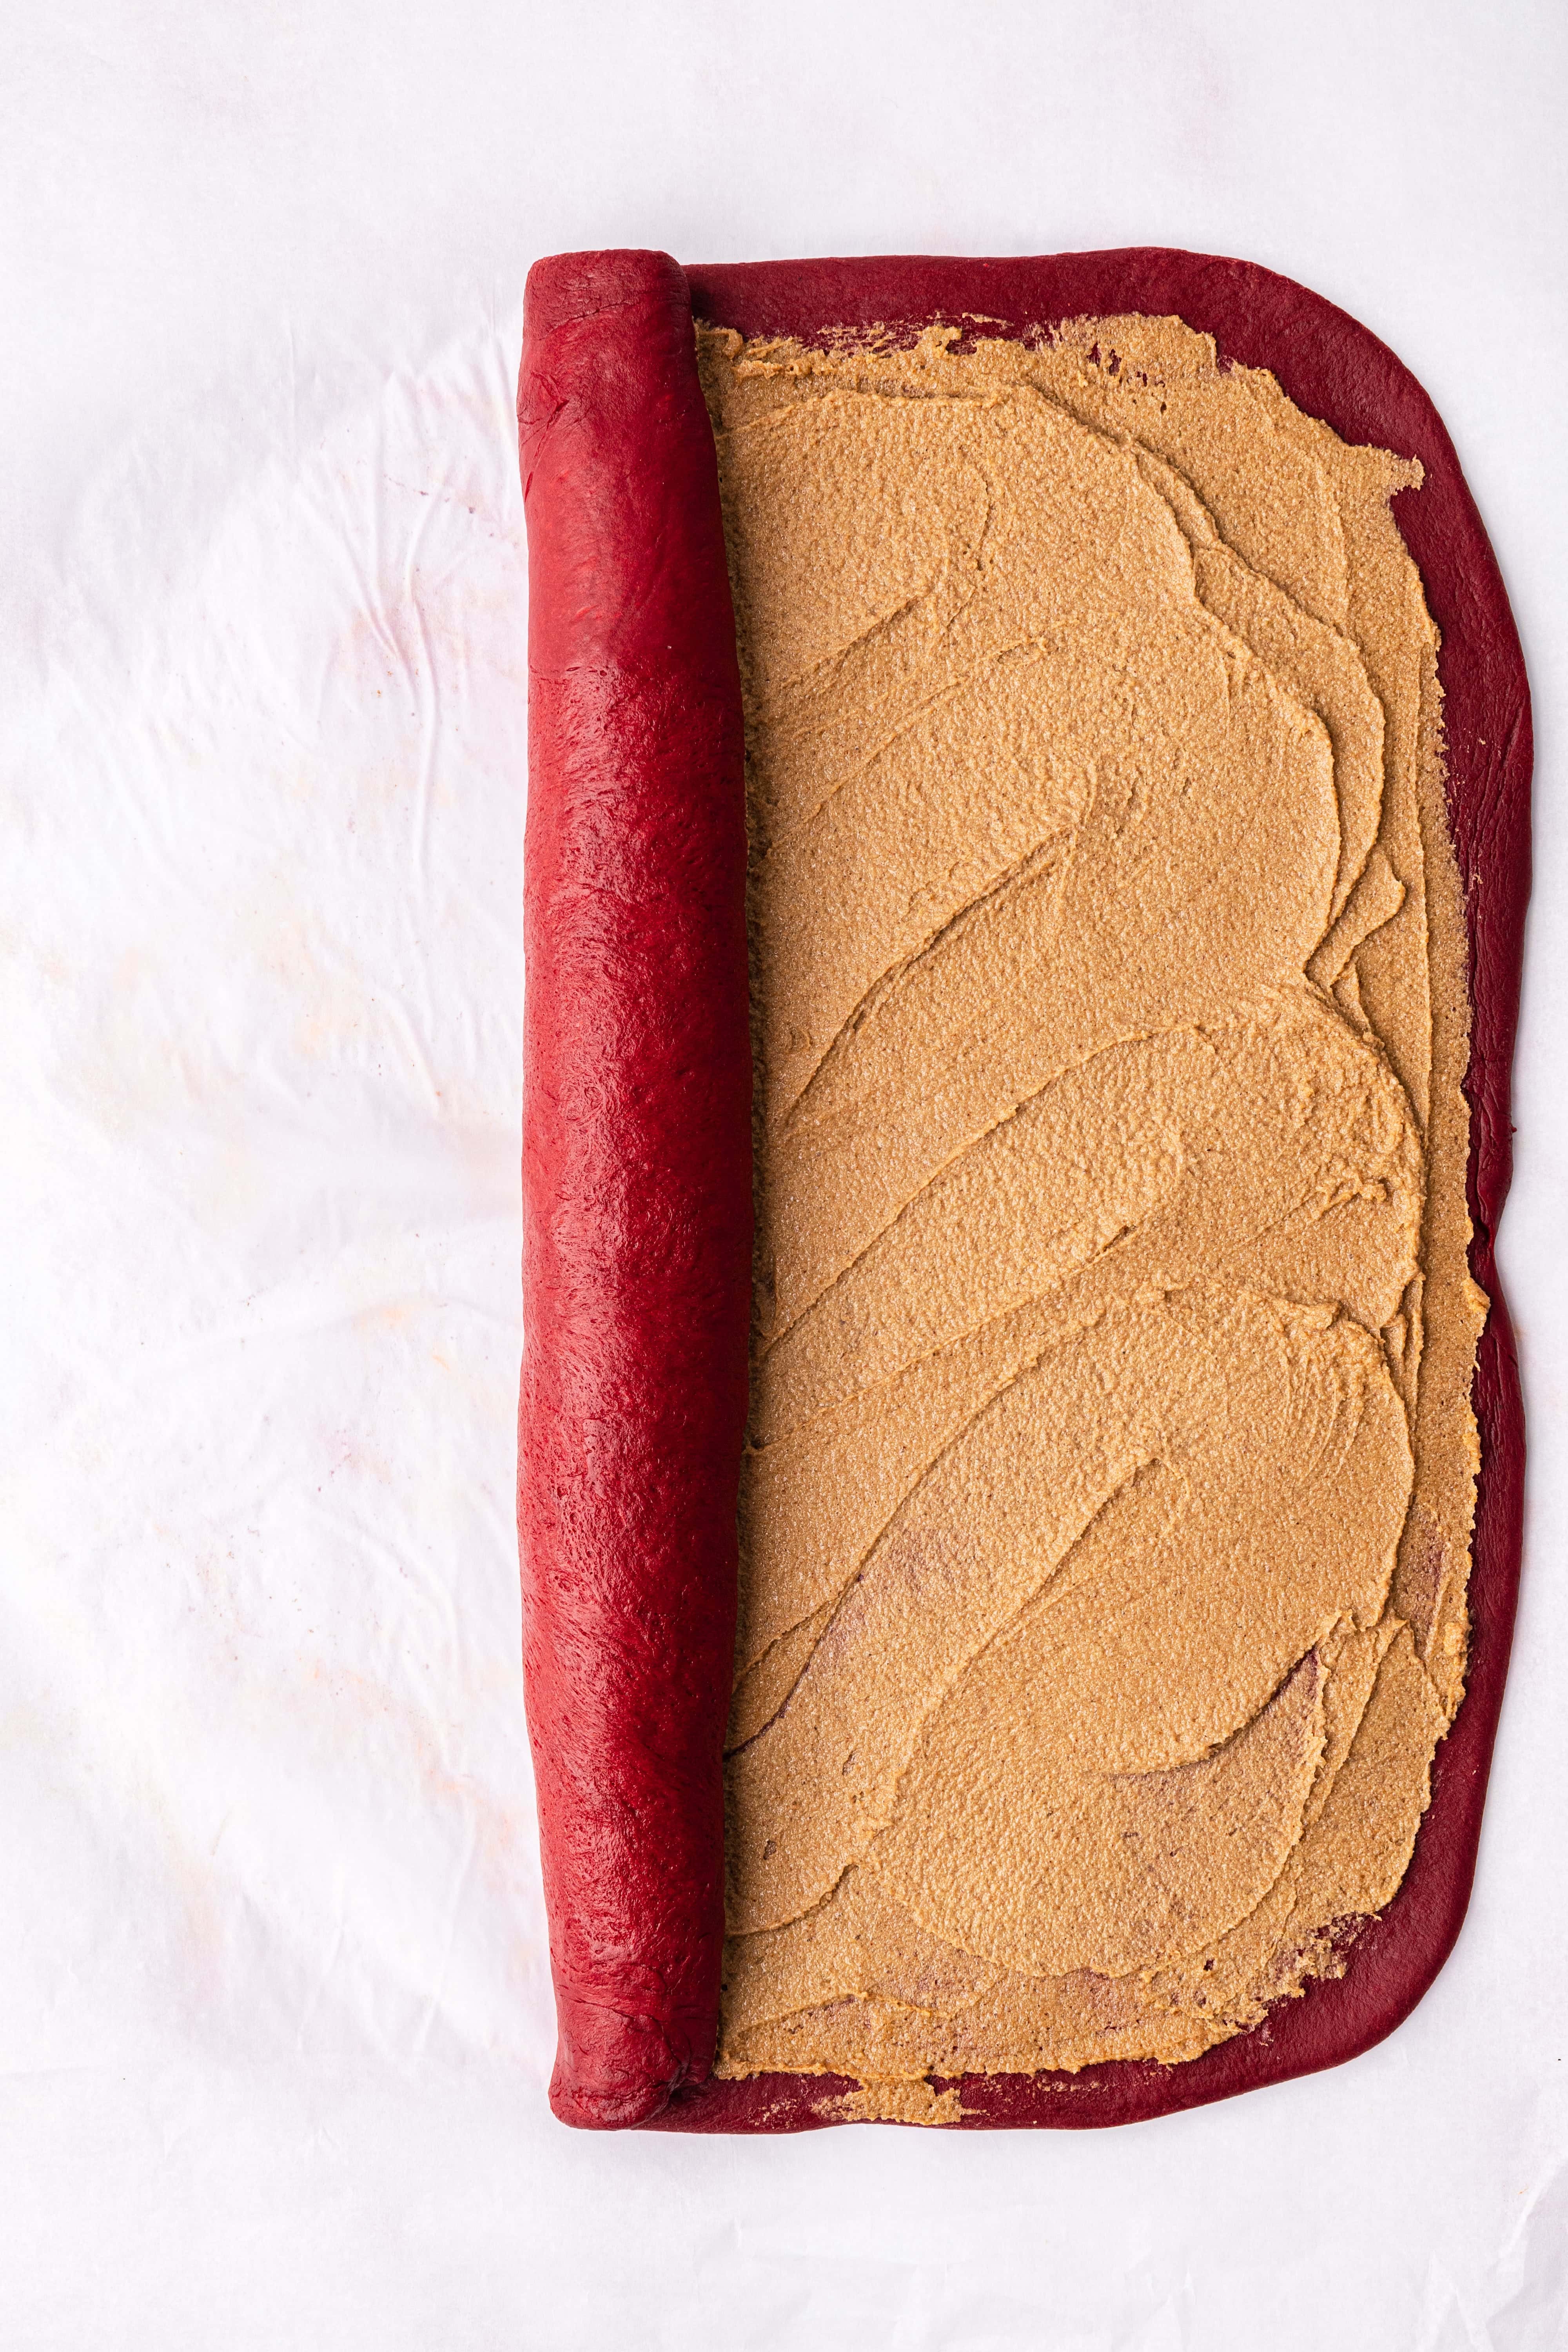
Roll your dough out into a large rectangle, about 16×10 inches. Starting from one of the long edges, tightly roll the dough towards the centre until it reaches the middle. Repeat on the other long edges. You should now have what looks like a closed scroll shape. Use your hands to squish the sides, top and bottom of the dough scroll together so it’s nice and compact.
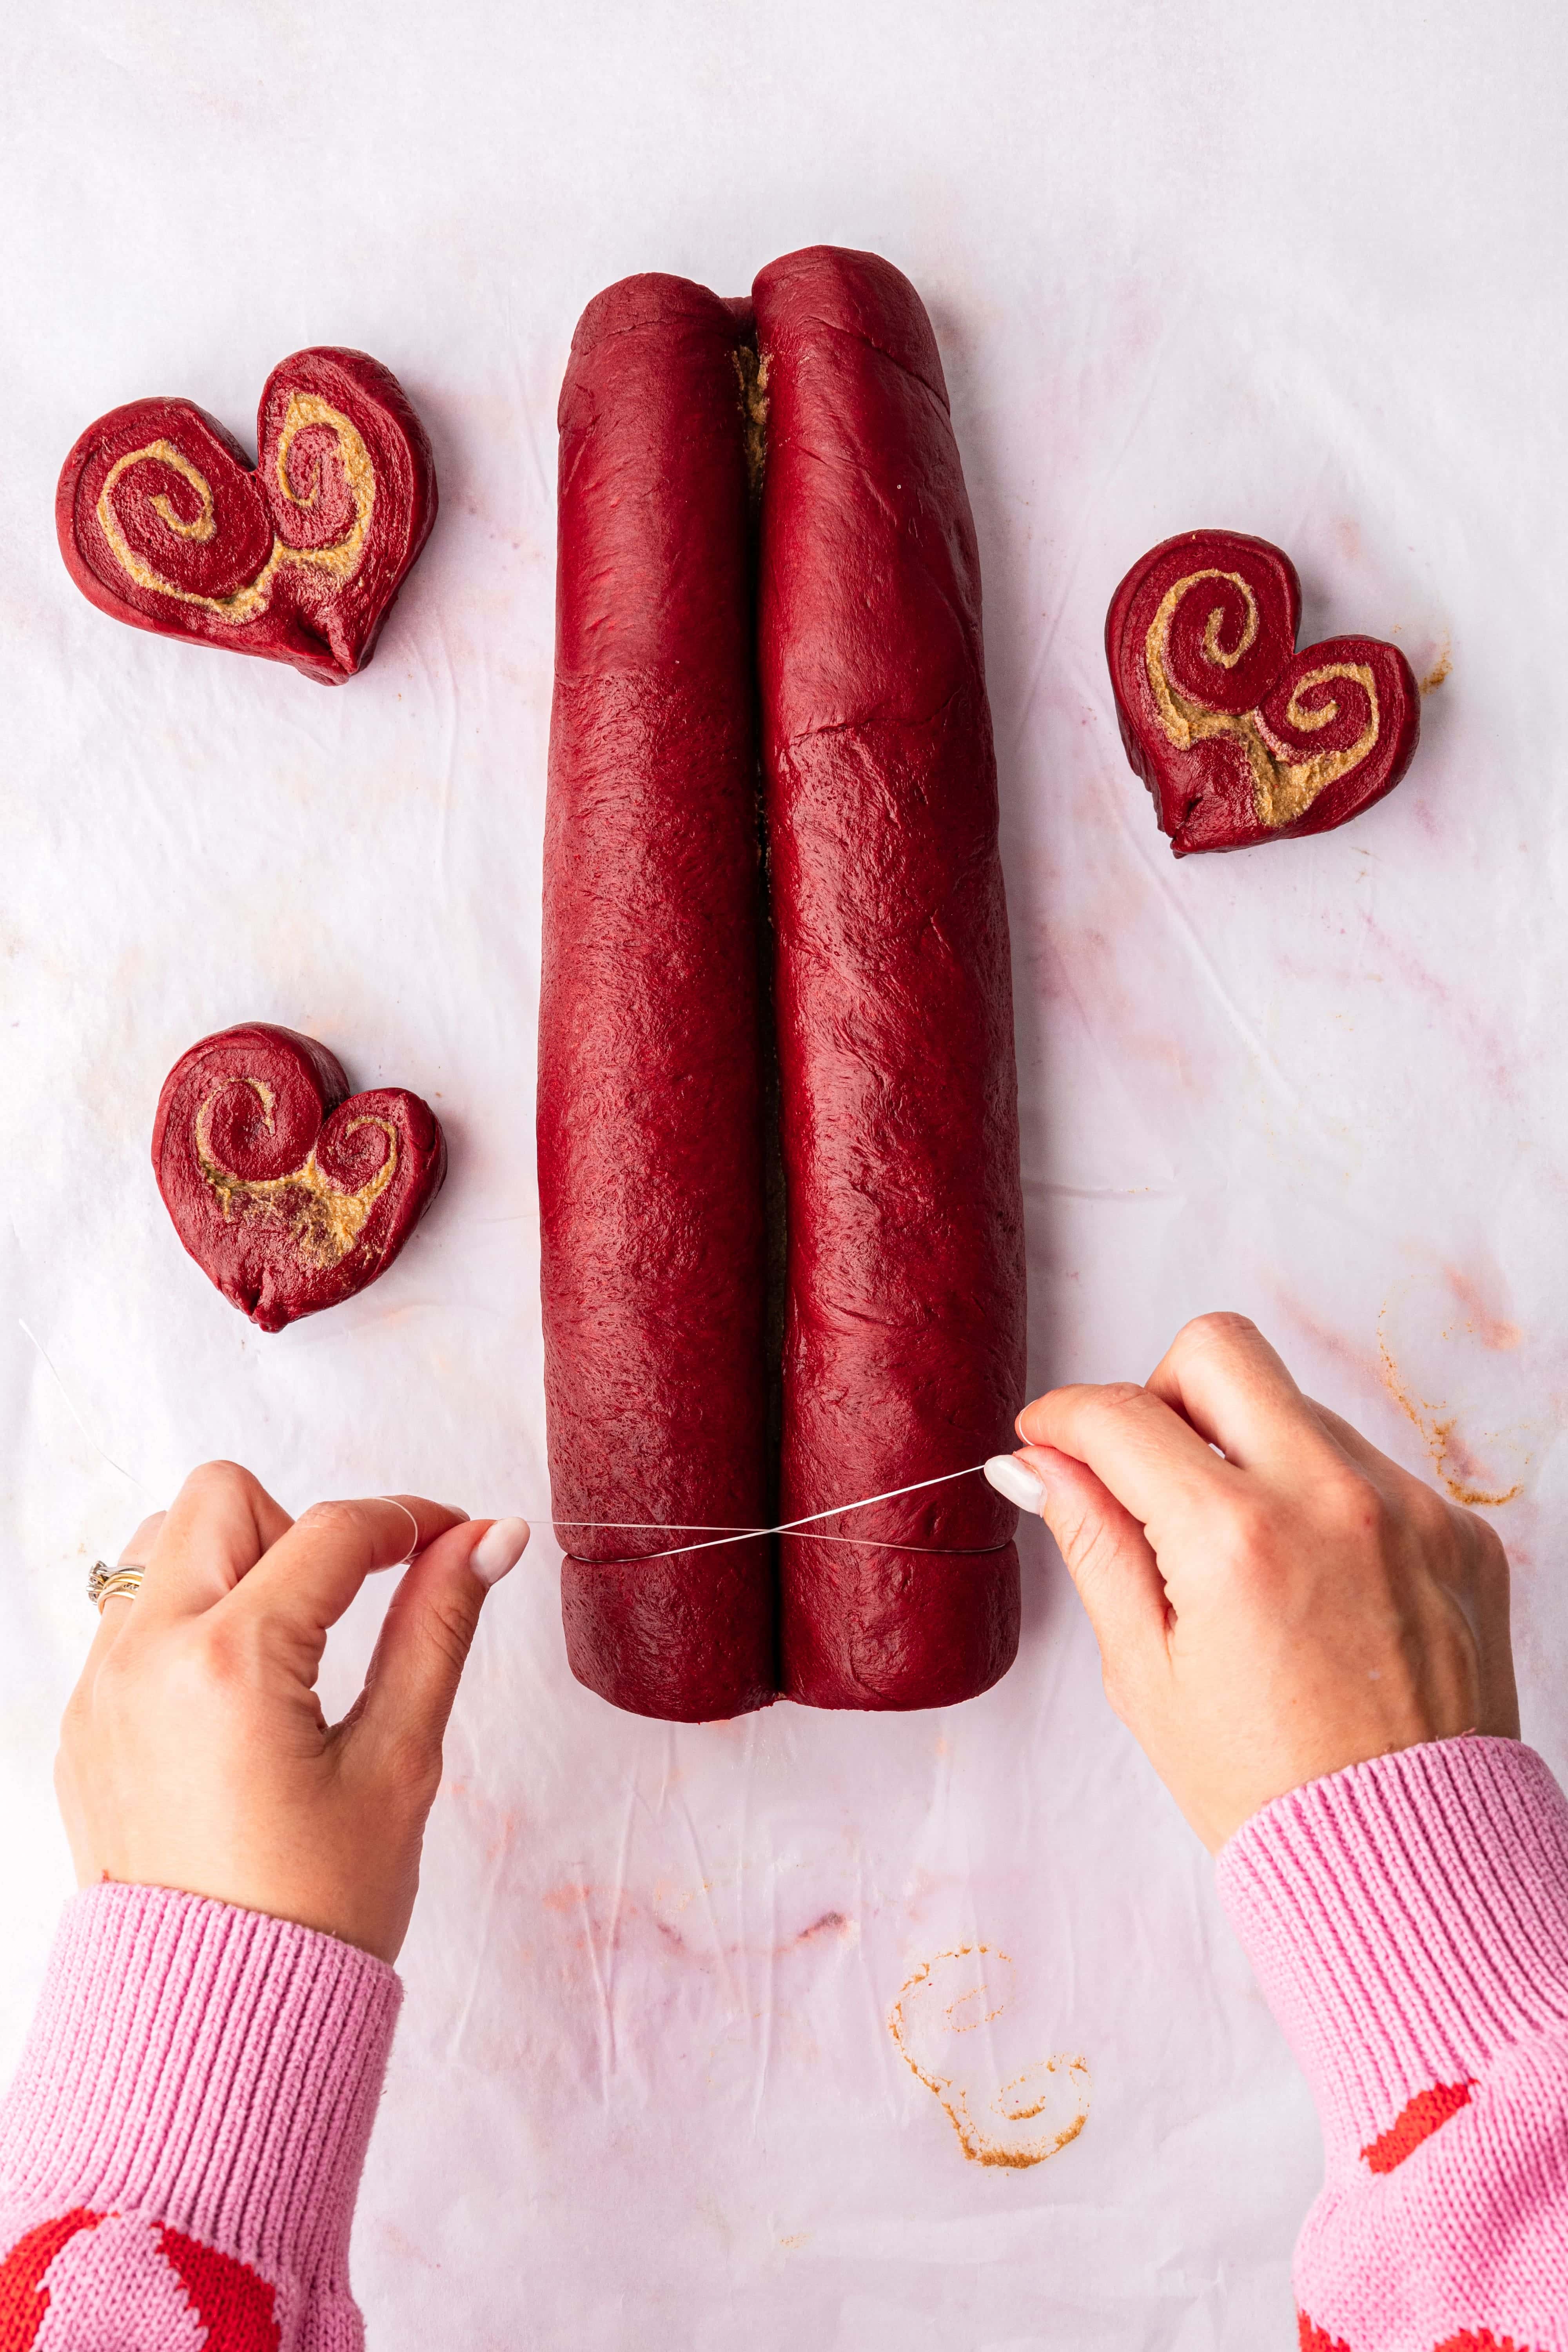
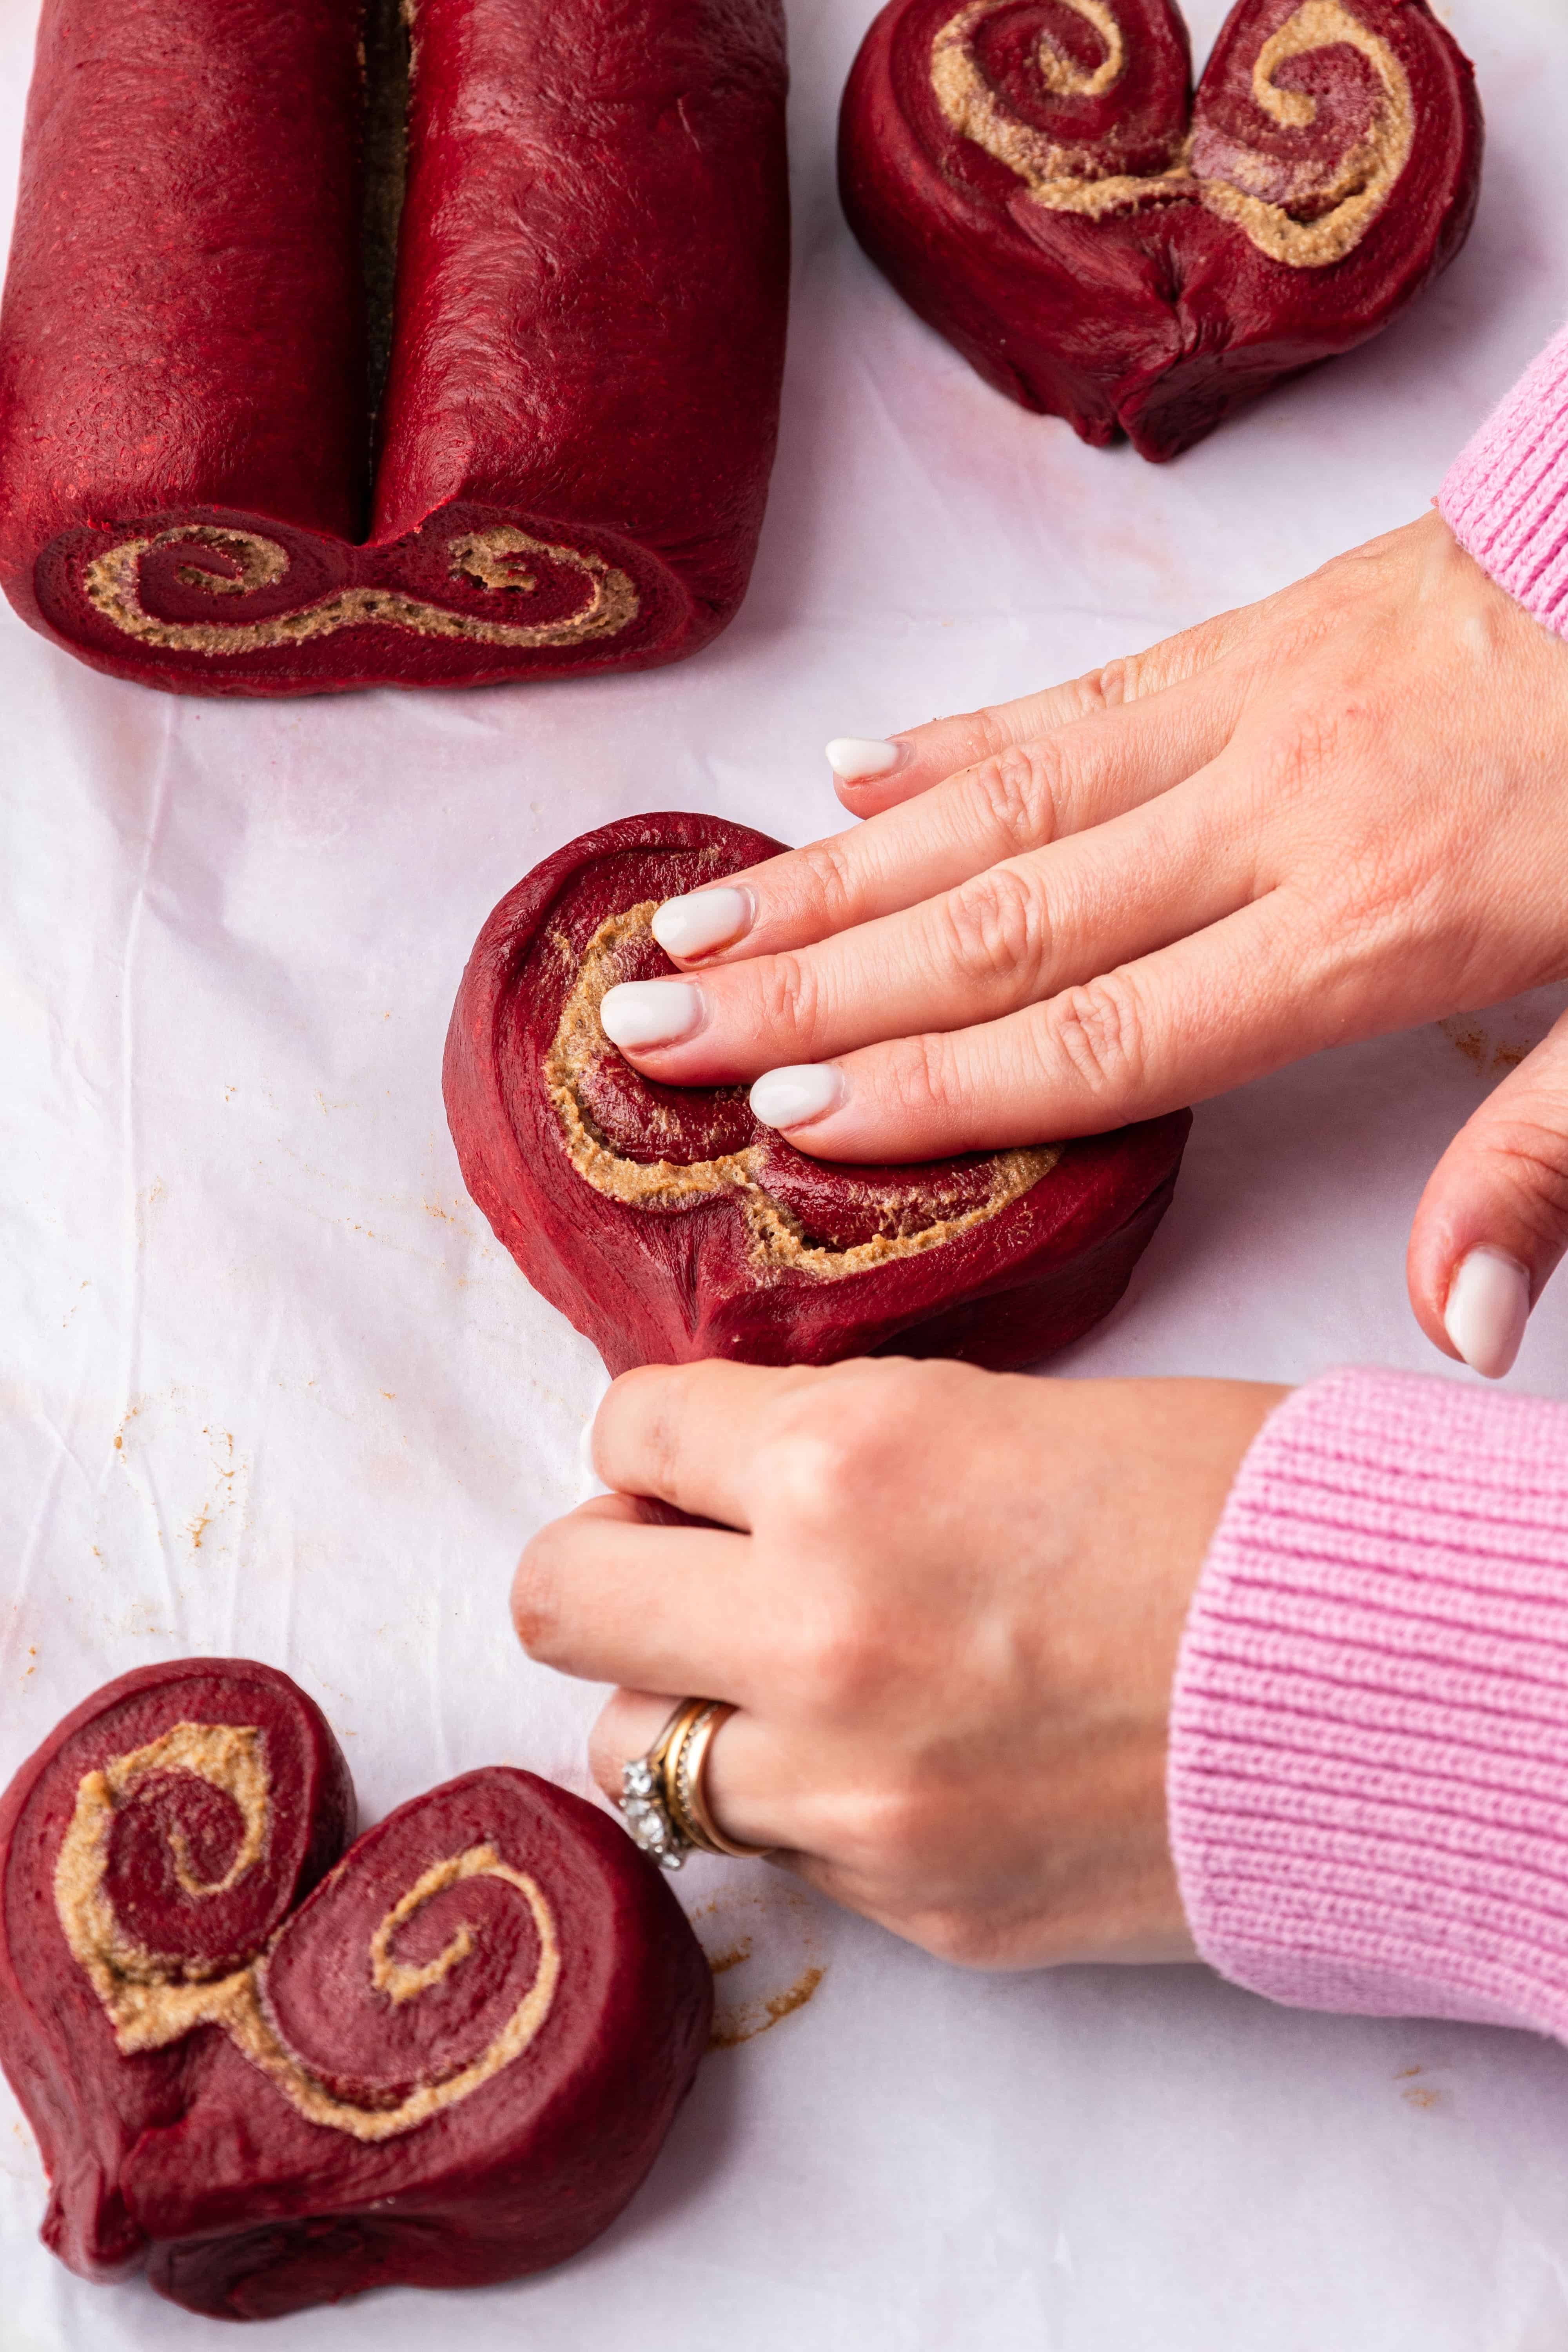
Next, slice the dough into sections, about 1.5 inches each. The easiest way to do this is by using floss, just make sure it’s not minty-scented! To create the heart shape, use one hand to press the swirls down whilst at the same time, using the other hand to pinch the bottom into a point.
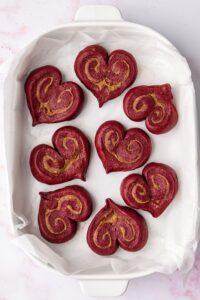
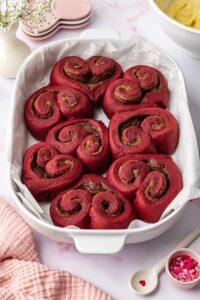
Place the heart rolls in a lined baking dish leaving roughly 1-inch space between each. Cover with clingfilm and leave in a warm spot to rise for another 30-45 minutes. They should puff up beautifully.
The Finishing Touches
Cream cheese frosting is non-negotiable when it comes to cinnamon rolls! This recipe pairs the red velvet rolls with white chocolate cream cheese frosting for extra indulgence. Spread the frosting over the rolls while they’re still warm so it melts into the swirls, letting the heart shape shine through. For the finishing touch, scatter a few heart sprinkles on top and you’re done 😍 Is anyone else’s mouth watering?! Time to dive in!
Marry Me Red Velvet Cinnamon Rolls
Rate this Recipe
Print Pin Rate this RecipeIngredients
For the red velvet dough:
- 60 grams Unsalted butter
- 250 millilitres Buttermilk or use 250ml whole milk and add 1 tsp white wine vinegar at the same time as the eggs.
- 1 sachet Fast-action/time-saver dried yeast I used Allison's Time Saver Dried Yeast (11g sachet)
- 50 grams Caster sugar
- 1 medium Egg room temperature
- 1 medium Egg yolk room temperature
- 2 teaspoons Vanilla extract
- 480-500 grams Plain all-purpose flour
- 40 grams Menier 100% Cocoa Powder
- 1 teaspoon Salt
- 1 teaspoon Red gel food colouring I recommend using Sugarflair Red Extra
For the cinnamon sugar filling:
- 75 grams Unsalted butter room temperature
- 75 grams Light brown sugar
- 4 teaspoons Ground cinnamon
- 1 teaspoon Cornflour or cornstarch optional but makes the filling extra gooey
For the white chocolate cream cheese frosting:
- 60 grams Menier Swiss White Chocolate
- 75 grams Salted butter or you can use unsalted and add a pinch of salt. Room temperature.
- 150 grams Icing sugar
- 75 grams Full-fat cream cheese cold from the fridge
Instructions
Start by making the red velvet dough:
- Measure the butter into a bowl and microwave for 30-60 seconds or until fully melted. Set aside.60 grams Unsalted butter
- Measure the buttermilk into a jug and microwave for 60 seconds (don't worry if it curdles a little). The milk needs to be ~40ºC/110ºF to properly activate the yeast. No thermometer? Test the temperature by dipping your finger into the buttermilk – it should feel like warm bathwater.250 millilitres Buttermilk
- Pour the warm milk into a large bowl and sprinkle the yeast on top. Let sit for 1 minute.1 sachet Fast-action/time-saver dried yeast
- Add the melted butter, vanilla, sugar, whole egg and egg yolk. Mix to combine (don't worry if the mixture curdles).50 grams Caster sugar, 1 medium Egg, 1 medium Egg yolk, 2 teaspoons Vanilla extract
- In a separate bowl, whisk 480g flour, cocoa powder and salt together until combined. Now add these to the bowl of wet ingredients and work the mixture into a shaggy dough.480-500 grams Plain all-purpose flour, 40 grams Menier 100% Cocoa Powder, 1 teaspoon Salt
- Transfer the dough to the bowl of an electric mixer fitted with a dough hook. Add the red food colouring.1 teaspoon Red gel food colouring
- Set the mixer to medium-low speed and knead for approx. 10 minutes. The dough is ready when it looks smooth, shiny and springs back when pressed with your finger.*If the dough sticks to the bottom of the bowl, stop the mixer and use a spatula to scrape the bottom. Sprinkle in a tablespoon of flour and turn the mixer back on. Repeat if needed until the dough comes together into a ball. ** You can also test the dough using the 'window pane' method. Tear off a piece of dough and stretch it out. If it tears, keep kneading. If it creates a thin 'window' that let's light through, it's ready. **No electric mixer? Turn the shaggy dough out onto a floured surface,add the food colouring, and knead by hand instead.
- Lift the dough out and lightly coat the inside of the bowl with oil. Shape the dough into a ball and place it inside the bowl. Cover with cling film.
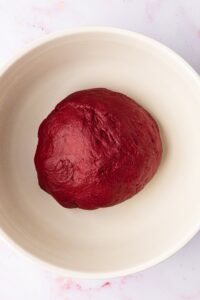
- Leave the dough to prove for 90-180 minutes in the warmest spot in your house (an airing cupboard/next to a radiator/in a sunny place). The dough should have doubled in size. It helps to take before and after pictures to compare the rise.
Fill and shape the rolls:
- Whilst the dough is proving, make the filling. Mix all the ingredients until smooth, soft and spreadable.75 grams Unsalted butter, 75 grams Light brown sugar, 4 teaspoons Ground cinnamon, 1 teaspoon Cornflour or cornstarch
- Roll the dough out into a 16×10 inch rectangle.
- Spread the sugar mixture on top, working it into the dough using the back of a spoon/spatula.
- Starting from one of the long edges, tightly roll the dough into the middle of the rectangle. Now roll the other long side into the middle

- Either use a knife or floss to cut the roll into 1.5-inch sections (you should be able to make 10-12 rolls in total). Shape the rolls into hearts by pressing down on the swirls whilst pinching the bottom into a point at the same time.
- Arrange in a couple of lined baking tins, leaving an inch between each so they have room to rise. Cover with clingfilm and leave to prove for another 30-45 minutes. The rolls should have puffed up and be touching. Meanwhile, preheat the oven to 180°C fan / 200°C conventional.
Bake and decorate:
- Bake for 18-20 minutes until risen and firm around the edges. Leave to cool while you make the frosting.
- Break the chocolate into small chunks and place in a bowl. Microwave for 45-60 seconds or until starting to melt. Remove and allow the heat from the bowl to melt the last few chunks. Stir until smooth and set aside to cool.60 grams Menier Swiss White Chocolate
- Beat the butter and icing sugar together, then fold in the cold cream cheese to make a smooth frosting. Fold in the melted white chocolate.75 grams Salted butter, 150 grams Icing sugar, 75 grams Full-fat cream cheese
- Spread the frosting over the rolls and decorate with love heart sprinkles. Enjoy!
Made these for Valentine’s Day and my husband and I are really enjoying them! They’re so pretty too! As a note it took me a bit longer than 10 minutes to knead the dough so I am glad I did the windowpane test to determine when it was ready
Hi Lee, so happy you enjoyed the recipe 🙂 The windowpane test is a great idea!
How to store them and how to make them last fresh longer? I want to bake them tomorrow and take some to my friends the next day
The best way to store them would be to wrap the unfrosted rolls tightly in foil and place in an airtight container or baking tin. Then you can warm the rolls in the oven for 5 minutes to freshen them up and add the frosting afterwards which will make them softer. Hope that helps 😊
Can I make dough night before and proof in refrigerator overnight?
Yes they can 🙂 However, I always fill and shape the cinnamon rolls first (after the first proof), put them in the baking tin and cover it with clingfilm, then refrigerate overnight. I also take the cinnamon rolls out of the fridge for at least 30 minutes before baking to bring them up to room temperature. Hope that helps!
Absolutely AMAZING. I have made these a handful of times and they go fast, even sent a dozen with my husband to work! The icing is so tasty with the addition of the white chocolate. These will be something I bake for years to come <3
The BEST review! Thank you so much and keep enjoying the recipe 😍
Amazing recipe
Thanks so much!
Wow 🤩 thanks
You’re very welcome Martha, enjoy!
THERE ARE SO WONDERFUL!!! THANKS!!
Yayy! So happy you enjoyed them Angela 🙂
I alredy bake them, they were delicious, thanks for sharing a wonderful recipe ✨
Woohoo! Thank you for your lovely review 🥰
❤️❤️❤️
I can’t wait to bake them!! 🤗🥰
Hope you love them Iris 🥰
Red velvet
Can I pour heavy cream on top before baking?
Thank you
Absolutely! It will make them super super soft 🙂
Thank you 😊